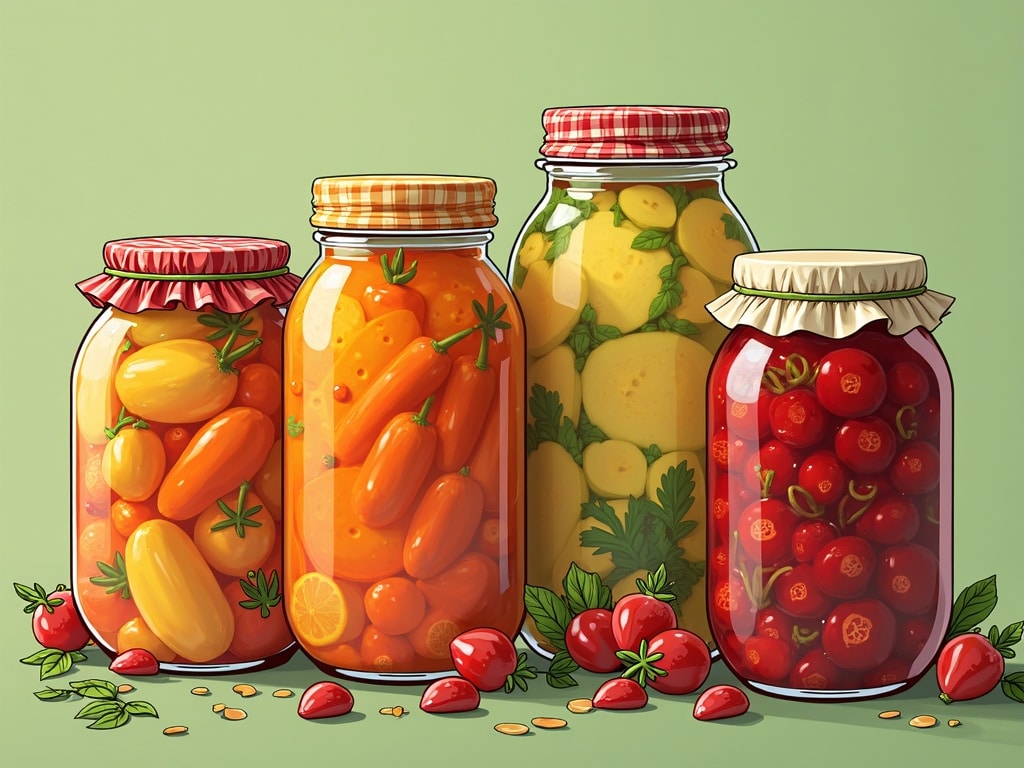
Pickling Vegetables 101: A Comprehensive Guide
Have you ever bitten into a crisp, tangy pickle and wondered how that simple cucumber could be transformed into such a flavorful delight? Pickling, one of the oldest methods of food preservation, is a magical process that not only extends the shelf life of your favorite vegetables but also elevates their taste to a whole new level. From the humble cucumber to exotic okra, pickling opens up a world of culinary possibilities. This guide will walk you through everything you need to know about pickling vegetables at home, ensuring your success from your first brine to your last crunchy bite.
Why Pickle Vegetables?
Beyond the incredible flavors, pickling offers a host of benefits that make it a worthwhile endeavor for any home cook:
- Preservation: Extend the life of your seasonal produce, allowing you to enjoy summer's bounty throughout the year.
- Flavor Enhancement: Transform ordinary vegetables into tangy, savory treats with a variety of spices and seasonings.
- Gut Health: Fermented pickles, in particular, are packed with probiotics, which are beneficial for your digestive system.
- Reduce Food Waste: Pickle those extra veggies instead of letting them spoil in the fridge.
- Cost-Effective: Homemade pickles are often more affordable and tastier than store-bought versions.
The Science of Pickling
At its core, pickling is about creating an environment where spoilage bacteria can't thrive. This is achieved primarily through acidity – either by adding an acid like vinegar or by encouraging the production of lactic acid through fermentation.
Acid Pickling
This method involves submerging vegetables in a brine that contains a high concentration of acid, typically vinegar. The acid prevents the growth of harmful bacteria and preserves the vegetables. The flavor profile is clean, tangy, and relies heavily on the spices added to the brine.
Fermentation Pickling
Fermentation is a natural process where beneficial bacteria, like lactobacilli, convert sugars in the vegetables into lactic acid. This acid not only preserves the vegetables but also creates a complex, tangy flavor and beneficial probiotics. This method often results in a more complex and nuanced flavor profile compared to acid pickling.
Essential Equipment for Pickling
Before you dive in, it’s essential to gather the right tools. Here's a list of equipment that will make your pickling process smooth and efficient:
- Canning Jars: Use specifically designed canning jars with two-part lids (lids and bands) for safe preservation. Sizes vary depending on your recipe.
- Large Pot or Dutch Oven: For heating the brine solution. Stainless steel or enamel-coated pots are ideal.
- Non-reactive Bowls: Glass or stainless steel bowls for preparing vegetables and brines; avoid aluminum.
- Measuring Cups and Spoons: Accurate measurements are crucial for successful pickling.
- Jar Lifter: Essential for safely lifting hot jars from the boiling water bath.
- Canning Funnel: Helps to pour the brine into jars without spilling.
- Bubble Remover/Headspace Tool: A plastic or wooden tool used to release trapped air bubbles and measure headspace in jars.
- Clean Kitchen Towels: For wiping jar rims and cleaning up spills.
- Cutting Board and Knife: For preparing your vegetables.
- Optional:
- Food Processor or Mandoline: For uniform slicing of vegetables.
- Canning Rack: To keep jars from directly touching the bottom of the pot during processing.
Key Ingredients for Pickling Success
The quality of your ingredients directly impacts the flavor and texture of your pickles.
Vegetables
Choose fresh, firm, and unblemished vegetables. The type of vegetable will determine the pickling time and brine recipe. Consider these popular options:
- Cucumbers
- Carrots
- Green Beans
- Asparagus
- Peppers (Bell, Jalapeño, Banana)
- Onions
- Beets
- Cauliflower
- Okra
Vinegar
Vinegar is the primary acid used in many pickling recipes. Here are some common types:
- White Distilled Vinegar: The most common type, with a clean, sharp flavor. It should have an acidity of 5%.
- Apple Cider Vinegar: Offers a slightly sweet and fruity flavor. Look for an acidity of 5%.
- White Wine Vinegar: A milder, more delicate flavor suitable for lighter-colored vegetables.
- Rice Vinegar: A mild and slightly sweet vinegar, commonly used in Asian-inspired pickles.
Important Note: Always use vinegar with at least 5% acidity for safe pickling.
Salt
Salt plays a vital role in pickling. It not only enhances flavor but also helps to draw out excess moisture from the vegetables, which contributes to their crispness.
- Pickling Salt: The best choice for pickling, as it is pure sodium chloride without any additives like iodine or anti-caking agents that can darken pickles or make the brine cloudy.
- Kosher Salt: A good alternative to pickling salt, as it also lacks additives.
- Avoid Table Salt: Table salt contains iodine and anti-caking agents that can negatively affect the color and clarity of your pickles.
Sugar
Sugar is often added to pickling brine to balance the acidity and enhance the flavor. The amount of sugar can be adjusted to your preference, depending on how sweet you want your pickles to be.
- Granulated Sugar: The most common type of sugar used in pickling.
- Brown Sugar: Adds a molasses-like flavor and can be used in certain recipes for a richer taste.
Spices and Herbs
This is where you can get creative and customize your pickles to your liking! Here are some popular options:
- Dill: Fresh or dried dill is a classic addition to cucumber pickles.
- Garlic: Adds a pungent and savory flavor.
- Mustard Seeds: Contribute a mild, peppery flavor.
- Peppercorns: Black, white, or mixed peppercorns add a subtle heat and complexity.
- Red Pepper Flakes: For a spicy kick.
- Bay Leaves: Impart a subtle, herbal flavor.
- Ginger: Fresh or dried ginger adds a warm, spicy note.
- Coriander Seeds: Provide a citrusy and earthy flavor.
- Onion: Adds flavor and texture.
- Other Options: Turmeric, celery seed, cloves, allspice, star anise, horseradish.
Pickling Methods: A Step-by-Step Guide
There are two primary methods for pickling vegetables: acid pickling and fermentation pickling. Here’s a detailed guide to both processes:
Acid Pickling: Quick and Easy
Acid pickling, also known as quick pickling, is a straightforward method that relies on vinegar to preserve the vegetables. It's ideal for beginners and offers quick results.
- Prepare the Vegetables: Wash and trim the vegetables according to the recipe. Cut them into desired shapes (slices, spears, chunks, etc.).
- Prepare the Brine: In a large pot, combine vinegar, water, salt, sugar (if using), and spices. Bring the mixture to a boil over medium-high heat, stirring until the salt and sugar dissolve.
- Pack the Jars: While the brine is heating, pack the prepared vegetables into clean, sterilized canning jars, leaving the recommended headspace (usually ½ inch). Add any desired spices directly into the jars.
- Pour the Brine: Carefully pour the hot brine over the vegetables in the jars, leaving the recommended headspace. Use a bubble remover or plastic utensil to release any trapped air bubbles.
- Wipe the Rims: Wipe the rims of the jars with a clean, damp cloth to remove any spills.
- Seal the Jars: Place the lids on the jars and screw on the bands until finger-tight (not too tight).
- Process the Jars (Water Bath Canning):
- Place a canning rack in a large pot and fill it with enough water to cover the jars by at least 1 inch.
- Bring the water to a boil.
- Carefully lower the jars into the boiling water bath using a jar lifter. Make sure the jars are not touching each other.
- Process the jars for the time specified in the recipe. Processing times vary depending on the type of vegetable and the size of the jars.
- Turn off the heat and let the jars sit in the hot water for 5 minutes.
- Remove the jars from the water bath using a jar lifter and place them on a towel-lined surface to cool.
- Check the Seals: As the jars cool, you should hear a popping sound as the lids seal. After the jars have cooled completely (12-24 hours), check the seals by pressing down on the center of each lid. If the lid doesn't flex, it's sealed properly. If the lid flexes, it's not sealed and should be refrigerated and consumed within a few weeks, or reprocessed with a new lid.
- Label and Store: Label the jars with the date and contents and store them in a cool, dark place for at least 2-3 weeks before eating to allow the flavors to develop.
Fermentation Pickling: A Natural Approach
Fermentation pickling relies on beneficial bacteria to create lactic acid, which preserves the vegetables and gives them a distinctive tangy flavor.
- Prepare the Vegetables: Wash and trim the vegetables according to the recipe. Cut them into desired shapes.
- Prepare the Brine: In a non-reactive bowl, combine water, salt, and any desired spices. Stir until the salt dissolves. The salt concentration is crucial for successful fermentation. Typically, a 2-5% brine solution is used (20-50 grams of salt per liter of water).
- Pack the Jars: Pack the prepared vegetables into clean jars, leaving about 1-2 inches of headspace. Add any desired spices directly into the jars.
- Submerge the Vegetables: Pour the brine over the vegetables, ensuring they are completely submerged. Use a fermentation weight (glass weight, ceramic weight, or even a clean rock) to keep the vegetables below the brine level. This prevents mold growth.
- Cover the Jars: Cover the jars with a fermentation airlock or a clean cloth secured with a rubber band. This allows gases to escape while preventing unwanted bacteria from entering.
- Ferment: Place the jars in a cool, dark place (ideally around 60-70°F or 15-21°C) to ferment. The fermentation time can vary from a few days to several weeks, depending on the temperature and the type of vegetable. Taste the pickles periodically to check their progress.
- Monitor for Mold: Check the jars regularly for any signs of mold. If mold appears, discard the entire batch.
- Refrigerate: Once the pickles have reached your desired level of sourness, transfer them to the refrigerator to slow down the fermentation process. They will continue to ferment slowly in the refrigerator.
- Enjoy: Fermented pickles can be stored in the refrigerator for several months.

Pickling Recipes to Get You Started
Here are a few classic pickling recipes to get you started on your pickling journey:
Classic Dill Pickles (Acid Pickled)
Ingredients:
- 4 pounds pickling cucumbers, about 4 inches long
- 8 cups water
- 4 cups white distilled vinegar (5% acidity)
- 1/2 cup pickling salt
- 8 cloves garlic, peeled
- 8 sprigs fresh dill
- 2 teaspoons mustard seeds
- 1 teaspoon black peppercorns
- 1/2 teaspoon red pepper flakes (optional)
Instructions:
- Wash cucumbers thoroughly and trim ends.
- In a large pot, combine water, vinegar, and salt. Bring to a boil, stirring until salt dissolves.
- Pack cucumbers into clean, sterilized jars, leaving ½ inch headspace.
- Add 1 clove garlic, 1 sprig dill, ¼ teaspoon mustard seeds, and a pinch of peppercorns and red pepper flakes (if using) to each jar.
- Pour hot brine over cucumbers, leaving ½ inch headspace.
- Wipe jar rims, seal with lids and bands, and process in a boiling water bath for 10 minutes (for pint jars) or 15 minutes (for quart jars).
- Cool completely and check seals. Store in a cool, dark place.
Fermented Dill Pickles
Ingredients:
- 4 pounds pickling cucumbers, about 4 inches long
- 8 cups non-chlorinated water
- 1/4 cup pickling salt
- 8 cloves garlic, peeled
- 8 sprigs fresh dill
- 2 teaspoons mustard seeds
- 1 teaspoon black peppercorns
- Grape leaves or oak leaves (optional, for crispness)
Instructions:
- Wash cucumbers thoroughly and trim ends.
- In a non-reactive bowl, combine water and salt. Stir until salt dissolves.
- Pack cucumbers into clean jars.
- Add 1 clove garlic, 1 sprig dill, ¼ teaspoon mustard seeds, and a pinch of peppercorns to each jar. Add a grape leaf or oak leaf to each jar, if using.
- Pour brine over cucumbers, ensuring they are completely submerged. Use a fermentation weight to keep them submerged.
- Cover jars with fermentation airlocks or clean cloths secured with rubber bands.
- Ferment in a cool, dark place (60-70°F) for 1-4 weeks, tasting regularly.
- Refrigerate to slow down fermentation.
Pickled Okra
Ingredients:
- 1 pound fresh okra pods, about 3-4 inches long
- 2 1/2 cups white vinegar (5% acidity)
- 1 cup water
- 2 tablespoons pickling salt
- 2 tablespoons sugar
- 4 cloves garlic, peeled
- 4 small red chili peppers
- 1 teaspoon mustard seeds
- 1 teaspoon black peppercorns
Instructions:
- Wash okra pods and trim stems, leaving about ¼ inch.
- In a large pot, combine vinegar, water, salt, and sugar. Bring to a boil, stirring until salt and sugar dissolve.
- Pack okra pods into clean, sterilized jars, leaving ½ inch headspace.
- Add 1 clove garlic and 1 chili pepper to each jar. Sprinkle ¼ teaspoon mustard seeds and ¼ teaspoon peppercorns into each jar.
- Pour hot brine over okra pods, leaving ½ inch headspace.
- Wipe jar rims, seal with lids and bands, and process in a boiling water bath for 10 minutes (for pint jars).
- Cool completely and check seals. Store in a cool, dark place.
Pickled Beets
Ingredients:
- 2 pounds beets, tops trimmed, leaving about 1 inch of stem
- 4 cups water
- 2 cups white vinegar (5% acidity)
- 1 cup sugar
- 2 teaspoons pickling salt
- 1 cinnamon stick
- 4 whole cloves
Instructions:
- Wash beets thoroughly. Place in a large pot and cover with water. Bring to a boil and cook until tender (about 30-45 minutes).
- Drain beets and let cool slightly. Rub off the skins and trim stems and roots. Cut into slices or cubes.
- In a large pot, combine water, vinegar, sugar, salt, cinnamon stick, and cloves. Bring to a boil, stirring until sugar and salt dissolve.
- Pack beets into clean, sterilized jars, leaving ½ inch headspace.
- Pour hot brine over beets, leaving ½ inch headspace. Remove cinnamon stick.
- Wipe jar rims, seal with lids and bands, and process in a boiling water bath for 30 minutes (for pint jars) or 35 minutes (for quart jars).
- Cool completely and check seals. Store in a cool, dark place.
Tips for Crispy Pickles
Achieving that perfect crunch is a common goal for pickle makers. Here are some tips to help you get crispy pickles every time:
- Use Fresh Vegetables: Freshly harvested vegetables are more likely to stay crisp during pickling.
- Trim Blossom Ends: Enzymes in the blossom end of cucumbers can soften pickles. Remove about 1/16 inch from the blossom end.
- Grape Leaves or Oak Leaves: Adding a grape leaf or oak leaf to each jar contains tannins that help to inhibit enzymes that cause softening.
- Alum or Calcium Chloride: Some recipes call for a small amount of alum or calcium chloride to help maintain crispness. Use sparingly, as too much can result in a bitter taste.
- Ice Bath: Soaking cucumbers in an ice bath for a few hours before pickling can help to keep them crisp.
- Proper Brine Strength: Using the correct amount of salt and vinegar in the brine is essential for preserving the texture of the vegetables.
- Avoid Overcooking: Do not over-process the jars in the boiling water bath, as this can lead to softer pickles.
Troubleshooting Common Pickling Problems
Even with the best intentions, pickling can sometimes present challenges. Here are some common problems and their solutions:
- Soft Pickles:
- Cause: Overripe vegetables, insufficient vinegar, improper processing.
- Solution: Use fresh, firm vegetables. Ensure the vinegar has at least 5% acidity. Follow processing times carefully.
- Cloudy Brine:
- Cause: Impurities in salt or vinegar, starch released from vegetables.
- Solution: Use pickling salt or kosher salt. Use distilled vinegar. Avoid overpacking the jars.
- Shriveled Pickles:
- Cause: Brine too strong, vegetables too dry.
- Solution: Follow the recipe carefully, ensuring accurate measurements. Soak vegetables in water before pickling.
- Hollow Pickles:
- Cause: Overripe vegetables, rapid growth during vegetable development.
- Solution: Use young, firm vegetables. Avoid pickling vegetables that have grown too quickly.
- Jars Not Sealing:
- Cause: Improper preparation, damaged lids, insufficient processing.
- Solution: Follow instructions carefully. Use new lids. Ensure the jar rims are clean. Process for the correct amount of time.
- Mold Growth in Fermented Pickles:
- Cause: Insufficient salt, vegetables not submerged in brine, contamination.
- Solution: Use the correct amount of salt. Ensure vegetables are completely submerged in brine. Use clean jars, utensils, and fermentation weights.
Creative Pickling Ideas
Once you’ve mastered the basics, don’t be afraid to experiment with different vegetables, spices, and vinegars. Here are a few creative pickling ideas to inspire you:
- Spicy Jalapeño Carrots: Add sliced jalapeños and a pinch of cayenne pepper to your carrot pickle brine for a fiery kick.
- Sweet and Tangy Watermelon Rind Pickles: Use the watermelon rind to make a unique and delicious pickle with a sweet and tangy flavor.
- Pickled Red Onions with Balsamic Vinegar: Create a vibrant and flavorful pickle by using red onions and balsamic vinegar.
- Ginger and Turmeric Pickled Cauliflower: Add grated ginger and turmeric to your cauliflower pickle brine for a vibrant color and health benefits.
- Pickled Green Tomatoes with Dill and Garlic: Use unripe green tomatoes to make a tangy and savory pickle.
Serving and Enjoying Your Pickles
Pickles are a versatile condiment that can be enjoyed in a variety of ways. Here are some serving suggestions:
- As a Snack: Enjoy them straight from the jar as a refreshing and tangy snack.
- With Sandwiches and Burgers: Add them to sandwiches and burgers for extra flavor and crunch.
- In Salads: Chop them up and add them to salads for a tangy twist.
- With Cheese and Charcuterie Boards: Serve them alongside cheese and cured meats for a balanced and flavorful appetizer.
- As a Garnish: Use them as a garnish for grilled meats, fish, and vegetables.
- In Cocktails: Add pickle juice to cocktails for a unique and savory flavor.
Safety Considerations for Pickling
Safety should always be your top priority when pickling. Here are some important safety considerations:
- Use the Right Equipment: Always use canning jars and lids specifically designed for home canning.
- Follow Tested Recipes: Use tested and approved pickling recipes from reputable sources.
- Maintain Proper Acidity: Ensure the vinegar has at least 5% acidity for safe preservation.
- Process Jars Correctly: Follow processing times and methods carefully to ensure a proper seal and prevent spoilage.
- Check Seals: Always check the seals of the jars after processing. If a jar is not sealed, refrigerate it immediately and consume the contents within a few weeks, or reprocess with a new lid.
- Store Pickles Properly: Store sealed jars in a cool, dark place. Refrigerate opened jars.
- Discard Spoiled Pickles: If you notice any signs of spoilage, such as mold, off-odors, or bulging lids, discard the pickles immediately.
Conclusion
Pickling vegetables is a rewarding and delicious way to preserve seasonal produce and add a burst of flavor to your meals. Whether you choose the quick and easy acid pickling method or the naturally tangy fermentation process, the possibilities are endless. With this comprehensive guide, you have all the knowledge and tools you need to embark on your pickling adventure. So, gather your favorite vegetables, experiment with different spices, and get ready to enjoy the delightful crunch of homemade pickles!