Thinking about growing your own lettuce but don't have a lot of space or a green thumb? You're in luck! Learning how to grow lettuce indoors hydroponically is actually way simpler than you might think. Forget about soil, pests, and unpredictable weather. With a few basic supplies and a little bit of know-how, you can have fresh, crisp lettuce ready to eat all year round, right in your own home. It’s a great way to get healthy greens without a lot of hassle.
Key Takeaways
- Hydroponics lets you grow lettuce indoors any time of year, regardless of the season.
- You can get cleaner, pesticide-free greens by growing your own lettuce hydroponically.
- Hydroponic systems are perfect for small spaces, allowing for big yields of lettuce.
- Controlling nutrient levels (EC and pH) is important for healthy lettuce growth.
- Proper lighting, temperature, and airflow are key to successful hydroponic lettuce cultivation.
How to Grow Lettuce Indoors Hydroponically
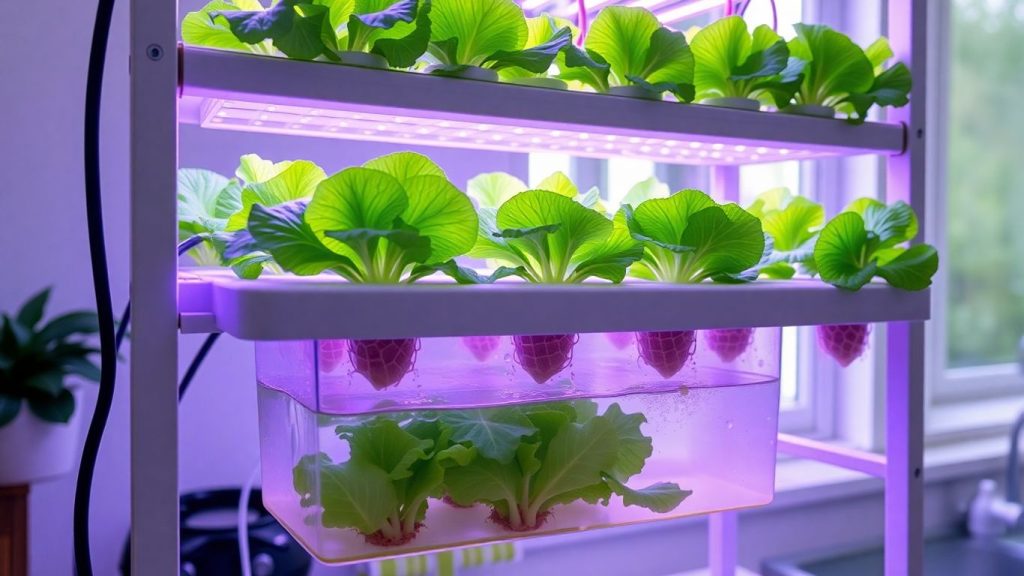
Growing lettuce inside with hydroponics is way less fussy than it sounds. No dirt. Little cleanup. You set seedlings in a nutrient solution, give them steady light, and watch them plump up fast. Once you dial in light, nutrients, and spacing, lettuce turns into a steady weekly harvest you can count on.
Quick tip: plan how many salads you want per week, then work backward to how many plants you need at different stages—seed, seedling, and ready-to-pick.
Fresh Harvests in Any Season
You don’t have to wait for spring. Lettuce is quick indoors, which makes it perfect for a simple rotation.
- Timing basics: 2–4 days to sprout, about 10–14 days to reach transplant size, then 3–5 weeks to harvest depending on variety and whether you grow baby leaf or heads.
- Staggered planting: start a small batch every 7–10 days so something is always ready.
- Variety picks: looseleaf and mini romaine types mature faster; butterheads are a touch slower but super tender.
How to set up a simple, year-round rhythm:
- Start 6–12 seeds each week in plugs or sponges.
- Transplant when roots poke out and the first true leaves show.
- Keep 3 groups going: new seedlings, growing plants, and harvest-ready.
- Harvest baby leaf at 4–6 inches tall or take full heads when they feel firm.
- Re-seed the same day you harvest to keep the train moving.
Cleaner, Pesticide-Free Greens
Indoors, you control what touches your food. That means no soil splash and fewer hitchhikers.
- Keep it tidy: rinse tools and trays, and wipe down lids and tubs between crops.
- Block light from the roots with opaque reservoirs or covers to avoid algae.
- Swap nutrient solution on a schedule (7–14 days) and top up with fresh water in between.
- Quarantine new plants and skip outdoor houseplant “roommates” near your lettuce.
- If you ever see pests, stick to gentle fixes first—sticky cards, hand removal, and a soapy wipe on surfaces.
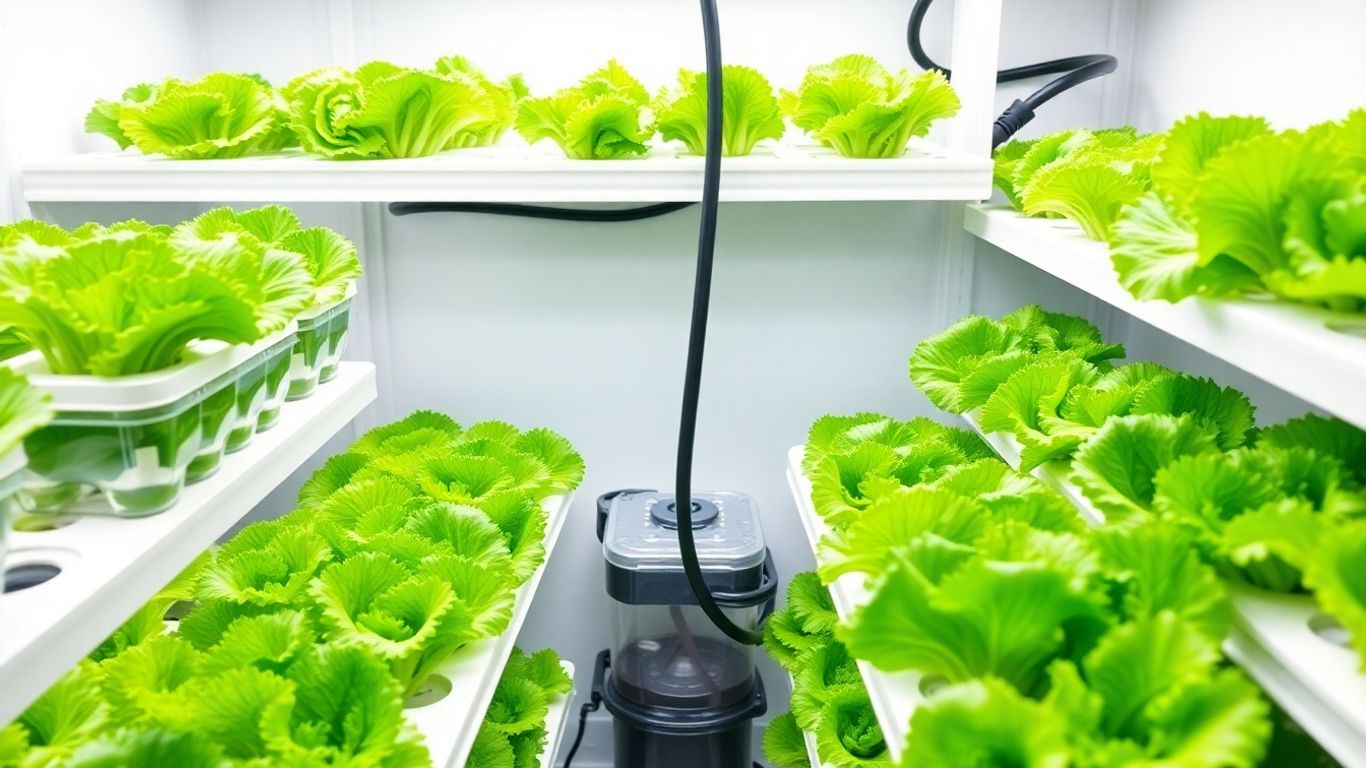
Small Spaces, Big Yields
You don’t need a spare room. A shelf and a tote can crank out salads.
- Counter friendly: a Kratky jar or two for baby leaves—cheap, no pumps, easy refills.
- Under-shelf tub: a 10–20 gallon DWC tote with 6–8 net cups grows a steady stream of heads.
- Vertical mindset: two shelves of 24–36 inches wide can hold 12–24 plants in rotation.
- Smart spacing: ~6–8 inches between heads to avoid crowding and limp leaves.
- Real-world output: a 2×3 ft footprint can supply 3–6 heads a week if you stagger plantings and re-seed on harvest day.
Choosing a Hydroponic System That Fits Your Space
Finding the right setup isn’t about chasing fancy gear. It’s about matching your home, your schedule, and the size of harvest you actually want.
Start small, master the basics, then add more sites.
Pick the system you can maintain on your busiest week, not your best week.
Deep Water Culture Made Simple
DWC keeps roots in a bubbling nutrient bath. It’s steady, fast, and great for full heads of lettuce.
What you’ll need:
- Light-proof bucket or tote with a tight lid (about 2–3 gallons per plant)
- Air pump, air stones, tubing, and a check valve
- 2–3 inch net pots and clay pebbles (or similar media)
- Basic EC/TDS and pH pens so you know what’s going on in the water
Quick setup:
- Drill or cut holes in the lid for net pots (6–8 inches apart for lettuce heads).
- Place air stones in the reservoir and run lines to the pump; add a check valve.
- Fill with nutrient solution, leaving roots room to stretch; keep water around 60–68°F.
- Set seedlings so net pots just touch the water, then let roots find the bubbles.
- Top off with plain water during the week; swap the full reservoir on a 1–2 week rhythm.
Why it fits busy growers:
- Stable water volume = fewer swings in pH and nutrients
- Forgiving oxygen supply from the air pump
- Works in closets, under-stairs nooks, or on a shelf with a spill tray
Heads-up:
- Pumps hum (low, but real); set them on foam or a towel to quiet vibration
- Keep lids opaque and lines tidy to block light and stop algae
Easy Kratky Setups for Beginners
No pumps. No power. Just a plant perched above a still solution with an air gap for breathing. It’s quiet, cheap, and perfect for a tiny footprint.
Getting started:
- Use dark jars, buckets, or totes to block light (or wrap containers in tape/foil).
- Mix nutrients, fill the container, and leave a small air gap under the net pot.
- Set your seedling so the cube just kisses the solution.
- As the plant drinks, an air gap forms naturally, and roots split into wet and dry zones.
- Harvest when the solution is nearly gone—don’t let it run dry early.
Tips that save headaches:
- One gallon per plant grows a decent head; smaller jars are great for baby leaf
- Warm rooms speed water use; check levels 2–3 times a week
- If the level drops fast, top off with half-strength nutrients so you don’t spike salts
Best use cases:
- Countertops, windowsills, or a single shelf
- Power outages, quiet spaces, or “try it before you go bigger” experiments
Racks and Towers for Tight Corners
Vertical systems stack plants to pack in more lettuce. You get a lot of sites in a small area, but you’ll manage pumps, lines, and a bit more upkeep.
Discover Proven Techniques to Preserve Your Food Year-Round and Enjoy Less Waste with More Freshness
Before you buy or build:
- Measure everything: ceiling height, door width, and the floor spot for a catch tray
- Count water weight (8.34 lb per gallon) so shelves and floors can handle it
- Plan even light to every tier; side lighting often helps reduce shadows
- Give water a clean path back to the reservoir to avoid spills
- Choose a reliable pump and simple timers; fewer fittings = fewer leaks
- Leave room to reach the top and back for pruning and cleaning
Care that keeps things smooth:
- Flush lines weekly and wipe salt crust from emitters
- Keep the reservoir dark and cool; light-tight lids prevent slime
- Sanitize between crops so roots stay white and fresh
Who should pick this:
- Anyone chasing high plant counts in a corner, hallway, or narrow room
- Growers ready to do quick weekly checks and the occasional deep clean
Setting Up Lights to Power Leafy Growth
Lights are the engine that make lettuce pile on leaves. The good news: you don’t need stadium lights—just the right spectrum, steady intensity, and a timer that never misses.
Picking the Right Spectrum for Lettuce
- Choose full-spectrum white LEDs in the 5000–6500K range. They grow tight, flavorful heads without the harsh purple glare.
- A bit more blue keeps plants squat and dense; heavy red can make them stretch. Balanced “daylight” fixtures work great.
- T5 fluorescents still work, but LEDs run cooler and sip power.
- Optional: a touch of far-red or UV isn’t needed for green lettuce. Red varieties can color up with slightly higher light, not fancy wavelengths.
Check the box or product page for photosynthetic output (PPF) and coverage charts. If the maker only lists watts, that’s guesswork; look for actual PAR numbers when you can.
Dialing in Intensity and Height
Aim for a PPFD of 200–250 µmol/m²/s at the canopy for compact, crunchy heads.
Targets to keep you honest:
- Baby leaf: 120–180 µmol/m²/s
- Mini/heads: 180–300 µmol/m²/s
- DLI sweet spot: about 12–17 mol/m²/day
Practical setup steps:
- Hang lights 12–18 inches above the canopy to start (bars closer, boards a bit higher).
- If your fixture dims, begin around 60–70% power.
- After 24–48 hours, check leaves: pale/bleached = too much; lanky/stretchy = too little.
- Change one thing at a time: raise or lower 2 inches, or tweak dimmer by 10%.
- Spread light evenly. Use reflective walls or shuffle plants so edges don’t lag behind the center.
- Keep heat off the leaves with a small fan; light that bakes is wasted.
Quick measuring hacks:
- A PAR meter is ideal. A phone lux app plus an online converter can get you close for white LEDs (rough ballpark only).
Hot lights slow lettuce. If canopy temps creep past 72°F, raise the fixture or boost airflow.
Running a Reliable Light Schedule
Lettuce likes plenty of light but also needs darkness to rest. Most home growers do well with 14–16 hours on a timer.
- Typical schedules:
- Heads: 14 hours on / 10 off
- Baby leaf: 16 on / 8 off
- Microgreens: 18 on / 6 off
- Watch for bolting risk with very long days plus warm rooms; cooler temps help keep plants in vegetative mode.
- Handy rule: DLI (mol/m²/day) ≈ PPFD (µmol/m²/s) × hours × 0.0036. Adjust either intensity or hours to hit your target.
Power and sanity tips:
- Run lights in the evening or at night if your room runs warm or if electricity is cheaper off-peak.
- Use a reliable timer and don’t change the photoperiod day to day; consistency shows up as even growth.
Mixing Nutrients Like a Pro
Lettuce isn’t picky, but it does want steady, balanced feed. If you can measure, stir, and write down a few numbers, you’re halfway there. Stable pH and EC give you crisp, sweet leaves.
Understanding EC and pH for Crisp Leaves
EC is your “how strong is the soup” number; pH is how acidic or basic it is. Lettuce is happiest when both stay in a narrow lane. Tap water often holds pH in place because of carbonate buffers—check out pH buffering basics to see why pH doesn’t move in a straight line when you add acid. The higher the alkalinity, the more acid it takes to nudge pH.
- Aim for pH 5.6–6.1 (sweet spot ~5.8–6.0). Adjust in small drops, then wait 10–15 minutes and recheck.
- EC targets (mS/cm): seedlings 0.4–0.6; early growth 0.8–1.0; mature 1.0–1.2. If tips brown, back off a bit.
- Keep solution 60–68°F (16–20°C) for good uptake and happy roots.
- Calibrate pH and EC meters monthly; rinse probes with clean water after use.
If pH drifts up every day, your source water likely has high alkalinity. Try RO or pre-treat with a little acid so you’re not forever chasing the number.
Simple Feeding Schedule from Seedling to Harvest
You don’t need a complex formula. A good hydroponic leafy-green nutrient plus calcium and magnesium does the job.
- Germination and seedlings (week 0–2): Start at 0.4–0.6 EC. Just enough to feed without stressing tiny roots.
- Early growth (week 2–3): Bump to 0.8–1.0 EC. Keep pH close to 5.8–6.0. If you’re using RO water, add a light cal-mag dose.
- Bulking up (week 3–5): Hold 1.0–1.2 EC. Watch for pale new leaves (may need a touch more N/Fe) and for burnt tips (EC too high or heat/airflow issues).
- Final 2–3 days: Optional light flush with plain water if you want an extra-clean taste, but not required.
Mix like this (never combine concentrates together):
- Add cal-mag to the reservoir first, stir, wait 2–3 minutes.
- Add base nutrients (A, then B if using a two-part), stirring between each.
- Top up to final volume, aerate or stir well, then measure EC and pH.
- Make tiny pH tweaks last. Small sips of acid/base beat big swings.
Clean Water and Regular Reservoir Changes
Bad water and stale tanks cause more headaches than “bad nutrients.” Keep it simple and clean.
- Top-offs: Add plain water daily to your target fill line. Re-check pH/EC after top-offs so strength doesn’t creep.
- Changeouts: Swap the whole reservoir every 7–10 days for lettuce. If EC or pH won’t settle, change sooner.
- Light-proofing: Keep light out of the tank and lines to starve algae. Lids, dark tubing, and covers help a lot.
- Wash routine: On change day, drain, wipe biofilm, then sanitize (e.g., a short soak with 3% H2O2 or a tiny splash of unscented bleach), rinse, and refill. Don’t forget air stones and pump parts.
- Source water check: If tap water starts above ~150–200 ppm, consider a carbon filter or RO. You’ll get steadier pH and cleaner mixes.
Starting Seeds and Transplanting Without Stress
Starting lettuce from seed is quick and low-stress once you get the rhythm. Keep things clean, don’t rush the move to the system, and you’ll be cutting salads in no time.
Fast Germination in Plugs or Sponges
Lettuce pops fast when the starter media is damp, clean, and not waterlogged. Plugs, foam sponges, or rockwool all work—just prep them right and give seeds a little light from day one.
- Prep the media: Rinse, then pre-soak with pH 5.5–6.0 water. Let excess drip off so it’s moist, not dripping.
- Sow shallow: Drop 1–2 seeds per hole, press gently for contact, don’t bury deep. Lettuce likes a hint of light to germinate.
- Humidity dome: Cover the tray to hold moisture, then crack it daily for fresh air. Keep a small fan nearby on low.
- Temperature: Aim for 65–72°F. If it’s too warm, lettuce may stall; too cold and it’ll take longer.
- Light: Put seedlings under gentle grow lights right after sowing—16 hours on keeps them stocky, not leggy.
- Water and feed: Use plain, pH’d water until the first true leaves show. Then start very light nutrients (about 1/4 strength).
Keep seedlings moist, warm, and in gentle light, and they’ll do the rest.
Quick tip: If temps creep past 77°F and seeds drag their feet, move the tray to a cooler room and they usually wake up fast.
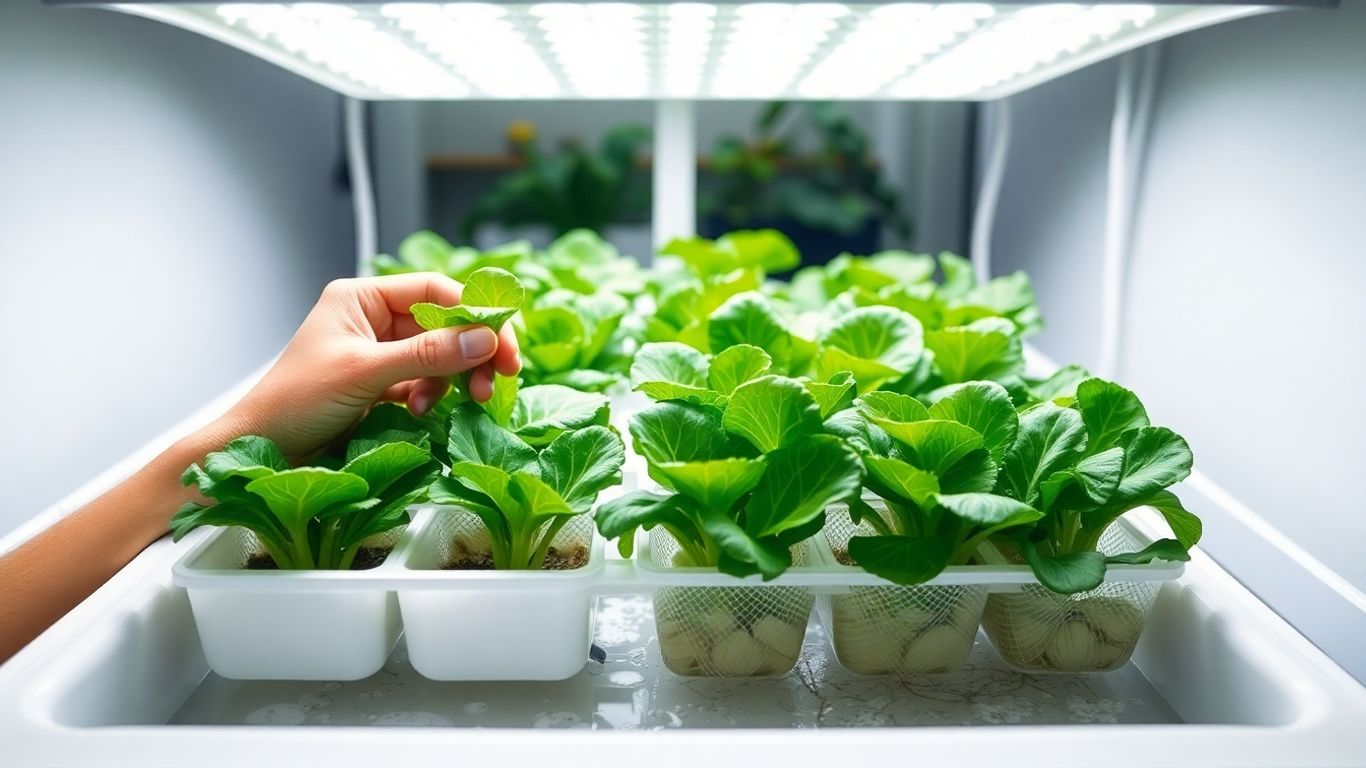
Transplant Timing for Strong Roots
Move seedlings when they’re sturdy, not tiny—and not pot-bound either. The sweet spot is when roots peek from the plug and the plant has 2–3 true leaves.
- Ready signs: roots showing, stem looks thick for its size, leaves are a healthy green.
- Red flags: stretched stems, yellowing, or roots spiraling thickly around the plug—don’t wait that long.
- Handle by the plug, not the stem. If a seedling splits, it’s game over.
How to set them in your system:
- DWC: Nest the plug high in the net pot with clay pebbles, and start the water line just touching the basket bottom for a few days. Then lower it about an inch as roots extend.
- Kratky: Same placement, but leave an air gap under the net pot from day one so roots have both air and solution.
Spacing That Prevents Crowding
Tight spacing looks tidy at first, then turns into shade battles and slow growth. Give each head room and you’ll get better size, better flavor, and fewer issues with tip burn.
- Baby leaf harvests: 4–5 inches apart
- Loose-leaf types: 6–8 inches apart
- Butterhead: 7–8 inches apart
- Romaine/head-forming: 8–10 inches apart
More small wins:
- Stagger plantings every 7–10 days so you’re not harvesting everything at once.
- Keep a gentle fan moving air between plants.
- If two seedlings share a site, snip the weaker one early so roots don’t compete.
Dialing in Temperature, Humidity, and Airflow
Keeping lettuce happy indoors comes down to cool temps, steady humidity, and a light breeze that never quits. Cool, steady air keeps lettuce crisp and trouble‑free.
Quick targets: 60–68°F air, 55–60% RH, and a gentle leaf flutter all day.
Cool Conditions Lettuce Loves
Lettuce is a cool-weather crop. Warm rooms speed growth but also invite limp leaves and bitter flavor. If things run hot, shift your light cycle to the evening, chill the reservoir a bit, and keep heat-making gear outside the tent if you can.
- Day air temp: 60–70°F (16–21°C)
- Night air temp: 55–65°F (13–18°C)
- Reservoir temp: 60–68°F (16–20°C); cooler roots = fewer slime issues
- Humidity: 50–65% RH (55–60% is the sweet spot)
- Place your thermometer/hygrometer at the canopy, not on the wall or the floor
- Quick fixes for heat: run lights at night, raise fixtures a few inches, add a small intake of cooler room air, drop in frozen water bottles for short-term reservoir cooling
Gentle Fans to Keep Leaves Dry
You want air that moves like a calm breeze on a porch—not a wind tunnel. Leaves should twitch a little, not fold or rattle. This keeps surfaces dry, stops algae smells, and helps the plant move water and nutrients better.
- Use 1–2 small oscillating fans per 2×4 ft area, aimed above and across the tops
- Add an exhaust fan to swap the room air regularly; bring in fresh air from a passive intake
- Run fans all day; after lights go off, keep them on 30–60 minutes to prevent humidity spikes
- Avoid blasting plants directly—windburn shows up as crispy edges and twisted growth
- Wipe fan grills and change filters monthly to keep airflow strong
Preventing Tip Burn Before It Starts
Tip burn shows up as brown, papery edges on young leaves. It’s usually a calcium supply problem made worse by heat, still air, or very fast growth. The fix isn’t fancy—it’s steady climate, steady feed, and space to breathe.
- Keep temps on the cool side late in the cycle (62–66°F is nice for heads)
- Hold RH near 55–60%; if you see 70%+ for long stretches, increase exhaust or add a small dehumidifier
- Keep a soft breeze into the center of each head; no stagnant corners
- Nutrition checks: pH 5.8–6.2, moderate EC (about 1.2–1.6 mS/cm), and a base formula with calcium (often from calcium nitrate)
- Don’t crowd: 6–8 inches between baby/butterhead, 8–10 inches for larger romaine types
- Avoid sudden jumps in light intensity; raise brightness over 2–3 days
- Root care: cool, oxygenated solution and regular changes; air stones help in DWC
- Harvest on time—overgrown heads are more prone to edge burn
Harvesting, Cleaning, and Storing for Peak Crunch
You did the hard part—now let’s keep that lettuce crunchy and sweet. Handle it gently, keep it cold, and don’t rush the drying.
Cold, clean, and quick handling keeps lettuce crisp.
Cut and Come Again for Continuous Greens
Want steady bowls of salad without replanting every week? Use a cut-and-come-again approach so plants keep producing.
- Pick in the coolest window you can—early morning or right after lights come on. Turn lights off 30–60 minutes before harvest if your grow room runs warm.
- Snip outer leaves when they’re 4–6 inches long. Leave the center (the crown) intact so it keeps pushing fresh leaves.
- For a “mini-head” harvest, cut the plant 1–1.5 inches above the base; don’t scalp the crown. Many varieties will give a second flush in 10–14 days.
- Sanitize shears with alcohol before you start and between plants to avoid spreading funk.
- Stagger new seeds weekly so you always have young plants coming up when older ones slow down.
Aim to go from cut to fridge in under 30 minutes for maximum crunch and shelf life.
Rinse, Dry, and Chill the Right Way
Hydro lettuce is cleaner than soil-grown, but it still needs a quick reset.
- Trim off damaged or yellowing bits first. They decay faster and spread moisture.
- Rinse in very cold water. A quick dip-and-swirl wakes up wilted leaves and rinses off any algae dust.
- Optionally, do a second bath with fresh cold water if the first gets cloudy.
- Spin or pat dry until leaves are barely damp. Water hiding in folds = soggy storage and slimy edges.
- Pack loosely in a lidded container or perforated bag lined with a dry paper towel. Don’t cram; crushed leaves break down fast.
- Store in the fridge’s crisper drawer, away from apples, bananas, and tomatoes (ethylene speeds up wilting and browning).
Flavor Boosts with Cool Temps and Quick Handling
Small tweaks before and after harvest can keep bitterness down and texture snappy.
- Keep plants cool the day before harvest. If your space runs warm, lower room temp or raise lights a bit to ease stress.
- Some growers slightly reduce nutrient strength the last few days; less stress and milder sap can mean gentler flavor. Don’t starve them—just a modest pullback.
- After cutting, do a 1–3 minute cold-water soak to rehydrate, then dry well. If leaves feel floppy later, a quick cold dunk before serving perks them back up.
- Pre-cool fast: container goes straight to the back of the fridge (34–38°F). High humidity helps—use that drawer.
- Whole heads with roots attached store longest. Wrap roots in a damp towel and bag the head loosely; rinse right before eating.
If you keep it clean, dry, and cold, cut leaves last 5–7 days and whole heads often hold a week or two. The first time I rushed and skipped drying, everything went limp by day two—lesson learned. Keep it simple, and let the fridge do the heavy lifting.
Troubleshooting Lettuce Problems in Hydroponics
Stuff goes sideways sometimes. Pumps unplug themselves, temps creep up, and suddenly your lettuce looks tired. Keep roots cool, dark, and oxygenated, and most problems melt away.
Quick gut-check: when leaves look rough, start with the roots and the reservoir before touching anything else.
Fixing Wilting and Slow Growth
If your lettuce is droopy or stuck in first gear, don’t panic. Work through a simple checklist and you’ll usually spot the culprit fast. I’ve forgotten to plug a pump back in more times than I’d like to admit.
- Temperature: Aim for 60–70°F air and 65–70°F water. Warm solution slows growth and saps oxygen; cold stalls roots.
- Air and oxygen: Verify your pump/airstones are running and bubbling well. No bubbles = wilt city.
- pH and nutrients: Keep pH 5.8–6.2. Target EC around 0.8–1.2 mS/cm (seedlings 0.4–0.6). Big swings cause stress.
- Light: If leaves bleach or curl down, raise or dim the light. If plants stretch and pale, increase intensity or lower the fixture a bit.
- Water level: In DWC, keep solution touching the net pot until roots hang, then drop it about 1/2 inch to create an air gap. In Kratky, maintain a clear air gap.
- Spacing and airflow: Tight spacing and still air make plants sulk. Give each head room and run a gentle fan.
- Quick reset: Top off with plain water if EC is high. If things look messy or smell off, swap the reservoir and mix fresh solution.
Stopping Algae and Root Rot
Green slime on surfaces? Brown, mushy roots with a swampy smell? You’ve got light leaks or low oxygen (or both). Move fast and you can save the crop.
- Block light: Opaque lids, black tape/paint on reservoirs, and collars over cubes stop algae at the source.
- Clean surfaces: Wipe biofilm from lids, tubing, and walls. Keep drips and spills to a minimum.
- Cool and oxygenate: Hold solution at 65–70°F and boost aeration. Warm, still water invites pathogens.
- Full refresh: Remove sick plants, dump the tank, scrub, sanitize, and refill with fresh nutrients on the lighter side.
- Root rescue: Rinse gently to remove slime. If roots are mushy throughout, cull the worst plants so the rest can rebound.
- Ongoing hygiene: Sanitize between runs. Use approved oxidizing sanitizers at label rates; don’t mix products.
Keeping Aphids and Gnats at Bay
Indoor greens aren’t immune to bugs—they just need a different game plan. Catching issues early makes life so much easier.
- Prevention first: Quarantine new plants, cover air intakes with fine mesh, and hang yellow sticky traps from day one.
- Clean zone: Remove dead leaves, wipe spills, and don’t let media stay soggy on top (gnats love it).
- Aphids (soft-bodied clusters): Knock them off with a firm water spray, then use a light insecticidal soap. Repeat every 3 days a couple of times. Beneficials like lacewing larvae can help in tents.
- Fungus gnats (tiny black flies): Use sticky traps, dry the top of cubes, top-dress with a thin sand layer, and apply BTI products to target larvae.
- Keep plants stress-free: Healthy, well-fed lettuce resists pests better—stay on top of pH, nutrients, airflow, and temperature.
If you fix the environment first, most “mystery” problems stop being mysterious. The rest is just small tweaks and a fresh reservoir.
Happy Growing!
So there you have it! Growing lettuce indoors with hydroponics is totally doable, and honestly, pretty rewarding. You get super fresh greens without all the hassle of soil or worrying about the weather. Plus, it’s kind of cool to have a little green patch right in your home. Give it a shot, and you might be surprised at how easy it is to have tasty lettuce ready whenever you want it. Enjoy your homegrown harvest!
Frequently Asked Questions
What are the main benefits of growing lettuce hydroponically indoors?
Growing lettuce indoors using hydroponics means you can have fresh greens all year, no matter the weather outside. It's also cleaner because you don't use soil, which often means no pesticides. Plus, you can grow a lot in a small space, which is great for apartments or homes with limited room.
Which hydroponic system is best for a beginner with limited space?
For beginners and small spaces, systems like Deep Water Culture (DWC) or the Kratky method are usually the easiest to start with. DWC involves keeping plant roots submerged in nutrient-rich water, while Kratky is a simpler, passive version where roots hang into the water and air as the water level drops. Racks and towers are also good for maximizing vertical space.
What kind of lights do I need for growing lettuce indoors?
Lettuce needs specific light to grow well. Look for full-spectrum LED grow lights, as they provide the right colors (red and blue are important) that plants need for leafy growth. You'll want to position the lights at the right distance from the plants, usually a few inches above, and keep them on for about 14-16 hours a day.
How do I make sure my lettuce gets the right nutrients?
You need to use a special hydroponic nutrient solution mixed with water. It's important to keep track of the water's pH level (usually between 5.5 and 6.5) and the nutrient strength (EC or PPM). Regularly changing the water in your system helps keep things clean and ensures the plants get fresh nutrients.
When should I move my lettuce seedlings to the main hydroponic system?
You can start lettuce seeds in small plugs or sponges. Once the seedlings have a few sets of true leaves and you can see roots starting to grow out of the bottom of the plug, they are usually ready to be moved. Make sure to give them enough space so they don't get too crowded as they grow.
What are the ideal temperature and humidity levels for growing lettuce?
Lettuce prefers cooler temperatures, ideally between 60-70°F (15-21°C). Keeping the humidity moderate is good, but you also want some air movement, like from a small fan, to help keep the leaves dry and prevent diseases. This also helps prevent issues like tip burn.