Want to make your kitchen more sustainable and waste less food? Homemade food preservation is the way to go. It's not as hard as you might think, and it lets you enjoy your garden's bounty or good deals from the store all year round. We'll cover the basics, from freezing and canning to dehydrating and fermenting, so you can fill your pantry with tasty, preserved goodies. Let's get started on making your kitchen a little more self-sufficient.
Key Takeaways
- Homemade food preservation helps reduce food waste and save money.
- Freezing is a simple method for preserving fresh foods quickly.
- Canning, both water bath and pressure, allows for long-term storage of many foods.
- Dehydrating concentrates flavors and is great for fruits, vegetables, and meats.
- Fermenting and pickling add unique flavors and can improve gut health.
Embrace The Bounty: Getting Started With Homemade Food Preservation
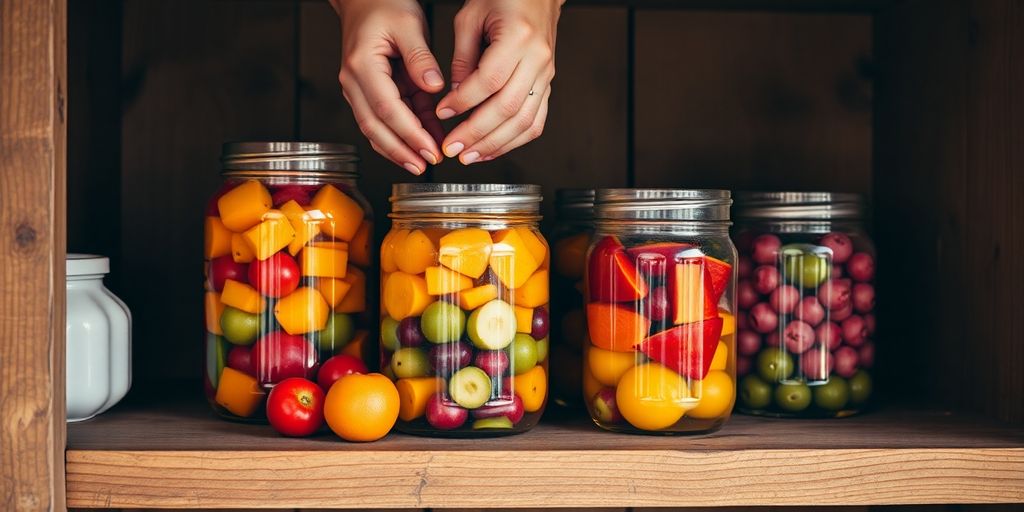
Feeling overwhelmed by the sheer amount of produce from your garden or a great farmers market haul? Don't let it go to waste! Homemade food preservation is your secret weapon for a more sustainable kitchen, turning that abundance into delicious meals and snacks that last. It’s not as complicated as you might think, and honestly, it’s pretty rewarding. You're basically giving your food a second life.
Why Preserve Your Harvest?
Think about it: that summer tomato, bursting with flavor, can be enjoyed in a hearty soup come winter. Or those berries, picked at their peak, can become a delightful jam for your morning toast. Preservation means less food waste, saving money, and having access to nutritious food all year round. Plus, there’s a real satisfaction in knowing exactly what went into your food – no weird additives here!
Setting Up Your Preservation Station
Before you start, get your space ready. You don't need a fancy setup, just a clean, organized area. Think about where you'll do the work and where you'll store your preserved goods. A dedicated spot makes the whole process smoother. You might want to clear off a counter or a section of a table. Having everything you need within reach is key.
Essential Tools For Your Kitchen
To get started, you'll need a few basics. Don't worry, you probably already have some of these:
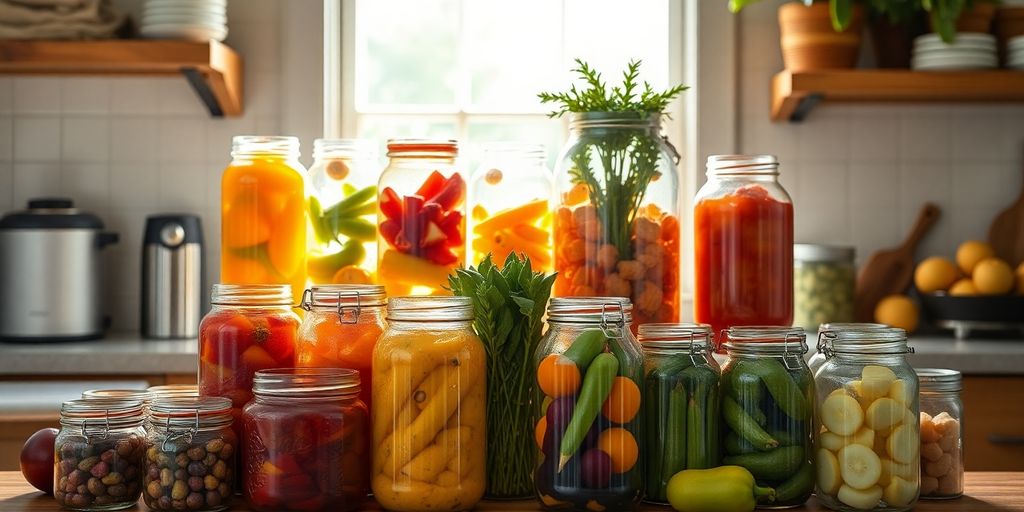
- Good quality jars and lids: Mason jars are popular for a reason. Make sure they're clean and ready to go.
- A large pot or water bath canner: This is for methods like water bath canning.
- Sharp knives and cutting boards: For prepping your produce.
- Measuring cups and spoons: Accuracy matters, especially in canning.
- Labels and markers: So you know what's in each jar and when you preserved it.
Getting your kitchen organized for preservation is like preparing for a fun project. Having the right tools and a clean space makes all the difference. It’s about setting yourself up for success and enjoying the process of keeping food good for longer. You'll be surprised at how much you can accomplish with just a few key items.
Ready to transform that fresh bounty? Let's explore the different ways you can preserve your food, starting with the simple magic of freezing. You can find some great starting points for canning and pickling with seven reliable recipes.
The Magic Of Freezing: Locking In Freshness Effortlessly
Freezing is such a straightforward way to keep your food fresh, almost like hitting a pause button on spoilage. It’s fantastic for preserving the taste and nutrients of so many things, from summer berries to last night's chili. You can really lock in that just-picked quality with minimal fuss.
Best Practices For Freezing Produce
When you're freezing fruits and veggies, a little prep goes a long way. Most vegetables benefit from a quick blanching before freezing. This means a short dip in boiling water followed by an ice bath. It stops enzymes that can make them mushy or change their flavor over time. For fruits, it's usually best to freeze them on a baking sheet first so they don't clump together in the bag. Think about how you'll use them later, too – maybe pre-slice your zucchini or chop your onions.
Freezing Meats And Meals
Freezing meat is pretty simple, but wrapping it well is key. Remove as much air as possible from the packaging to prevent freezer burn. This applies to leftovers and full meals too! Portioning out meals before freezing makes it super easy to grab a single serving for a quick dinner. Just make sure everything is cooled down before it goes into the freezer. It’s a great way to save time during busy weeks.
Tips For Preventing Freezer Burn
Freezer burn happens when food is exposed to air, leading to those dry, icy patches. The best defense is good packaging. Use heavy-duty freezer bags or wrap items tightly in plastic wrap and then foil. Squeeze out all the air before sealing. Keeping your freezer temperature consistently at zero degrees Fahrenheit or below is also super important for quality. A good freezer thermometer can help you keep tabs on this. If you notice a little freezer burn, you can often just trim it off before cooking; the food is still safe to eat.
Freezing is a lifesaver for busy kitchens. It means you can enjoy seasonal produce all year round and have ready-made meals waiting for you. Just remember to pack things well and keep that freezer cold!
Canning Creations: Preserving Flavors For The Long Haul
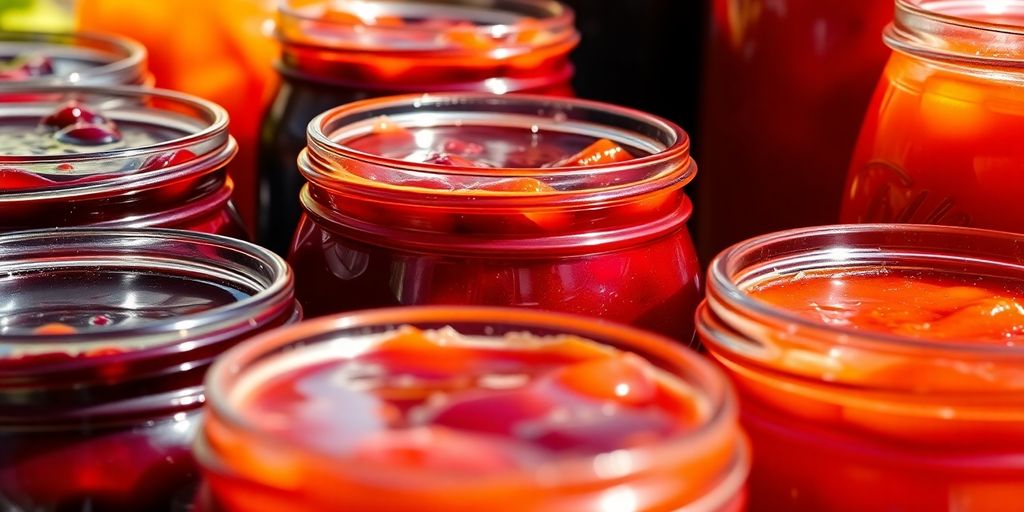
Canning is a fantastic way to keep food safe and tasty for a really long time. It's like magic in a jar, really. You heat food in a sealed jar, and that heat kills off any bad stuff, then the seal keeps it fresh. It’s a tried-and-true method that’s been around forever, and for good reason. It lets you enjoy summer's bounty all through the winter.
Understanding Water Bath Canning
Water bath canning is perfect for high-acid foods like fruits, jams, jellies, pickles, and tomatoes. You basically put your filled jars into a big pot of boiling water for a set amount of time. The boiling water does the work of killing spoilage organisms and creating that satisfying "pop" as the jars seal. It’s a pretty straightforward process, and once you get the hang of it, you’ll be canning all sorts of things. Just make sure your jars and lids are clean and ready to go.
Mastering Pressure Canning Safely
Now, for low-acid foods like vegetables, meats, and beans, you absolutely need a pressure canner. These work differently because they reach temperatures higher than boiling water, which is what’s needed to kill off dangerous bacteria like botulism. Safety is super important here, so always follow the manufacturer's instructions for your specific canner. It might seem a bit intimidating at first, but once you understand the pressure and timing, it’s totally manageable. You can find great resources on safe pressure canning techniques online, like those explaining how to preserve a wide variety of foods, including meats, beans, vegetables, and soups, using a pressure canner here.
Delicious Recipes For Canning
Once you've got the canning basics down, the fun really begins with what you can make! Think about canning peaches for cobblers, or maybe some dill pickles for sandwiches. You can even can whole meals, like chili or stew, which is a lifesaver on busy weeknights. Some popular choices include:
- Spicy Dilly Beans
- Sweet Cherry Pie Filling
- Hearty Beef Stew
It’s amazing how much flavor you can lock away in a jar. You’ll be so proud of yourself when you open a jar of your own homemade goodness months later. It really makes you appreciate the food you’ve preserved.
Dehydrating Delights: Concentrating Taste And Nutrition
Dehydrating is a fantastic way to concentrate the flavors of fruits, vegetables, and even meats, making them last much longer. It’s like magic, really – you take something fresh and vibrant, remove the water, and suddenly you have a chewy, intensely flavored snack or ingredient that keeps for ages. This method is great for reducing food waste and creating portable, healthy options. You're essentially taking the essence of the food and preserving it.
Choosing The Right Dehydrator
When you're starting out, you might wonder if you really need a special machine. While you can technically dehydrate in an oven on its lowest setting, a dedicated dehydrator makes things so much easier and more consistent. There are a few main types:
- Electric Dehydrators: These are the most common. They usually have stacked trays and a fan to circulate air evenly. Some are round, others are square, and they come in various sizes.
- Excalibur Dehydrators: These are a popular brand known for their large capacity and horizontal airflow, which many people find superior for even drying.
- Collapsible/Portable Dehydrators: If you're short on space or want something for camping, these can be a good option, though they often have less capacity.
Think about how much food you plan to dehydrate and the space you have available when making your choice. It’s a worthwhile investment if you plan to do this regularly.
Dehydrating Fruits and Vegetables
This is where dehydrating really shines. Fruits become wonderfully chewy and sweet, perfect for snacks or adding to baked goods. Vegetables can be rehydrated for soups and stews, or used as crispy additions to salads.
- Preparation is Key: Wash everything thoroughly. For fruits like apples or bananas, slice them thinly and evenly. You might want to toss them in a little lemon juice to prevent browning. For veggies, it's similar – thin, uniform slices work best.
- Temperature Matters: Different foods need different temperatures. Fruits generally do well around 135°F (57°C), while vegetables might need a bit higher, around 125°F (52°C). Always check specific recommendations for what you're drying.
- Drying Time Varies: This can take anywhere from 6 to 12 hours, or even longer, depending on the food's moisture content and the thickness of your slices. You're looking for a leathery or crisp texture, with no visible moisture.
Dehydrating is a food processing technique used to preserve various foods indefinitely by removing their moisture content. This process inhibits the growth of microorganisms and enzymes that cause spoilage, effectively extending the shelf life of the food. It's a simple yet effective way to keep your harvest from going to waste. You can find more information on the basics of food preservation.
Making Your Own Jerky and Fruit Leathers
Jerky is a classic for a reason – it’s a protein-packed, savory snack. Fruit leathers are like concentrated fruit roll-ups, but without all the added sugar.
- Jerky: Start with lean cuts of meat like beef, turkey, or venison. Slice it very thinly against the grain. Marinate it in your favorite spices and seasonings for several hours or overnight. Then, lay the strips on your dehydrator trays, making sure they don't overlap. You'll want to dehydrate jerky at a slightly higher temperature, around 160°F (71°C), to ensure it's safe.
- Fruit Leathers: Puree ripe fruits, perhaps with a touch of honey or cinnamon if you like. Pour the puree onto silicone dehydrator sheets or parchment paper, spreading it thinly and evenly. Once dried, you'll have a flexible sheet of concentrated fruit flavor. Cut it into strips and roll them up for easy storage.
Both jerky and fruit leathers are incredibly satisfying to make yourself, and you control exactly what goes into them. It’s a great way to use up extra produce or meat, turning it into something delicious and long-lasting.
Fermentation Fun: Cultivating Flavor And Gut Health
Fermentation is like a little science experiment right in your kitchen, and it’s way easier than you might think! It’s all about letting good bacteria do their thing, transforming simple ingredients into something tangy, tasty, and good for your gut. You're basically cultivating a tiny, delicious ecosystem. It’s a fantastic way to add some zing to your meals and boost your digestive health. Plus, the flavors you can create are just amazing.
The Basics Of Fermenting Vegetables
Getting started with fermented veggies is pretty straightforward. You really only need a few things: fresh vegetables, salt, and a way to keep them submerged in their own juices. The salt draws out water from the vegetables, creating a brine. This brine is where the magic happens, creating an environment where beneficial lactic acid bacteria can thrive. These bacteria are what give fermented foods their characteristic sour taste and also help preserve the vegetables.
- Choose fresh, high-quality vegetables. Organic is great if you can get it.
- Wash everything thoroughly, but don't go crazy with sanitizing – you want those natural microbes.
- Use non-iodized salt, like sea salt or kosher salt. Iodine can mess with the fermentation process.
- Make sure your vegetables stay below the brine. This is key to preventing mold.
Fermentation is a natural process that has been used for centuries to preserve food and enhance its nutritional profile. It's a living process, so don't be alarmed by bubbling or cloudy brine – that's usually a good sign!
Creating Your Own Sauerkraut And Kimchi
Sauerkraut is probably the most famous fermented vegetable, and it’s super simple to make. Just shred cabbage, mix it with salt, and pack it tightly into a jar. Let it sit at room temperature for a few days or weeks, and voilà! Kimchi is a bit more involved, typically featuring cabbage, radishes, and a spicy paste made from chili powder, garlic, ginger, and other seasonings. Both are packed with probiotics and offer a wonderful depth of flavor.
Exploring Other Fermented Foods
Once you've mastered sauerkraut and kimchi, the world of fermentation opens up even more! Think about fermenting other vegetables like carrots, cucumbers, or even beets. You can also explore fermented dairy like yogurt and kefir, or even fermented drinks like kombucha. It’s a whole new world of flavors and health benefits waiting for you to discover. You can find some great starter cultures online to help you along the way for your kitchen.
Pickling Perfection: Tangy Treats From Your Garden
Pickling is such a fun way to add some zing to your food. It’s not just about cucumbers, either! You can pickle almost anything from your garden, turning simple veggies into tangy treats that last. It’s a fantastic way to preserve the fresh flavors of summer for months to come.
Quick Pickling Versus Traditional Pickling
When you're thinking about pickling, there are two main paths you can take: quick pickling and traditional pickling. Quick pickles, sometimes called refrigerator pickles, are super fast. You just make a brine, pour it over your veggies, and pop them in the fridge. They're usually ready to eat in a day or two and have a brighter, crisper texture. Traditional pickling, on the other hand, involves a longer process, often with fermentation or canning, which gives the pickles a deeper, more complex flavor and a longer shelf life. It’s all about what you’re going for!
Flavorful Brine Recipes
The brine is really where the magic happens. It’s not just salt and water; you can get creative! Think about adding spices like dill, mustard seeds, peppercorns, or even a pinch of red pepper flakes for a little heat. Garlic cloves and bay leaves add a nice aromatic touch. For a sweeter pickle, a bit of sugar or honey can be added. Experimenting with different flavor profiles is half the fun. You can find tons of great brine recipes online, but a basic starting point is usually:
- 1 cup vinegar (white or apple cider)
- 1 cup water
- 1 tablespoon salt
- 1 tablespoon sugar (optional)
Preserving Cucumbers And Beyond
Of course, cucumbers are the classic pickling choice, and there are so many ways to prepare them. But don't stop there! Carrots, green beans, onions, radishes, and even cauliflower can be pickled beautifully. For cucumbers, make sure to use pickling varieties if you can, as they tend to have a better texture. When packing your jars, remember to leave about half an inch of space at the top for the brine. This headspace is important for proper sealing, especially if you plan to can them later.
When you're packing your jars, it's a good idea to pack the vegetables in tightly. This helps them stay submerged in the brine and prevents them from floating around too much. You want to make sure everything gets nicely flavored and preserved.
If you're looking to get started with pickling cucumbers, packing them tightly into canning jars is a great first step. You'll want to leave about half an inch of headspace at the top for the brine, which is key for successful preservation. It’s a simple technique that makes a big difference in the final result.
Root Cellaring Secrets: Natural Storage For A Bountiful Winter
Think of a root cellar as nature's refrigerator, a cool, dark, and humid place that keeps your harvest fresh for months. It’s a fantastic way to extend the life of so many good things you grow or buy. Building your own isn't as complicated as you might think, and the payoff is huge when you can still pull crisp apples or firm potatoes from storage in the dead of winter. It’s a really satisfying feeling.
Creating the Ideal Root Cellar Environment
Getting the conditions right is key. You're aiming for a consistent temperature, usually between 32°F and 40°F (0°C to 4°C), and high humidity, around 85-95%. Too dry and things shrivel; too warm and they might sprout or rot. Ventilation is also important to prevent stale air and mold. You can achieve this with simple vents or even a small fan if you're building a more elaborate setup. Many people find success with simple underground structures or even modified basements. You can find some great ideas for building your own.
Storing Root Vegetables and Apples
Different items have different needs. Root vegetables like carrots, potatoes, and beets do best when packed in damp sand or sawdust. This helps maintain their moisture. Just make sure the packing material isn't soaking wet. Apples, on the other hand, can be stored individually wrapped in paper or simply placed in crates, but keep them away from potatoes, as apples release ethylene gas, which can cause potatoes to sprout.
- Potatoes: Store in a dark, cool, humid place. Don't wash them before storing.
- Carrots & Beets: Trim the greens, leaving about an inch of stem. Pack in damp sand or peat moss.
- Onions & Garlic: Need a cool, dry, well-ventilated spot. They don't like humidity.
- Apples: Store in a cool, humid place, ideally wrapped individually.
Keeping your stored produce healthy means regular check-ins. Remove anything that looks like it's starting to go bad immediately to prevent it from affecting the rest of your harvest. It’s a bit like tending a garden, but underground.
Maintaining Your Stored Harvest
Once everything is tucked away, you still need to keep an eye on things. Periodically check for any signs of spoilage, mold, or sprouting. Rotate your stock, using the oldest items first. If you notice humidity levels dropping, you might need to lightly mist the storage area or add more damp packing material. It’s all about creating that stable, protected environment that lets your food last as long as possible.
Jamming And Jelly Making: Sweet Success In A Jar
Making jam and jelly is such a rewarding way to capture the sweet taste of summer. It’s not as tricky as you might think, and the results are just fantastic. You get to enjoy those bright, fruity flavors all year long, right from your own pantry. Plus, a jar of homemade jam makes a really thoughtful gift.
Achieving The Perfect Set
Getting that perfect, spreadable consistency is key. It all comes down to the right balance of fruit, sugar, and pectin. Pectin is a natural substance found in fruits that helps them gel. Some fruits are naturally high in pectin, like apples and citrus, while others, like strawberries and peaches, are lower. If you're using lower-pectin fruits, you might need to add commercial pectin, or cook the mixture a bit longer to concentrate the natural pectin. Using a candy thermometer is a game-changer here; it helps you hit that magic temperature where the jam will set properly. Don't be afraid to experiment a little, but always start with a reliable recipe. You can find some great tips on getting the right set here.
Creative Jam And Jelly Combinations
Once you get the hang of the basics, the flavor possibilities are endless! Think beyond just strawberry or grape. Try mixing fruits for unique tastes – maybe raspberry-rhubarb, or peach-ginger. You can also add a little something extra to your batches. A splash of vanilla, a bit of lemon zest, or even a pinch of spice like cinnamon or cardamom can really make your jam special. It’s all about playing with flavors to see what you like best.
Proper Jarring And Sealing Techniques
To make sure your delicious creations last, proper jarring and sealing are super important. You'll want to use clean jars and lids. Most recipes will have you fill the hot jam into the jars, leaving a little headspace at the top. Then, you wipe the rims clean, put on the lids and rings, and process them in a boiling water bath. This process creates a vacuum seal as the jars cool, which keeps everything fresh and safe to store at room temperature. It’s a simple step that makes a big difference in how long your jam will keep.
Storing Grains And Legumes: Building Your Pantry Staples
Building a well-stocked pantry with grains and legumes is a fantastic way to ensure you always have hearty, nutritious ingredients on hand. These staples are the backbone of so many meals, from comforting soups to filling side dishes. Getting them ready for long-term storage is simpler than you might think, and it really pays off when you need a quick meal or want to add substance to your cooking.
Proper Cleaning and Drying Methods
Before you even think about putting your grains and legumes into storage, a little prep work goes a long way. For dried beans and lentils, it's a good idea to give them a quick once-over. Spread them out on a clean surface and pick out any small stones, bits of dirt, or shriveled-up pieces that don't look quite right. Some people like to rinse them, but if you do, make sure they are completely dry before storing. Moisture is the enemy of long-term storage, so if you're washing anything, a thorough drying is key. You can spread them on a clean towel or baking sheet and let them air dry for a day or two, or even use a very low setting in your oven or a dehydrator if you have one.
Airtight Storage Solutions
Once your grains and legumes are clean and dry, the next step is finding the right home for them. Airtight containers are your best friend here. Think glass jars with good seals, sturdy plastic containers with locking lids, or even food-grade buckets. These keep out moisture, pests, and anything else that might try to spoil your hard-earned supplies. For smaller quantities, mason jars work wonderfully, and you can easily see what you have. For larger amounts, consider investing in some good quality food storage containers. Organizing your kitchen by grouping similar items and using stackable, airtight containers like glass jars for dried goods such as beans, grains, and pasta to keep them fresh longer. Small baskets can also aid in efficient storage and long-term food organization. glass jars for dried goods
Extending the Shelf Life of Your Grains
With the right storage, many grains and legumes can last for years. Store them in a cool, dark, and dry place. A pantry, a basement shelf, or even a cupboard away from heat sources like the oven or direct sunlight is ideal. Avoid storing them near anything that produces moisture or strong odors. If you're really concerned about pests, you can add a food-grade desiccant packet to your containers to absorb any residual moisture. Regularly check your stored items, especially if you live in a humid climate, just to be safe. It’s all about creating a stable environment for your pantry staples to thrive.
Creative Uses For Preserved Foods: Enjoying Your Efforts Year-Round
So, you've spent time and effort preserving all that wonderful food. Now what? It’s time to actually enjoy the fruits (and veggies, and meats!) of your labor. Preserved foods aren't just for emergencies; they can really liven up your everyday meals and make cooking a breeze. Think about it: that jar of pickled beets can add a bright, tangy punch to a simple green salad, or those frozen berries can be whipped into a quick smoothie on a busy morning. It’s all about making your kitchen work smarter, not harder.
Incorporating Preserves Into Daily Meals
Don't let those jars and bags just sit in the pantry collecting dust! They're ready to be part of your regular cooking. Here are a few ideas to get you started:
- Breakfast Boost: Toss frozen berries into pancake batter or yogurt. A spoonful of homemade jam on toast is always a winner.
- Lunchtime Love: Add pickled onions to sandwiches or wraps. Sun-dried tomatoes can jazz up pasta salads or omelets.
- Dinner Delights: Use preserved vegetables as a side dish, or incorporate them into casseroles and stews. Dehydrated mushrooms add a deep flavor to sauces.
- Snack Attack: Fruit leathers are a fantastic, healthy snack for kids and adults alike. A handful of dried fruit is also a great energy booster.
Gift Giving With Homemade Preserves
Homemade preserves make incredibly thoughtful and personal gifts. Imagine giving someone a beautifully arranged basket filled with your canned peaches, a jar of your spicy pickled green beans, and some homemade fruit leather. It shows you care and have put real effort into something special. Package them nicely with a handwritten tag explaining what they are and maybe even a simple serving suggestion. It’s a gift that keeps on giving, long after the special occasion has passed. You can even create convenient meals in a jar for a truly unique present.
Seasonal Recipe Ideas
Preserved foods are perfect for bridging the gap between seasons. When fresh produce isn't readily available or is out of season, your preserved stash comes to the rescue. Think about using your canned apples in a crisp during the fall, or enjoying your frozen corn in a chowder during the winter. Pickled vegetables are fantastic for adding brightness to heavier winter meals. Even simple things like adding a dollop of preserved fruit to your morning oatmeal can make it feel like a special treat, no matter the weather outside. It’s a way to keep that taste of summer or fall alive all year long.
Keep Those Jars Filling Up!
So there you have it! Preserving food at home is a pretty cool way to cut down on waste and save some cash. It might seem like a lot at first, but once you get the hang of it, it's really rewarding. Imagine opening a jar of your own peaches in the middle of winter, or having homemade pickles ready for your next BBQ. It's a simple skill, but it makes a big difference in your kitchen and for the planet. Don't be afraid to experiment with different methods and recipes. Happy preserving, and enjoy all the deliciousness you create!
Frequently Asked Questions
Why should I bother preserving food?
Preserving food means keeping it fresh for a long time, so you don't waste it. It's like saving your favorite snacks for later! This helps you eat healthy food all year, even when it's not in season, and saves you money.
What stuff do I need to start preserving food?
You'll need a clean space, jars, lids, and maybe some special tools depending on how you want to preserve. Think of it like setting up a craft station, but for food!
How do I freeze food without it getting bad?
Freezing is super easy! Just put your food in special freezer bags or containers. Make sure to get as much air out as possible to stop it from getting icy and weird, which we call freezer burn.
What's the difference between water bath and pressure canning?
Canning uses heat to seal food in jars. Water bath canning is for fruits and acidic foods, while pressure canning is for low-acid foods like veggies and meats. It's important to follow the steps carefully to make sure the food is safe to eat.
What is dehydrating and how does it work?
Dehydrating removes water from food, making it last longer and concentrating its flavor. You can use a special machine called a dehydrator, or even your oven on a low setting. It's great for fruits, veggies, and even making jerky!
What is fermenting and why would I do it?
Fermenting uses good bacteria to change food, like making pickles or yogurt. It makes the food taste tangy and can be really good for your tummy. You just need salt, veggies, and a jar!
How is pickling different from other ways of preserving?
Pickling is like giving food a sour bath in vinegar and spices. It makes things like cucumbers taste zesty and last longer. You can do quick pickles that are ready in a few days, or traditional ones that take longer.
Can I give my preserved food as gifts?
Yes! Preserved foods are awesome for gifts. Imagine giving someone homemade jam or pickled veggies for the holidays. It's a thoughtful way to share your hard work and delicious creations.