
How to Make Fruit Leather: A Comprehensive Guide to Delicious Homemade Snacks
Imagine biting into a chewy, flavorful snack that bursts with the taste of summer fruits, even in the dead of winter. That's the magic of fruit leather, a delightful and healthy treat that's surprisingly easy to make at home. Forget those store-bought versions loaded with artificial flavors and preservatives. With a few simple ingredients and a little patience, you can create your own customized fruit leather that's both delicious and nutritious. This guide will walk you through everything you need to know about how to make fruit leather, from selecting the best fruits to mastering the drying process.
What is Fruit Leather?
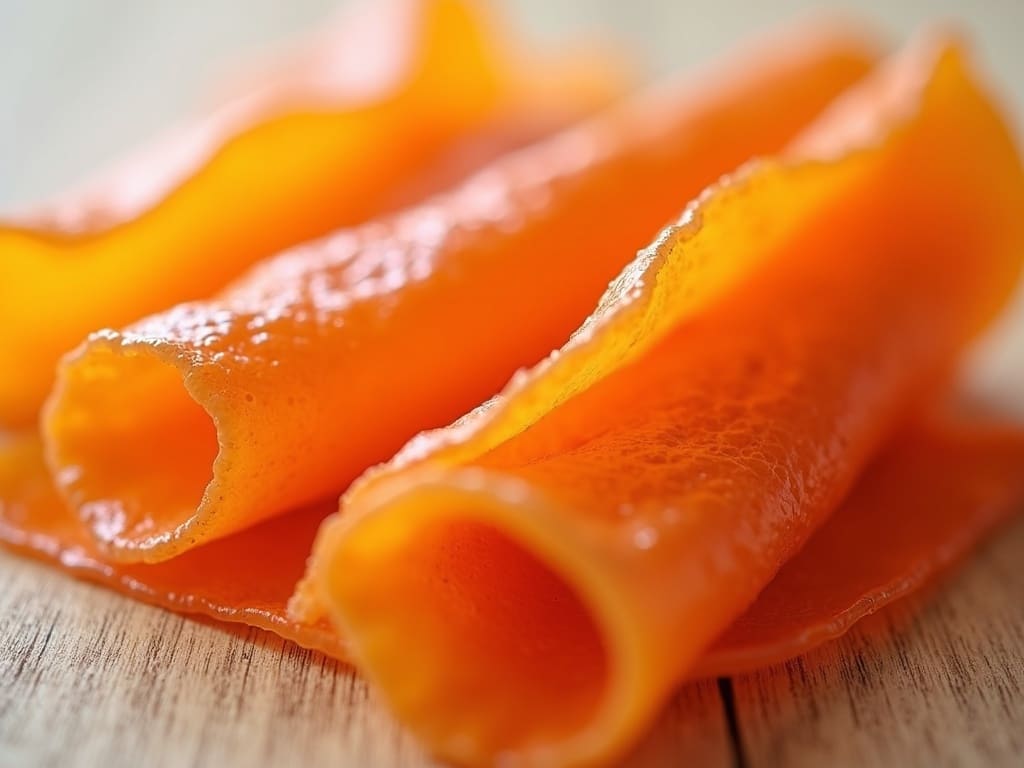
Fruit leather, also known as fruit roll-ups or fruit jerky, is essentially dehydrated fruit puree. It's a concentrated form of fruit, with a chewy texture and intense flavor. The dehydration process removes most of the water content, which not only preserves the fruit but also creates a pliable, leathery consistency that's perfect for snacking.
Why Make Your Own Fruit Leather?
There are plenty of compelling reasons to ditch the store-bought fruit leather and embark on your own homemade adventure:
- Healthier Ingredients: You control exactly what goes into your fruit leather. No added sugars, artificial flavors, or preservatives – just pure fruit goodness.
- Cost-Effective: Making your own fruit leather can be significantly cheaper than buying pre-made versions, especially if you have access to seasonal fruits or a garden.
- Customization: Get creative with your flavor combinations! Mix and match different fruits, add spices, or even incorporate vegetables for a unique and personalized snack.
- Reduces Food Waste: Fruit leather is a fantastic way to use up overripe fruits that might otherwise go to waste.
- Fun Activity: Making fruit leather can be a fun and engaging activity for the whole family, especially with kids.
Essential Equipment
Before you start, gather the necessary equipment:
- Blender or Food Processor: For pureeing the fruit. A high-powered blender will create the smoothest texture.
- Saucepan (Optional): For pre-cooking certain fruits or fruit combinations.
- Dehydrator or Oven: The most crucial piece of equipment for drying the fruit puree. A dehydrator offers more precise temperature control, but an oven can work just as well.
- Dehydrator Trays or Baking Sheets: For spreading the fruit puree. For baking sheets, you'll need parchment paper or silicone mats.
- Spatula or Offset Spreader: For evenly spreading the fruit puree.
- Knife or Pizza Cutter: For cutting the finished fruit leather into strips or shapes.
- Airtight Containers or Zip-Top Bags: For storing the finished fruit leather.
Choosing the Right Fruits
The beauty of fruit leather lies in its versatility. You can use almost any fruit you like, either alone or in combination. Here's a guide to some popular choices and considerations:
- Berries (Strawberries, Blueberries, Raspberries, Blackberries): These are excellent choices, offering vibrant colors, naturally sweet flavors, and plenty of antioxidants.
- Stone Fruits (Peaches, Nectarines, Plums, Apricots, Cherries): Stone fruits provide a rich, sweet flavor and a smooth texture. Peeling peaches and nectarines is recommended for a smoother final product.
- Apples and Pears: These fruits work well, but they can be a bit tart on their own. Consider combining them with sweeter fruits or adding a touch of honey or maple syrup.
- Mangoes and Pineapples: Tropical fruits add an exotic twist to your fruit leather. Mangoes create a particularly smooth and creamy texture.
- Bananas: Bananas contribute sweetness and a creamy texture, but they can also dominate the flavor. Use them sparingly in combination with other fruits.
- Citrus Fruits (Oranges, Lemons, Limes): Citrus fruits can add a tangy kick, but use them in moderation, as the acidity can affect the drying process. A squeeze of lemon juice can also help prevent browning.
Tips for Choosing Fruits
- Use Ripe or Overripe Fruits: These fruits are at their sweetest and most flavorful. Overripe fruits are also softer, making them easier to puree.
- Consider the Sugar Content: Some fruits are naturally sweeter than others. If you're using tart fruits, you may need to add a touch of sweetener.
- Think About Texture: Softer fruits will create a smoother fruit leather. If you're using fruits with a lot of seeds (like berries), you may want to strain the puree to remove them.
- Experiment with Combinations: Don't be afraid to get creative! Some popular combinations include:
- Strawberry-Banana
- Apple-Cinnamon
- Mango-Pineapple
- Peach-Raspberry
The Basic Fruit Leather Recipe
This recipe provides a foundation. Feel free to adjust the ingredients and flavors to your liking.
Ingredients:
- 4 cups of fruit, chopped (about 2 pounds)
- 1-2 tablespoons of lemon juice (optional, to prevent browning and add a touch of tartness)
- 1-2 tablespoons of sweetener (optional, such as honey, maple syrup, or agave)
- Spices or Flavorings (optional, such as cinnamon, ginger, vanilla extract)
Instructions:
- Prepare the Fruit: Wash and chop the fruit into small pieces. Remove any pits, seeds, or cores.
- Cook the Fruit (Optional): For some fruits, especially apples or tougher fruits, pre-cooking can help soften them and enhance their flavor. Place the fruit in a saucepan with a little water (about 1/4 cup) and simmer over medium heat until softened, about 10-15 minutes.
- Puree the Fruit: Transfer the fruit to a blender or food processor and blend until completely smooth. If necessary, add a little water to help the blending process.
- Strain the Puree (Optional): If you're using fruits with seeds, strain the puree through a fine-mesh sieve to remove them.
- Add Lemon Juice, Sweetener, and Spices (Optional): Stir in the lemon juice, sweetener, and any spices or flavorings you're using. Taste and adjust as needed.
- Prepare the Dehydrator Trays or Baking Sheets: Line your dehydrator trays with fruit leather sheets designed for your dehydrator or line baking sheets with parchment paper or silicone mats. A slightly raised edge on the tray is ideal for containing the puree.
- Spread the Puree: Pour the fruit puree onto the prepared trays or baking sheets. Use a spatula or offset spreader to spread it into an even layer, about 1/8 to 1/4 inch thick. Avoid making it too thin, or it will be brittle. Avoid making it too thick, or it will take too long to dry and may become sticky.
- Dehydrate or Bake:
- Dehydrator: Set the dehydrator to 135°F (57°C) and dehydrate for 6-12 hours, or until the fruit leather is no longer sticky to the touch and has a pliable, leathery texture. The drying time will vary depending on the type of fruit, the thickness of the puree, and the humidity.
- Oven: Preheat your oven to the lowest possible temperature, ideally 170°F (77°C) or lower. If your oven doesn't go that low, prop the oven door open slightly to allow moisture to escape. Bake for 3-8 hours, or until the fruit leather is no longer sticky. Check it periodically to prevent burning.
- Cool and Cut: Once the fruit leather is dry, let it cool completely on the trays or baking sheets. Then, carefully peel it off the parchment paper or silicone mats. Use a knife or pizza cutter to cut the fruit leather into strips, squares, or any shapes you like.
- Store: Store the fruit leather in airtight containers or zip-top bags at room temperature for up to several weeks, or in the refrigerator for longer storage. To prevent the strips from sticking together, you can wrap them individually in parchment paper or plastic wrap.
Dehydrator vs. Oven: Which is Best?
Both dehydrators and ovens can be used to make fruit leather, but each has its pros and cons:
Dehydrator
Pros:
- Precise Temperature Control: Dehydrators allow you to set a specific temperature, which is crucial for optimal drying and preventing burning.
- Even Drying: Dehydrators circulate air evenly, ensuring that the fruit leather dries uniformly.
- Energy Efficient: Dehydrators typically use less energy than ovens, especially for long drying times.
Cons:
- Initial Investment: Dehydrators can be expensive, although there are many affordable models available.
- Space Requirement: Dehydrators take up counter space.
- Drying Time: Although energy efficient, dehydrating can take longer than using an oven.
Oven
Pros:
- Widely Available: Most people already have an oven, so there's no need to buy a separate appliance.
- Faster Drying Time: Ovens can dry fruit leather faster than dehydrators, especially if set at a higher temperature (though this increases the risk of burning).
Cons:
- Temperature Control: Many ovens don't have precise temperature control at very low settings, making it difficult to maintain the ideal temperature for fruit leather.
- Uneven Drying: Ovens may not circulate air as evenly as dehydrators, leading to uneven drying.
- Energy Consumption: Ovens typically consume more energy than dehydrators, especially for long drying times.
- Risk of Burning: It's easier to burn fruit leather in an oven, especially if the temperature is too high or if you're not checking it regularly.
Tips for Using an Oven
If you're using an oven, here are some tips to minimize the drawbacks:
- Use the Lowest Possible Temperature: Aim for 170°F (77°C) or lower. If your oven doesn't go that low, prop the oven door open slightly to allow moisture to escape.
- Use a Convection Oven: If you have a convection oven, use the convection setting to circulate air more evenly.
- Check the Fruit Leather Frequently: Check the fruit leather every hour or so to prevent burning.
- Rotate the Baking Sheets: Rotate the baking sheets halfway through the drying time to ensure even drying.
Troubleshooting Common Problems
Even with the best instructions, you might encounter a few snags along the way. Here's how to troubleshoot common fruit leather problems:
- Fruit Leather is Too Sticky:
- Cause: Not dried long enough.
- Solution: Continue drying for a few more hours, checking every hour until it's no longer sticky.
- Fruit Leather is Too Brittle:
- Cause: Dried for too long or spread too thinly.
- Solution: Next time, spread the puree a little thicker and check it more frequently during the drying process. You can also try adding a tablespoon or two of applesauce or mashed banana to the puree to increase its pliability.
- Fruit Leather is Burning:
- Cause: Oven temperature is too high.
- Solution: Reduce the oven temperature and check the fruit leather more frequently. If using a dehydrator, ensure the temperature isn't set too high.
- Fruit Leather is Molding:
- Cause: Not dried thoroughly or improperly stored.
- Solution: Make sure the fruit leather is completely dry before storing it. Store it in airtight containers or zip-top bags in a cool, dry place. If you live in a humid climate, consider storing it in the refrigerator. Unfortunately, if mold appears, you'll need to discard the batch.
- Fruit Leather Tastes Bland:
- Cause: Not enough sweetener or flavorful fruits.
- Solution: Add more sweetener to the puree next time. You can also try using more flavorful fruits or adding spices or extracts.
- Fruit Leather is Sticking to the Parchment Paper:
- Cause: Not cooled completely or parchment paper not properly adhered.
- Solution: Ensure the fruit leather is completely cooled before attempting to peel it off the parchment paper. You can also try greasing the parchment paper lightly with cooking spray before spreading the puree. Consider using silicone mats instead of parchment paper, as they are naturally non-stick.
Creative Variations and Flavor Combinations
Once you've mastered the basic fruit leather recipe, the possibilities are endless! Here are some creative variations and flavor combinations to inspire you:
- Spiced Apple: Add cinnamon, nutmeg, and a pinch of cloves to your apple puree for a warm and comforting flavor.
- Strawberry-Basil: Combine strawberries with a few fresh basil leaves for a refreshing and unique twist.
- Peach-Ginger: Add a pinch of ground ginger or a few slices of fresh ginger to your peach puree for a spicy kick.
- Mango-Coconut: Combine mangoes with shredded coconut and a touch of lime juice for a tropical treat.
- Berry-Beet: Sneak in some extra nutrients by adding cooked and pureed beets to your berry mixture. The beets add a subtle sweetness and a beautiful color.
- Pumpkin Spice: Combine pumpkin puree with cinnamon, ginger, nutmeg, and cloves for a fall-inspired fruit leather.
- Chocolate-Cherry: Add a tablespoon or two of unsweetened cocoa powder to your cherry puree for a decadent treat. You can also drizzle melted chocolate over the finished fruit leather.
- Savory Tomato: For a savory option, try making tomato leather with herbs like basil, oregano, and thyme. This can be used as a wrap for sandwiches or as a flavorful addition to soups and salads.
Tips for Making Fruit Leather with Kids
Making fruit leather is a great activity to do with kids. Here are some tips for making it fun and easy:
- Involve them in the fruit selection process. Let them choose their favorite fruits and help with washing and chopping (under supervision, of course).
- Let them help with pureeing. Kids love watching the fruit transform into a smooth puree.
- Make it a sensory experience. Let them smell the different fruits and spices.
- Let them help spread the puree. This is a great way for them to practice their fine motor skills.
- Use cookie cutters to create fun shapes. Once the fruit leather is dry, let them use cookie cutters to make stars, hearts, or other shapes.
- Let them help with packaging. Let them wrap the fruit leather strips in parchment paper or plastic wrap and decorate the bags or containers.
Storing Fruit Leather Properly
Proper storage is essential for maintaining the quality and extending the shelf life of your homemade fruit leather. Here are some tips:
- Cool Completely: Ensure the fruit leather is completely cooled before storing it. Warm fruit leather can trap moisture and lead to mold growth.
- Airtight Containers: Store the fruit leather in airtight containers or zip-top bags. This will prevent it from drying out and becoming brittle.
- Parchment Paper or Plastic Wrap: To prevent the strips of fruit leather from sticking together, wrap them individually in parchment paper or plastic wrap.
- Room Temperature: Fruit leather can be stored at room temperature for up to several weeks.
- Refrigeration: For longer storage, store the fruit leather in the refrigerator for up to several months.
- Freezing: Fruit leather can also be frozen for up to a year. Wrap it tightly in plastic wrap and then place it in a freezer-safe bag or container.
Fruit Leather as a Healthy Snack
Fruit leather is a naturally sweet and satisfying snack that can be a healthy alternative to processed sweets and sugary treats. Here's why:
- Made with Real Fruit: Fruit leather is made from pure fruit, which means it's packed with vitamins, minerals, and antioxidants.
- No Added Sugars (Usually): When you make your own fruit leather, you can control the amount of sweetener you add, or even omit it altogether.
- Good Source of Fiber: Fruit leather contains fiber, which can help you feel full and satisfied.
- Convenient and Portable: Fruit leather is easy to pack and take on the go, making it a great snack for kids and adults alike.
- Customizable: You can customize your fruit leather to suit your dietary needs and preferences. Whether you're looking for a low-sugar snack, a vegan snack, or a gluten-free snack, fruit leather can be tailored to your needs.
Beyond Snacking: Creative Uses for Fruit Leather
While fruit leather is delicious on its own, it can also be used in a variety of creative ways:
- Trail Mix Addition: Cut fruit leather into small pieces and add it to your trail mix for a chewy and flavorful boost.
- Yogurt Topping: Crumble fruit leather over yogurt for a healthy and delicious topping.
- Oatmeal Mix-in: Stir chopped fruit leather into your oatmeal for added sweetness and flavor.
- Salad Garnish: Use thinly sliced fruit leather as a garnish for salads.
- Cheese Board Accompaniment: Serve fruit leather alongside cheese and crackers for a sweet and savory combination.
- Wrap for Appetizers: Use savory fruit leather (like tomato leather) to wrap appetizers, such as cheese sticks or vegetable skewers.
- Garnish for Cocktails: Use fruit leather as a garnish for cocktails.
Embrace the Art of Homemade Fruit Leather
Making your own fruit leather is a rewarding experience that allows you to create healthy, delicious, and customized snacks for yourself and your family. With a little practice and experimentation, you'll be able to master the art of fruit leather and enjoy the taste of summer fruits all year round. So, gather your favorite fruits, dust off your dehydrator or preheat your oven, and embark on your own fruit leather adventure today. Remember to visit [externalLink insert] for more information on food preservation.