
How to Harden Off Seedlings: A Complete Guide to Preparing Your Plants for the Great Outdoors
Imagine nurturing delicate seedlings indoors, watching them sprout and grow with anticipation, only to have them wither and decline when finally planted outside. The culprit? A lack of hardening off. This crucial process bridges the gap between the protected environment of your home and the unpredictable challenges of the garden.
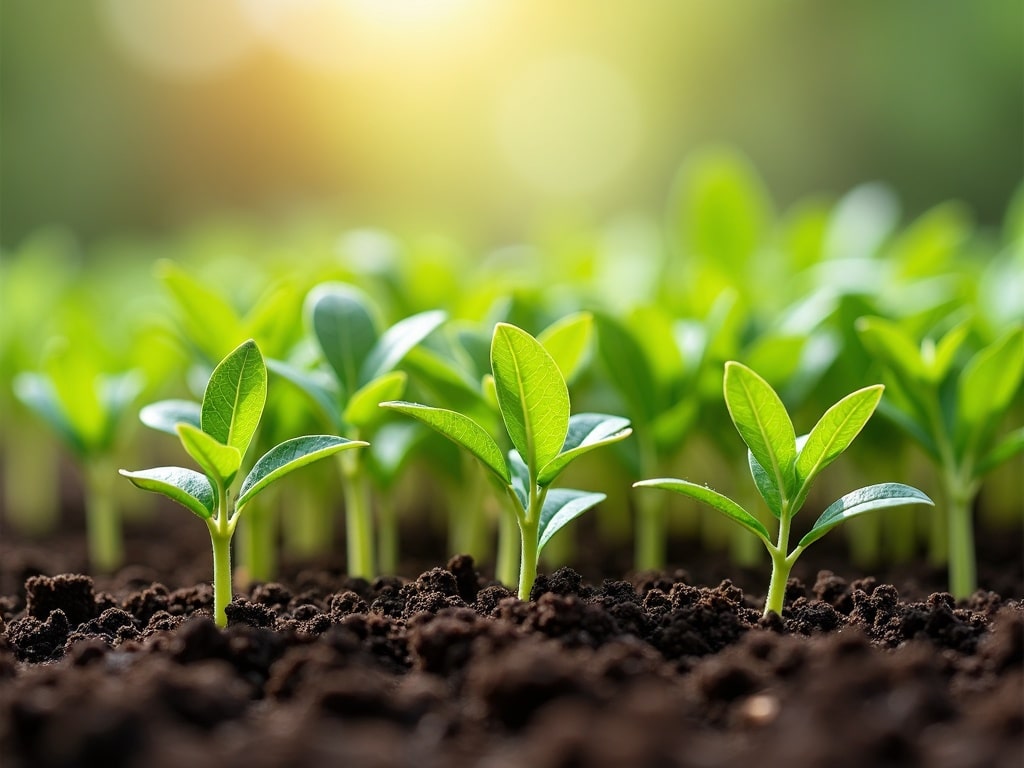
Hardening off seedlings is the gradual acclimation of indoor-grown plants to outdoor conditions. It’s like sending your child off to their first day of school—a little preparation goes a long way toward ensuring success. In this comprehensive guide, we'll delve into the whys, whens, and hows of hardening off, ensuring your seedlings thrive in their new outdoor home.
Why Hardening Off Seedlings is Essential
Think of your indoor seedlings as pampered guests, enjoying consistent temperatures, gentle lighting, and protection from harsh weather. Suddenly thrusting them into the garden is like dropping them into a survival course. They’re not prepared for the intensity of the sun, the fluctuating temperatures, the strong winds, or the varying humidity levels.
Hardening off allows seedlings to gradually adjust to these stressors, building resilience and preventing transplant shock. Transplant shock is a condition where plants struggle to establish themselves after being moved, exhibiting symptoms like wilting, stunted growth, and even death.
Here's a breakdown of the key benefits of hardening off:
- Increased tolerance to sunlight: Indoor light is significantly less intense than direct sunlight. Hardening off allows plants to develop protective pigments and adjust their leaf structure to prevent sunburn.
- Improved water conservation: Outdoor conditions can be much drier than the humid environment of an indoor growing space. Hardening off helps seedlings develop thicker cuticles (the waxy coating on leaves) to reduce water loss.
- Enhanced stem strength: Wind and rain can be brutal on tender stems. Hardening off encourages plants to develop stronger stems that can withstand these elements.
- Adaptation to temperature fluctuations: Indoor temperatures are typically stable, while outdoor temperatures can swing dramatically between day and night. Hardening off allows plants to acclimate to these variations.
- Reduced transplant shock: By gradually exposing seedlings to outdoor conditions, you minimize the stress of transplanting, allowing them to establish themselves more quickly and efficiently.
When to Start Hardening Off Seedlings
Timing is everything when it comes to hardening off seedlings. The process should begin approximately 1-2 weeks before the anticipated transplant date. This timeframe allows sufficient time for plants to adjust without hindering their growth.
Several factors influence the ideal time to start hardening off:
- Last frost date: The date of the last expected frost in your region is a crucial consideration. You want to avoid exposing your seedlings to freezing temperatures. Consult local weather resources or agricultural extension services for accurate frost date information.
- Plant type: Some plants are more sensitive to cold than others. Warm-season crops like tomatoes, peppers, and basil require warmer soil and air temperatures than cool-season crops like lettuce, spinach, and kale. Start hardening off cool-season crops earlier than warm-season crops.
- Weather conditions: Keep an eye on the weather forecast. Avoid hardening off seedlings during periods of extreme heat, cold, or strong winds. Ideal conditions include mild temperatures (50-70°F), gentle breezes, and partly cloudy skies.
A simple rule of thumb is to begin hardening off when the daytime temperatures consistently reach 50°F (10°C) or higher. However, always consider the specific needs of your plants and the local weather conditions.
The Step-by-Step Guide to Hardening Off Seedlings
Hardening off is a gradual process that requires careful attention and monitoring. Follow these steps to ensure your seedlings make a successful transition to the outdoors:
Day 1-3: Gentle Introduction to the Outdoors
**Location:Choose a sheltered location outdoors, such as a shaded patio, a covered porch, or a cold frame. Avoid direct sunlight and strong winds.
**Exposure:Place your seedlings in the chosen location for 1-2 hours on the first day, gradually increasing the exposure time by an hour or two each day.
**Watering: Water your seedlings thoroughly before placing them outdoors. Check the soil moisture regularly and water as needed to keep the soil consistently moist, but not soggy.
**Observation:Observe your seedlings closely for any signs of stress, such as wilting, leaf burn, or discoloration. If you notice any of these symptoms, bring the seedlings back indoors immediately and reduce the exposure time the following day.
Day 4-7: Gradual Increase in Sunlight and Wind Exposure
**Sunlight:Gradually increase the amount of direct sunlight your seedlings receive each day. Start with morning sun, which is less intense than afternoon sun. Over the course of several days, gradually expose them to more and more direct sunlight until they can tolerate a full day of sun.
**Wind:As your seedlings become accustomed to the sun, gradually expose them to more wind. Start by placing them in a location with a gentle breeze, and then gradually move them to a more exposed location.
**Watering:Continue to monitor the soil moisture and water as needed. Seedlings may dry out more quickly outdoors than they do indoors, so check them more frequently.
**Observation:Continue to observe your seedlings closely for any signs of stress. Adjust the exposure time as needed based on their response.
Day 8-14: Overnight Exposure (Weather Permitting)
**Temperature:If the weather forecast calls for mild overnight temperatures (above 50°F/10°C), you can begin leaving your seedlings outdoors overnight.
**Protection:Even if the temperatures are mild, it's a good idea to provide some protection from unexpected cold snaps or heavy rain. You can cover your seedlings with a frost blanket or move them to a cold frame.
**Watering: Make sure the soil is adequately moist before leaving your seedlings out overnight.
**Observation:Check your seedlings first thing in the morning for any signs of damage from pests or cold temperatures.
Day 15: Transplanting into the Garden
**Timing:Choose a cloudy or overcast day to transplant your seedlings into the garden. This will minimize stress on the plants.
**Preparation:Prepare the planting site by digging holes that are large enough to accommodate the root balls of your seedlings. Amend the soil with compost or other organic matter to improve drainage and fertility.
**Planting:Gently remove the seedlings from their containers and place them in the prepared holes. Backfill with soil and water thoroughly.
**Protection:Provide newly transplanted seedlings with some temporary protection from the sun and wind. You can use shade cloth, row covers, or even empty flowerpots to create a protective barrier.
**Watering:Water your newly transplanted seedlings regularly, especially during the first few weeks.
Troubleshooting Common Hardening Off Problems
Even with careful planning and execution, you may encounter some challenges during the hardening off process. Here are some common problems and how to address them:
**Wilting:Wilting is a common sign of transplant shock or dehydration. If your seedlings wilt, bring them back indoors or provide them with shade and water. Make sure the soil is consistently moist, but not waterlogged.
**Leaf Burn:Leaf burn is caused by excessive exposure to sunlight. If your seedlings develop leaf burn, reduce the amount of direct sunlight they receive. Provide them with shade during the hottest part of the day.
**Stunted Growth:Stunted growth can be caused by a variety of factors, including transplant shock, nutrient deficiencies, or pests. Make sure your seedlings are getting adequate water, nutrients, and protection from pests. Amend the soil with compost or fertilizer to provide them with the nutrients they need.
**Pest Infestations:Seedlings are vulnerable to pests, such as aphids, whiteflies, and spider mites. Inspect your seedlings regularly for signs of pests and take appropriate action to control them. Use insecticidal soap or neem oil to treat infestations.
**Cold Damage:If your seedlings are exposed to freezing temperatures, they can suffer cold damage. Damage indicators could include blackened or mushy leaves. Protect your seedlings from cold temperatures by covering them with a frost blanket or bringing them indoors.
Tips for Success
**Start with Healthy Seedlings:The healthier your seedlings are to begin with, the better they will be able to tolerate the stress of hardening off. Provide them with adequate light, water, and nutrients during the indoor growing phase.
**Use a Cold Frame:A cold frame is a simple structure that provides a protected environment for hardening off seedlings. It can help to moderate temperatures and protect plants from wind and rain.
**Monitor the Weather:Pay close attention to the weather forecast and adjust your hardening off schedule accordingly. Avoid hardening off seedlings during periods of extreme heat, cold, or strong winds.
**Be Patient:Hardening off is a gradual process that takes time. Don't rush it. Allow your seedlings to adjust to outdoor conditions at their own pace.
**Don't Overwater:Overwatering can lead to root rot, which can weaken your seedlings and make them more susceptible to transplant shock. Water only when the soil is dry to the touch.
**Provide Support:Tall or leggy seedlings may need support during the hardening off process. Use stakes or trellises to prevent them from bending or breaking in the wind.
**Consider a Hardening-Off Spray:There are commercially available hardening-off sprays that can help to protect seedlings from stress and promote growth. These sprays typically contain nutrients, hormones, and other beneficial ingredients.
**Document Your Progress:Keep a record of your hardening off schedule and any challenges you encounter. This information will be valuable for future gardening seasons.
**Talk to Other Gardeners:Share your experiences and learn from other gardeners in your community. They may have valuable tips and insights to share. A local gardening club is a great resource![externalLink insert]
**Successive Hardening:For certain crops, especially those that are particularly sensitive or that you intend to transplant into a harsh environment, consider repeating the hardening-off process. After the initial two weeks, bring the plants back indoors for a few days before repeating the outdoor exposure. This can further toughen them up.
Beyond the Basics: Understanding Plant Physiology
While following the steps outlined above will lead to success, understanding the underlying plant physiology can provide a deeper appreciation for the hardening-off process.
**Abscisic Acid (ABA):ABA is a plant hormone that plays a crucial role in stress response. During hardening off, plants increase their ABA production in response to environmental stressors like drought and temperature fluctuations. ABA helps to close stomata (small pores on leaves) to reduce water loss and triggers the production of protective proteins.
**Antioxidant Production:Exposure to sunlight and other stressors can lead to the formation of free radicals, which can damage plant cells. Hardening off stimulates the production of antioxidants, which neutralize free radicals and protect cells from damage.
**Cell Wall Strengthening:Hardening off encourages the deposition of lignin and other compounds in cell walls, making them stronger and more resistant to physical stress from wind and rain.
**Root Development:While the focus is often on above-ground changes, hardening off also promotes root development. As plants adapt to drier conditions, they send out roots in search of moisture, leading to a stronger and more extensive root system.
Hardening Off Different Types of Seedlings: Specific Considerations
While the general principles of hardening off apply to most seedlings, there are some specific considerations for different types of plants:
**Tomatoes:Tomatoes are relatively easy to harden off. They tolerate a wide range of temperatures and adapt well to outdoor conditions.
**Peppers:Peppers are more sensitive to cold than tomatoes. Start hardening them off later in the season, when the temperatures are consistently warm.
**Eggplants:Eggplants are also sensitive to cold. They require warm soil and air temperatures to thrive.
**Lettuce and Spinach:These cool-season crops can tolerate cooler temperatures than warm-season crops. Start hardening them off earlier in the season.
**Herbs:Most herbs are relatively easy to harden off. They are generally more tolerant of drought and other stressors than vegetables.
Conclusion: A Thriving Garden Awaits
Hardening off seedlings is an investment in the future success of your garden. It may seem like an extra step, but the benefits of stronger, healthier, and more resilient plants are well worth the effort. By understanding the principles and following the steps outlined in this guide, you can ensure that your seedlings make a smooth and successful transition from the protected environment of your home to the thriving ecosystem of your garden. So, take the time to harden off your seedlings properly, and get ready to enjoy a bountiful harvest.