Thinking about growing your own sprouts at home? It's actually way easier than you might think. Forget those fancy gardening setups; you can get started with just a few simple things. Imagine having super fresh greens ready to go whenever you want them, right in your kitchen. This guide will walk you through everything you need to know to grow your own sprouts at home, from picking the right seeds to enjoying your harvest.
Key Takeaways
- Enjoy guaranteed freshness and nutrient-rich harvests by growing your own sprouts at home.
- Select the right seeds and gather basic sprouting supplies to begin your home sprout garden.
- Master the simple process of daily watering and proper airflow to nurture your sprouts.
- Know when your sprouts are ready to harvest and discover delicious ways to eat them.
- Troubleshoot common issues like sliminess or mold to ensure a successful sprout-growing experience.
Why You Should Grow Your Own Sprouts at Home
It’s pretty awesome to think about growing your own food, right? And sprouts are like the super-fast-track to doing just that. Forget those sad, wilted greens you sometimes find at the store. When you grow your own sprouts, you’re in charge.
Enjoy Freshness Guaranteed
Seriously, nothing beats the taste of something you just picked. With sprouts, you can harvest them right before you eat them. This means they’re packed with flavor and all the good stuff they’re supposed to have. It’s a whole different ballgame compared to produce that’s traveled miles and sat on shelves. You get that vibrant, crisp texture every single time.
Pesticide-Free Produce
This is a big one for me. When you grow your own sprouts, you know exactly what’s going into them – just water and seeds. No weird sprays, no chemicals. It’s a really clean way to eat, and you can feel good about feeding them to yourself and your family. It’s about taking control of what you consume, which is pretty empowering. You can learn more about growing your own food.
Nutrient-Rich Harvests
Sprouts are little powerhouses of vitamins and minerals. Because you’re eating them so soon after they start growing, they haven’t lost any of their nutritional punch. Think of them as tiny, edible superfoods that are ready to go in just a few days. It’s a simple way to boost your daily intake of healthy stuff without a lot of fuss.
Growing your own sprouts is a fantastic way to get fresh, healthy food on your table quickly. It’s a rewarding process that connects you more closely to your food and offers a sense of accomplishment.
Getting Started With Your Sprout Garden
So, you're ready to jump into the wonderful world of growing your own sprouts! It's honestly way simpler than you might think, and the payoff is huge. Let's get you set up.
Choosing Your Seeds
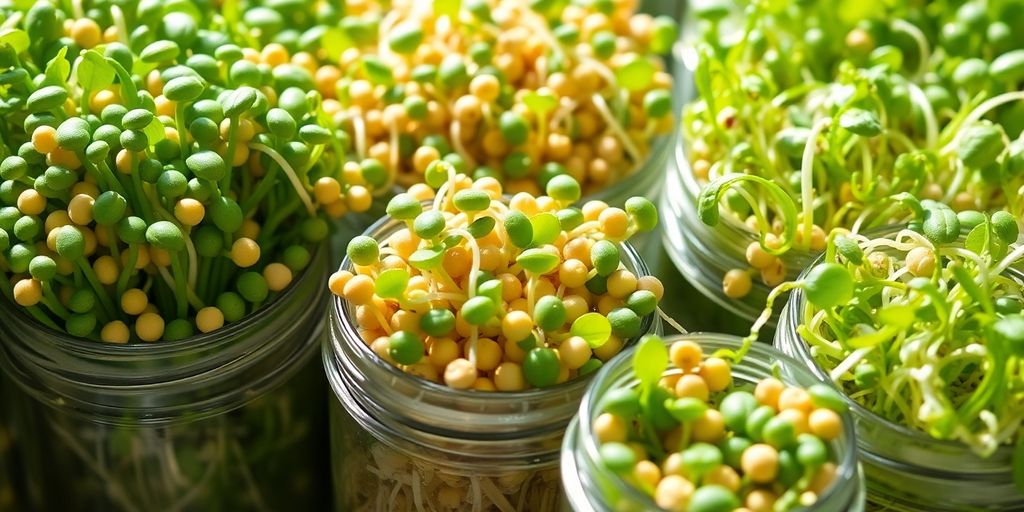
First things first, you need seeds! Not just any seeds, though. You'll want to look for seeds specifically labeled for sprouting. These are usually small and packed with life. Some super popular choices include:
- Alfalfa: A classic, mild flavor that's great for beginners.
- Broccoli: These pack a serious nutrient punch and grow pretty quickly. You can find out more about growing broccoli sprouts at home here.
- Radish: For a bit of a peppery kick!
- Mung Beans: These are hearty and make for satisfying sprouts.
It's important to use seeds meant for sprouting, as others might have been treated with things you don't want to eat.
Essential Sprouting Supplies
Don't worry, you don't need a fancy setup. Most people already have what they need, or can get it easily.
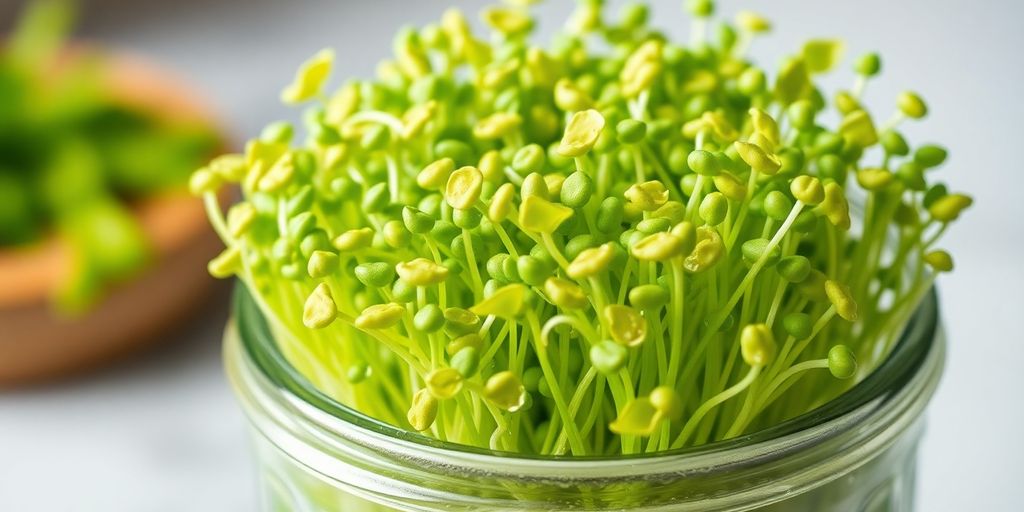
- A Jar: A wide-mouth Mason jar (quart size is perfect) is ideal. You can also use a sprouting jar with a screen lid, but a regular jar works just fine.
- A Screen or Cheesecloth: This is for covering the jar opening. You want something that lets air in but keeps the seeds contained. A piece of cheesecloth secured with a rubber band or the ring from a canning lid works great.
- A Tray or Bowl: To catch any water that drains out.
The Simple Sprouting Process
Here’s the basic rundown. It’s a cycle you’ll repeat a few times a day:
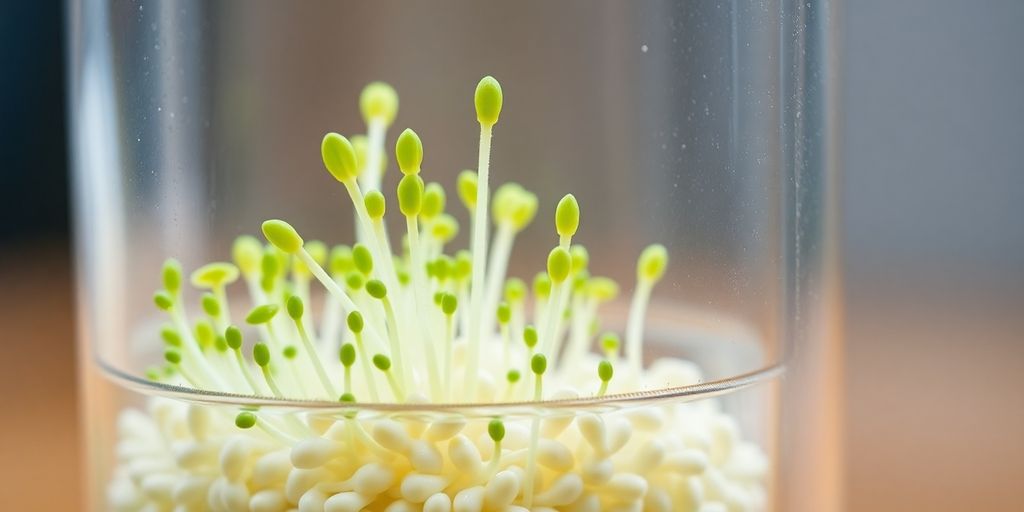
- Rinse and Soak: Put about 1-2 tablespoons of your chosen seeds into the jar. Add water, swirl them around, and then drain. Fill the jar with fresh water, cover it with your screen or cheesecloth, and let the seeds soak for about 8-12 hours (or overnight).
- Drain and Rinse: After soaking, drain all the water out completely. Then, add fresh water, swirl the seeds around, and drain again. This rinsing step is super important and you'll do it every 12 hours or so.
- Let Them Grow: Keep the jar upside down at an angle in a bowl or on a tray. This allows for good air circulation and lets any remaining water drain away. You'll see them start to sprout in just a day or two!
The key is consistent rinsing and draining. This keeps the seeds moist but not waterlogged, which is exactly what they need to grow happy and healthy.
Just keep repeating the drain and rinse cycle, and before you know it, you'll have a jar full of fresh sprouts ready to eat!
Nurturing Your Sprouts to Perfection
Alright, so you've got your seeds ready to go, and maybe some basic supplies. Now comes the fun part: actually helping those little guys grow! It’s not complicated, but there are a few things to keep in mind to make sure your sprouts turn out happy and healthy.
Discover Proven Techniques to Preserve Your Food Year-Round and Enjoy Less Waste with More Freshness
Daily Watering Rituals
Think of watering your sprouts like giving them a refreshing drink. You don't want them to dry out, but you also don't want them sitting in a puddle. The general idea is to rinse them thoroughly a couple of times a day. Here’s a simple way to do it:
- Rinse: Gently pour fresh, cool water over your sprouts in their container. Make sure all the seeds get a good soak.
- Drain: Tip the container to let all the water drain out completely. This is super important to prevent any yucky stuff from growing.
- Repeat: Aim for two to three rinses per day, depending on how humid your place is. You'll get a feel for it pretty quickly.
The key is consistent moisture, but never soggy bottoms!
Ensuring Proper Airflow
Sprouts need to breathe, just like us! Good airflow helps them dry out a bit between waterings and keeps things fresh. If you're using a jar, the mesh lid is usually perfect for this. If you're using a tray, make sure it's not packed too tightly.
Stagnant air can lead to mold or other issues, so giving your sprouts room to breathe is a simple step that makes a big difference in their health and your harvest.
Watching Them Grow
This is the most rewarding part! Over the next few days, you'll see a transformation. Those tiny seeds will start to sprout little roots and then tiny leaves. It’s pretty amazing to witness. Just keep up with those daily rinses and make sure they have good air circulation. You'll be amazed at how quickly they go from seeds to something you can actually eat. It’s a little bit of magic happening right on your countertop!
Harvesting and Enjoying Your Bounty
It’s finally time to enjoy the fruits (or rather, sprouts!) of your labor. Knowing when your sprouts are ready is pretty straightforward. You’re looking for those little green shoots to have developed their first set of leaves, often called cotyledons. This usually happens within a few days to a week, depending on the type of seed you’re growing.
Once they look good and green, it’s time for the final rinse and drain. Give them a good swish in cool water, then let them drain really well. You want them to be moist, but not sitting in water, which can lead to yucky stuff like mold or sliminess. A fine-mesh sieve is your best friend here.
So, what do you do with all these tasty little guys?
- Toss them into salads for a fresh crunch.
- Add them to sandwiches and wraps for an extra layer of flavor and nutrition.
- Blend them into smoothies for a hidden health boost.
- Use them as a vibrant garnish on soups or stir-fries.
Remember, the fresher they are, the better they taste and the more nutrients they pack. It’s a simple process, but the payoff is huge in terms of flavor and health. Enjoying your homegrown sprouts is one of the most rewarding parts of the whole experience. You've grown them yourself, after all!
Don't forget that you can save seeds from your harvest to keep the cycle going, ensuring you always have a fresh supply. This is a great step towards greater variety and self-reliance in your home garden.
Troubleshooting Common Sprouting Hiccups
Even the most enthusiastic sprout grower can run into a few snags. Don't worry, these are usually pretty easy to fix! It's all part of the learning process, and before you know it, you'll be a sprouting pro.
Dealing with Sliminess
If your sprouts feel a bit slimy, it's often because they're staying too wet. Sprouts need moisture, but they also need to breathe. Too much stagnant water can create that slick feeling. The best way to combat this is to make sure you're rinsing and draining them thoroughly, at least twice a day. Really give them a good shake to get rid of excess water. Sometimes, a bit of sliminess is just part of the natural mucilage some seeds produce, like flax or chia, but if it's excessive and smells off, it might be time to toss that batch and start fresh.
Preventing Mold Growth
Mold is probably the most common concern, and it usually pops up when there isn't enough airflow or if the sprouts are too wet. You want to make sure your sprouting jar or container has good ventilation. If you're using a jar, a mesh lid is perfect for this. Always rinse and drain well, and give them a good shake to dry them off a bit. If you spot any fuzzy mold, it's best to discard the batch immediately. It's not worth the risk. Remember, fresh sprouts should smell clean and earthy, not musty.
When Sprouts Don't Sprout
Sometimes, you'll put seeds in, do all the right things, and… nothing happens. This can be a bit disheartening, but it's usually down to a couple of things. First, check your seeds. Are they fresh? Old seeds might not have the same germination power. You can test a small handful before committing a whole jar. Second, make sure they're getting enough water but not too much. If the seeds dry out completely between rinses, they won't sprout. Conversely, if they sit in water, they can rot. It might also be the temperature; most sprouts like a consistent room temperature. If you're having trouble with germination, you might want to check out some tips on keeping plants healthy.
It's important to remember that not every single seed will sprout, and that's perfectly okay! A few stragglers won't affect the overall success of your harvest. Just keep an eye on the ones that are growing and enjoy the process.
The Perks of Homegrown Sprouts
Beyond the simple joy of watching tiny seeds transform into vibrant greens, growing your own sprouts at home offers some pretty sweet advantages. It’s not just about having something fresh to munch on; it’s about taking a little bit of control back and making some smart choices for yourself and the planet.
Cost Savings
Let’s be real, grocery bills can add up fast, and fresh produce is often a big chunk of that. When you grow your own sprouts, you’re cutting out the middleman. A small packet of seeds can yield a surprising amount of food, making it one of the most budget-friendly ways to get nutritious greens onto your plate. Think about it: a few dollars for seeds can replace many times that amount spent at the store over time. It’s a small investment that really pays off.
Food Security
In today’s world, we hear a lot about supply chain issues and how quickly things can disappear from store shelves. Growing your own sprouts gives you a little buffer against that uncertainty. You have a reliable source of fresh food right in your kitchen, no matter what’s happening out there. It’s a comforting feeling to know you can always harvest something healthy, even if the stores are looking a bit bare.
Environmental Impact
This is a big one. When you grow sprouts at home, you’re cutting down on a lot of the environmental impact associated with commercial food production. Think about it: no long-distance transportation, no plastic packaging to throw away, and no energy used for refrigeration during shipping. You’re reducing your carbon footprint with every batch you grow. Plus, you’re using minimal water compared to traditional farming. It’s a simple way to be a bit kinder to the earth.
Growing your own sprouts is a small step that makes a noticeable difference. You get fresher food, save money, and help the environment, all from your own kitchen counter. It’s a win-win-win situation that’s hard to beat.
Happy Growing!
So there you have it! Growing your own sprouts at home is totally doable and honestly, pretty rewarding. You get super fresh greens, you know exactly what went into them, and it’s a neat little project to keep your kitchen stocked. Give it a try, and you might be surprised at how easy and satisfying it is. Happy sprouting!
Frequently Asked Questions
Why should I grow my own sprouts instead of buying them?
Growing your own sprouts means you can enjoy them super fresh, right when they're at their best. Plus, you know exactly what went into them – no yucky pesticides! They're packed with good stuff for your body, too.
What basic stuff do I need to start sprouting?
You don't need much! The main things are your chosen seeds (like broccoli or alfalfa), a jar or container with a lid that lets air in and out, and some clean water. That's pretty much it to get going.
How often do I need to water my sprouts?
You'll want to rinse your sprouts about two to three times a day. This keeps them moist and washes away anything that might cause problems. Just drain them well after each rinse.
What if my sprouts feel a bit slimy?
A little sliminess can happen, especially with certain types of seeds. Make sure you're rinsing and draining them really well. If it's a lot of slime, it might be a sign of too much water or not enough air, so adjust your routine.
How do I know when my sprouts are ready to eat?
Sprouts are usually ready in about 3 to 7 days. You'll see little green leaves and the roots will have grown a bit. They should look plump and fresh. Give them a taste to see if you like the flavor!
Are there any special ways to eat sprouts?
Nope, they're super versatile! You can toss them into salads, add them to sandwiches or wraps, mix them into stir-fries, or even blend them into smoothies. They add a nice crunch and fresh flavor to almost anything.