
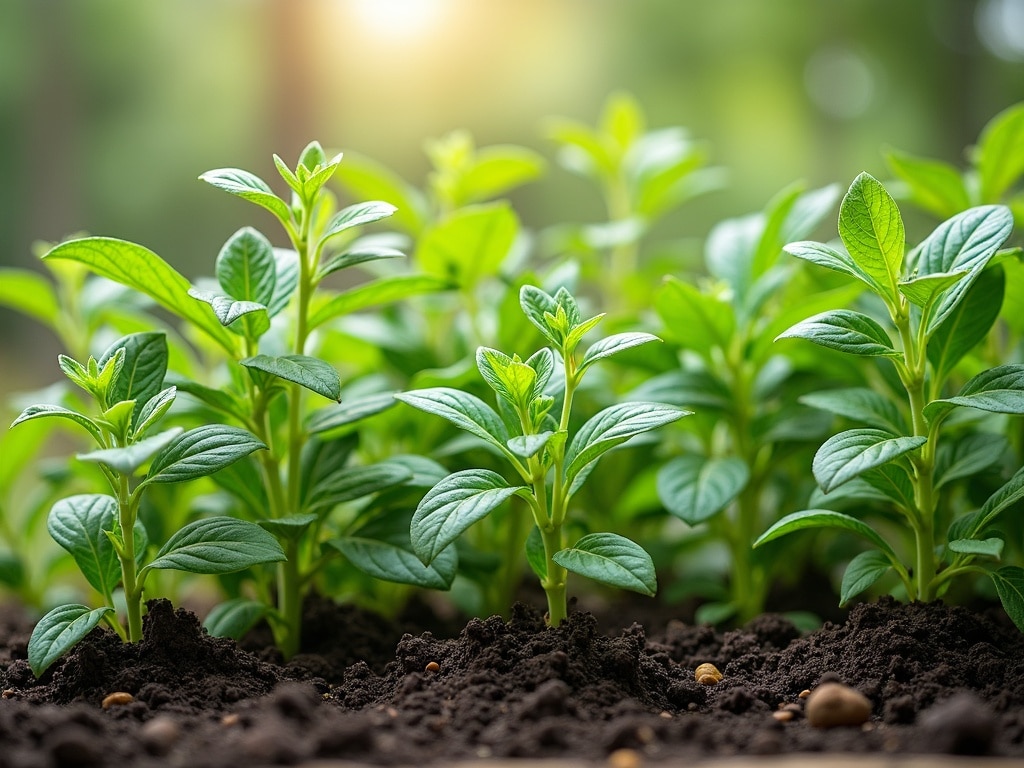
Growing Herbs From Cuttings: A Comprehensive Guide
Imagine effortlessly expanding your herb garden, filling it with fragrant basil, mint, rosemary, and more, all without spending a fortune on new plants. The secret? Propagating herbs from cuttings! This simple yet rewarding technique allows you to clone your favorite plants, preserving their unique characteristics and saving you money in the process. Whether you're a seasoned gardener or just starting out, mastering the art of growing herbs from cuttings is a game-changer. Let's dive into the world of herbal propagation and unlock the secrets to a flourishing herb garden.
Why Propagate Herbs from Cuttings?
Before we get into the how, let's explore the why. Growing herbs from cuttings offers a multitude of advantages:
**Cost-Effective:Why buy new plants when you can create your own for free? All you need are a few healthy cuttings and some basic supplies.
**Preserve Desired Traits:Cuttings produce clones of the parent plant, ensuring you maintain specific flavors, fragrances, and growth habits. This is especially valuable for unique or heirloom varieties.
**Easy and Accessible:With a little patience and the right techniques, anyone can successfully propagate herbs from cuttings. No special equipment or expertise is required.
**Fast Results:Compared to starting from seed, cuttings often root and grow much faster, allowing you to enjoy your new herb plants sooner.
**Expand Your Garden:Expand your herb garden and share your favorite plants with friends and neighbors. Propagation from cuttings is a great way to build a thriving community of plant lovers.
Understanding the Basics of Herb Propagation
At its core, propagation from cuttings is about encouraging a stem cutting to develop its own root system, effectively creating a new, independent plant. This process relies on the plant's ability to regenerate and differentiate cells, a remarkable feat of nature.
**Stem Cuttings:A section of a stem is cut from the parent plant and placed in a suitable rooting medium.
**Rooting Hormones (Optional):These can stimulate root development, especially in slow-rooting herbs.
**Environmental Factors:Humidity, temperature, and light all play crucial roles in successful rooting.
**Patience:Rooting can take anywhere from a few days to several weeks, depending on the herb and environmental conditions.
Choosing the Right Herbs for Propagation
While many herbs can be propagated from cuttings, some are easier than others. Here's a breakdown of some popular choices:
**Easy to Root:Mint, basil, oregano, rosemary, thyme, sage, lemon balm, and lavender.
**Moderate Difficulty:Chives, tarragon, and winter savory.
**More Challenging:Parsley (best from seed), dill (best from seed), and cilantro (best from seed).
Keep in mind that success rates can vary depending on the specific variety and your growing conditions. Don't be discouraged if your first attempt isn't perfect – practice makes perfect!
Tools and Materials You'll Need
Before you start snipping away at your herb plants, gather the following supplies:
**Sharp, Clean Pruning Shears or Knife:A clean, sharp blade is essential for making clean cuts and preventing the spread of disease.
**Rooting Medium:Options include:
**Seed Starting Mix:A lightweight, well-draining mix specifically designed for starting seeds and cuttings.
**Perlite or Vermiculite:These inert materials provide aeration and drainage.
**Coir (Coconut Fiber):A sustainable alternative to peat moss, coir retains moisture while providing good drainage.
**Water:Some herbs can be rooted directly in water.
**Rooting Hormone (Optional):Available in powder or liquid form, rooting hormone can speed up the rooting process and increase success rates.
**Small Pots or Containers:Choose pots with drainage holes to prevent waterlogging.
**Clear Plastic Bags or Humidity Dome:These help create a humid environment, which is crucial for successful rooting.
**Spray Bottle:For misting the cuttings to maintain humidity.
**Labels:To keep track of your cuttings.
Taking Herb Cuttings: A Step-by-Step Guide
Now for the fun part! Here's how to take herb cuttings like a pro:
1. **Choose the Right Stem:Select healthy, non-flowering stems from the current year's growth. Avoid stems that are woody, diseased, or stressed. The ideal stem will be flexible but not too soft.
2. **Time of Day:Take cuttings in the morning when the plant is well-hydrated.
3. **Prepare Your Tools:Sanitize your pruning shears or knife with rubbing alcohol to prevent the spread of disease.
4. **Make the Cut:Using your clean, sharp tool, make a clean cut just below a node (the point where leaves emerge from the stem). The cutting should be about 4-6 inches long.
5. **Remove Lower Leaves:Strip off the leaves from the bottom 1-2 inches of the cutting. This prevents the leaves from rotting in the rooting medium and encourages root development. Leaving a few leaves at the top allows the cutting to photosynthesize.
6. **Apply Rooting Hormone (Optional):Dip the cut end of the stem in rooting hormone powder or liquid. Tap off any excess powder.
7. **Plant the Cutting:Insert the cutting into your chosen rooting medium, burying the bottom 1-2 inches.
8. **Water Gently:Water the rooting medium gently to moisten it. Avoid overwatering, which can lead to rot.
9. **Create a Humid Environment:Place the pot in a clear plastic bag or humidity dome to create a humid environment. You can also mist the cuttings regularly with a spray bottle.
10. **Provide Indirect Light:Place the cuttings in a location with bright, indirect light. Avoid direct sunlight, which can scorch the leaves.
11. **Be Patient:Rooting can take anywhere from a few days to several weeks. Check the cuttings regularly for signs of root development.
12. **Test for Roots:After a few weeks, gently tug on the cutting. If it resists, it has likely developed roots. You can also gently remove the cutting from the rooting medium to inspect the roots.
13. **Transplant:Once the cutting has developed a healthy root system, transplant it into a larger pot with well-draining potting soil.
Specific Herb Cutting Techniques
While the general steps for taking herb cuttings are the same, there are a few nuances to consider for different herbs:
**Softwood Cuttings:Taken from new, soft growth in the spring or early summer. Best for herbs with soft stems like mint, basil, and oregano.
**Semi-Hardwood Cuttings:Taken from partially matured growth in late summer or early fall. Best for herbs with slightly woody stems like rosemary, thyme, and sage.
**Hardwood Cuttings:Taken from dormant, mature growth in late fall or winter. Less common for herbs, but can be used for some woody varieties.
Adjust the length of the cutting and the amount of leaves removed based on the specific herb. For example, rosemary cuttings may benefit from having the bottom inch or so scraped gently to encourage faster root development.
Rooting Herbs in Water: An Alternative Method
While most herbs root well in a solid rooting medium, some can also be rooted directly in water. This method is particularly easy and allows you to observe root development directly.
1. **Take a Cutting:Follow the same steps for taking a stem cutting, as described above.
2. **Place in Water:Place the cutting in a glass or jar filled with water, ensuring that the bottom nodes are submerged.
3. **Change Water Regularly:Change the water every day or two to prevent the growth of bacteria and algae.
4. **Provide Indirect Light:Place the glass in a location with bright, indirect light.
5. **Wait for Roots:Roots should start to develop within a week or two.
6. **Transplant:Once the roots are about an inch long, transplant the cutting into a pot with well-draining potting soil.
Herbs that root well in water include mint, basil, oregano, and lemon balm.
Caring for Your New Herb Cuttings
Once your herb cuttings have rooted and been transplanted, it's important to provide them with the right care to ensure they thrive:
**Watering:Water regularly, allowing the soil to dry out slightly between waterings. Avoid overwatering, which can lead to root rot.
**Fertilizing:Feed your new herb plants with a diluted liquid fertilizer every few weeks.
**Light:Provide bright, indirect light. Most herbs need at least 6 hours of sunlight per day.
**Pruning:Prune your herb plants regularly to encourage bushier growth.
**Pest and Disease Control:Monitor your plants for signs of pests or diseases. Treat any problems promptly with organic pest control methods.
Troubleshooting Common Propagation Problems
Even with the best techniques, you may encounter some challenges when propagating herbs from cuttings. Here are some common problems and how to solve them:
**Cuttings Rotting:This is usually caused by overwatering or poor drainage. Ensure that your rooting medium is well-draining and avoid overwatering.
**Cuttings Not Rooting:This could be due to several factors, including:
**Incorrect Stem Selection:Make sure you are using healthy, non-flowering stems.
**Lack of Humidity:Ensure that the cuttings are in a humid environment.
**Insufficient Light:Provide bright, indirect light.
**Old or Ineffective Rooting Hormone:Use fresh rooting hormone.
**Cuttings Wilting:This is usually caused by dehydration. Mist the cuttings regularly and ensure that the rooting medium is moist.
The Best Season for Taking Herb Cuttings
The ideal time for taking herb cuttings depends on the type of cutting: Softwood cuttings are best taken in spring, semi-hardwood in late summer or early fall, and hardwood in late fall or winter. Generally, you'll have the most success when the parent plant is actively growing but not flowering vigorously.
Adapting Techniques for Specific Herbs
**Rosemary:Can be slow to root. Use semi-hardwood cuttings and consider gently scraping the bottom of the stem to encourage rooting.
**Mint:Roots very easily in water or soil. Be careful – mint can be invasive once planted in the garden.
**Basil:Use softwood cuttings. Pinch off any flower buds to encourage leaf growth.
**Lavender:Use semi-hardwood cuttings. Lavender prefers well-drained soil and doesn't like to be overwatered.
**Thyme:Use semi-hardwood cuttings. Thyme is drought-tolerant and prefers a sunny location.
**Sage:Use semi-hardwood cuttings. Sage can be susceptible to fungal diseases, so good air circulation is important.
Advanced Propagation Techniques
For those looking to take their propagation skills to the next level, consider these advanced techniques:
**Bottom Heat:Using a heat mat to warm the rooting medium can speed up the rooting process.
**Air Layering:An alternative propagation method that involves rooting a stem while it is still attached to the parent plant.
**Grafting:A technique used to join two plants together, combining the desirable traits of both.
It's worth experimenting, but knowing the basics of herb care will always be the most important part.
Using Your Propagated Herbs
Once your herb cuttings have matured into healthy plants, the possibilities are endless! Use them in your cooking, create beautiful herb gardens, or share them with friends and family.
Here are just a few ideas:
Discover Proven Techniques to Preserve Your Food Year-Round and Enjoy Less Waste with More Freshness
**Culinary Uses:Add fresh herbs to your favorite recipes, make pesto, or create infused oils and vinegars.
**Medicinal Uses:Many herbs have medicinal properties and can be used to make teas, tinctures, and salves. *Note: Consult with a healthcare professional before using herbs for medicinal purposes.*
**Aromatic Uses:Fragrant herbs can be used to make potpourri, sachets, and bath products.
**Ornamental Uses:Herbs can be used to create beautiful and fragrant gardens.
Final Thoughts
Growing herbs from cuttings is a rewarding and sustainable way to expand your herb garden and enjoy the many benefits of fresh, homegrown herbs. With a little patience and practice, you'll be able to propagate your favorite herbs with ease, saving money and creating a thriving collection of plants. So, grab your pruning shears, gather your supplies, and get ready to embark on a journey into the fascinating world of herbal propagation! The satisfaction of nurturing new life from a simple cutting is unmatched, and the possibilities for using your homegrown herbs are endless. Happy gardening!