
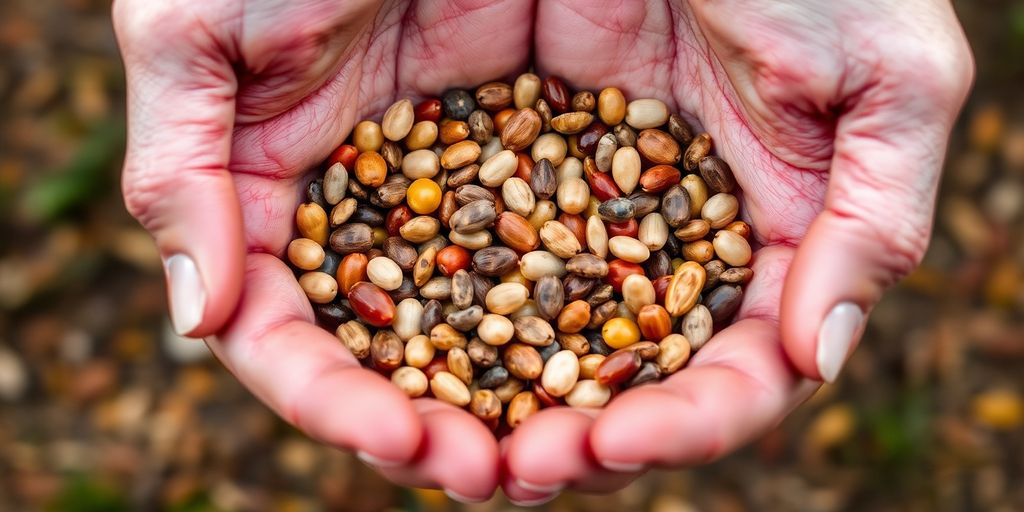
Want a garden that keeps on giving? Learning how to save seeds is a fantastic way to keep your favorite plants going year after year. It's not as hard as it sounds, and it saves you money too! This guide will walk you through the basics of seed saving tips, from picking the right plants to storing your harvest so they'll sprout next spring. Get ready to fill your garden with plants you love, all from seeds you collected yourself.
Key Takeaways
- Start with easy plants like beans, peas, and tomatoes for your first seed saving attempts.
- Know when your plant's seeds are truly ripe; this is key for good germination.
- Clean and dry your seeds properly to prevent mold and keep them viable.
- Store seeds in cool, dry, and labeled containers for the best chance of sprouting later.
- Open-pollinated varieties are best for saving if you want true-to-type plants next season.
Getting Started With Seed Saving
Ready to start saving seeds? It's a fantastic way to connect with your garden and get more from your plants year after year. You don't need a lot of fancy equipment to begin; just a few basic things will get you going.
Why Save Your Own Seeds?
Saving seeds is more than just a gardening hack; it's a way to preserve the unique traits of your favorite plants. When you save seeds from plants that do well in your specific garden conditions, you're essentially breeding plants that are perfectly suited to your little patch of earth. Plus, it's incredibly rewarding to plant a seed you saved yourself and watch it grow. It’s a great way to save money too!
What Seeds Are Best For Beginners?
If you're just starting out, some plants are much easier to save seeds from than others. Focus on self-pollinating plants for your first attempts. These are plants where the flower is pollinated by its own pollen, meaning you don't have to worry as much about other varieties cross-pollinating and changing the seeds. Good choices include:
- Beans
- Peas
- Lettuce
- Tomatoes
- Peppers
These are generally straightforward and give you a good chance of success. You can find more information on easy-to-save seeds.
Gathering Your Seed Saving Supplies
Before you start collecting, gather a few simple supplies. You probably have most of what you need already:
- Paper bags or envelopes: For collecting and storing dry seeds.
- Small bowls: For separating seeds from fruit or pods.
- A fine-mesh sieve: Helpful for cleaning smaller seeds.
- Permanent marker: For labeling everything clearly.
- A notebook and pen: To record details about the plant and when you saved the seeds.
Having these items ready makes the whole process smoother. It’s all about being prepared so you can focus on the fun part – the seeds themselves!
Harvesting Your Precious Seeds
Harvesting your seeds is a really rewarding part of gardening. It’s like getting a little gift from your plants to keep the cycle going. But when exactly do you know it’s time to collect them? It can be a bit tricky, but there are some good signs to look for.
Knowing When Seeds Are Ripe
Most seeds are ready when the fruit or pod they’re in has dried out and changed color. For things like beans and peas, you’ll see the pods turn yellow or brown and get papery. Tomatoes are a bit different; you want to pick them when they’re fully ripe and soft, then scoop out the seeds from the gel. The key is to let the plant do its thing and dry down as much as possible. For many plants, waiting until the seed head or pod is brittle is a good indicator. You don't want to harvest too early, or your seeds might not be viable.
The Art of Hand-Pollination
Sometimes, you might want to control which plants pollinate each other, especially if you’re trying to keep a specific variety pure. This is where hand-pollination comes in. For plants like tomatoes or peppers, you can gently tap the flower or use a small brush to move pollen from the stamen to the pistil. It’s a delicate process, but it gives you a lot of control over your seed saving. It’s a bit like being a tiny garden matchmaker!
Collecting Seeds From Different Plant Types
Different plants have different ways of storing their seeds, so you’ll need to adjust your technique.
- Dry Seeds: For plants like sunflowers, zinnias, and beans, wait for the flower heads or pods to dry completely on the stalk. Then, you can rub them out or shake them free.
- Wet Seeds: For fruits like tomatoes, cucumbers, and peppers, you’ll collect the seeds from the fleshy part. Often, these need a bit of fermentation to remove the gel coating, which helps with germination. You can find out more about seed saving essentials.
- Bulb/Root Seeds: Some plants, like carrots or onions, will send up a flower stalk. You wait for that stalk to dry and the tiny seeds to form at the top.
It’s always a good idea to check specific plant guides if you’re unsure. Each plant has its own rhythm, and understanding that makes the whole process much smoother. Don't be afraid to experiment a little; that's how you learn what works best in your garden.
Cleaning Your Harvested Seeds
Now that you've gathered your seeds, it's time for the cleaning phase. This step might seem a bit tedious, but it's super important for making sure your seeds stay healthy and ready to grow next season. Think of it as giving your future garden a really good start!
Simple Seed Cleaning Techniques
Cleaning seeds is all about getting rid of the extra stuff – the bits of pod, leaves, or even dried flower petals that got mixed in. The method you use really depends on the type of seed you're working with. For larger seeds, like beans or peas, you can often just pick out the debris by hand. It’s a good chance to inspect each seed, too. For smaller seeds, things get a little more involved, but don't worry, it's totally doable.
Washing Seeds For Purity
Some seeds, especially those from fruits like tomatoes, benefit from a good wash. This helps remove any sticky pulp or sugars that could cause problems later. You can gently rinse them in a colander under cool water. For tomato seeds, you'll want to let them ferment a bit in their own pulp for a day or two. This might sound weird, but it actually helps break down a gel coating that can stop germination. After fermenting, you rinse them thoroughly. It’s a neat trick that really helps with seed viability. You can find more tips on cleaning different types of seeds at seed saving resources.
Discover Proven Techniques to Preserve Your Food Year-Round and Enjoy Less Waste with More Freshness
Drying Seeds To Perfection
Once your seeds are clean, drying them properly is the next big step. Moisture is the enemy of stored seeds, so you need to get them as dry as possible without damaging them. Spread your cleaned seeds out in a single layer on screens, paper towels, or trays. Keep them in a warm, dry place with good air circulation, away from direct sunlight. You don't want to use high heat, as that can kill the embryo inside. Just a gentle, consistent drying process is best. You'll know they're dry when they feel hard and brittle, and they snap rather than bend when you try to break them. This thorough drying is key to long-term storage.
Proper drying prevents mold and keeps your seeds viable for a long time. It's a simple process that makes a huge difference in the success of your seed saving efforts.
Proper Seed Storage Secrets
Alright, you've done the hard work of collecting and cleaning your seeds. Now comes the part that really makes all that effort worthwhile: storing them properly so they'll be ready to go when planting season rolls around again. It’s not super complicated, but a few simple steps can make a big difference in whether your seeds sprout next year or just turn into dust. Getting your seeds stored right is key to a successful garden next season.
Choosing The Right Containers
So, what kind of containers should you use? You want something that will keep your seeds safe and sound. Small glass jars with tight-fitting lids are fantastic. They're airtight and you can see what's inside. If you don't have glass jars, small paper envelopes work too, but you'll want to put those inside a larger airtight container, like a plastic bin or a metal tin. This adds an extra layer of protection. Think about the quantity of seeds you have, too. Don't cram a ton of seeds into a tiny container; give them a little breathing room.
Keeping Seeds Cool And Dry
This is probably the most important part. Seeds really don't like moisture or heat. Think of it like putting them in hibernation. A cool, dark, and dry place is ideal. Your refrigerator is often a good spot, especially if you can keep it away from the crisper drawer where humidity can build up. A basement or a closet that stays consistently cool and doesn't get too humid can also work. Avoid storing seeds in places with big temperature swings, like a shed or garage. You want a stable environment. If you're worried about moisture, you can toss a silica gel packet into your containers – they're great at soaking up extra dampness. You can find these in lots of product packaging, or buy them online. Storing seeds properly is an economical way to propagate plants, and this guide provides the best methods for storing your saved seeds.
Labeling For Future Success
Don't skip this step, seriously. It might seem obvious now what you've got in each little packet or jar, but trust me, six months from now, you might be scratching your head. Use a permanent marker and write down the type of seed, the variety (if you know it), and the date you saved it. This information is super helpful when you're planning your garden next year. You can even add a little note about where you got the original plant or any special characteristics. Good labeling means you'll know exactly what you're planting and when you saved it, making your seed saving journey much smoother.
Understanding Seed Viability
Saving seeds is a rewarding part of gardening, but knowing if those seeds will actually grow is key to a successful next season. This section is all about understanding seed viability – basically, how alive and ready to sprout your seeds are.
How Long Do Seeds Last?
Most seeds don't last forever, but many have a surprisingly long shelf life if stored properly. For instance, tomatoes and peppers can often stay viable for 4-10 years, while beans and peas might last 3-5 years. Some seeds, like lettuce, are a bit more delicate and might only be good for 2-3 years. It really depends on the type of plant and how you keep them. Proper storage is your best friend here.
Testing Your Seeds For Germination
Before you commit to planting a whole packet of saved seeds, it's a smart move to test a small batch. It’s pretty simple! You can try the paper towel method: just grab about 10 seeds, wrap them in a damp paper towel, pop that into a plastic bag, and keep it somewhere warm. Check on them every day or two. If most of them sprout within a week or two, you've got good seeds! You can find more details on how to test seed viability.
Reviving Old Seeds
Sometimes, seeds that have been stored for a while might seem a bit sluggish. Don't give up on them just yet! Often, a little extra care can wake them up. Making sure they have consistent moisture and warmth when you plant them can make a big difference. You might also find that planting a few extra seeds per spot helps account for any that are a bit weaker. It’s all about giving them the best possible start.
Saving Seeds From Open-Pollinated Varieties
Saving seeds from open-pollinated (OP) varieties is where the real magic happens in seed saving. These plants, unlike hybrids, will grow true to type, meaning the seeds you save will produce plants just like the parent. It’s like bottling up the best of your garden for next year! This consistency is what makes OP seeds so special for gardeners who want to maintain unique plant traits.
The Magic Of Open-Pollinated Plants
Open-pollinated plants are the old-school varieties, the ones your grandparents might have grown. They reproduce reliably through natural pollination, usually by wind or insects. When you save seeds from an OP plant, you’re preserving its specific characteristics – its flavor, its color, its growth habit. It’s a way to keep heirloom varieties alive and thriving in your own garden. Think of it as collecting little packets of history!
Preventing Cross-Pollination
This is probably the most important part of saving OP seeds. Cross-pollination happens when pollen from one variety of a plant fertilizes the flower of another variety. For plants that rely on insects or wind for pollination, like squash or corn, this can be a real issue. If you’re growing more than one type of, say, zucchini, their seeds might get mixed up, and you won’t get true zucchini next year. You might get something… else!
To avoid this, you have a couple of options:
- Isolation: Plant different varieties of the same species far apart. The distance needed varies by plant, but for things like cucumbers and melons, a good 500 feet or more is often recommended. This gives nature a better chance to keep things pure.
- Single Variety: If you don’t have a lot of space, just grow one variety of each species. For example, pick one type of tomato, one type of bean, and one type of pepper. This simplifies things immensely and guarantees your seeds will be true to type.
- Hand-Pollination: For some plants, you can even hand-pollinate to be extra sure. This involves manually transferring pollen from the male part of a flower to the female part, often using a small brush or cotton swab. It’s a bit more work, but it gives you ultimate control.
When you're saving seeds from plants like tomatoes or peppers, which are mostly self-pollinating, cross-pollination is less of a worry. They tend to do their own thing naturally. But for plants that cross-pollinate easily, like brassicas or cucurbits, paying attention to isolation distances or growing only one variety is key to keeping your seed lines pure and predictable for the next growing season.
Maintaining Plant Purity
Saving seeds from OP varieties is a fantastic way to build your own seed collection tailored to your garden's specific conditions. Over time, by selecting the best plants to save seeds from, you can even develop varieties that are perfectly suited to your local climate and soil. It’s a rewarding process that connects you more deeply with your food and the natural cycles of your garden. Happy saving!
Seed Saving Tips For Common Garden Favorites
Saving seeds from your favorite garden plants is a fantastic way to keep your garden going year after year, and some veggies are just plain easier to start with than others. Let's look at a couple of popular choices that are super beginner-friendly.
Tomatoes: A Seed Saver's Delight
Tomatoes are often the first plant people think of when it comes to seed saving, and for good reason! They're pretty straightforward. Most tomatoes are self-pollinating, meaning they don't need help from bees or wind to make seeds. The key is to let the fruit get really ripe, almost overripe, on the vine. This ensures the seeds inside are mature and ready to go.
Here’s a simple way to get those tomato seeds ready:
- Scoop out the pulp and seeds from a ripe tomato into a jar.
- Add a little water to the jar. This helps start a fermentation process.
- Let it sit for a couple of days, stirring once a day. You'll see a little mold or foam on top – that's normal!
- The good seeds will sink to the bottom, while the bad ones and pulp float. Rinse the seeds thoroughly until the water runs clear.
- Spread them out on a plate or screen to dry completely. Don't let them clump together when wet!
Fermenting helps remove a gel coating that can stop seeds from germinating. It sounds a bit weird, but it really works to get you viable seeds for next season.
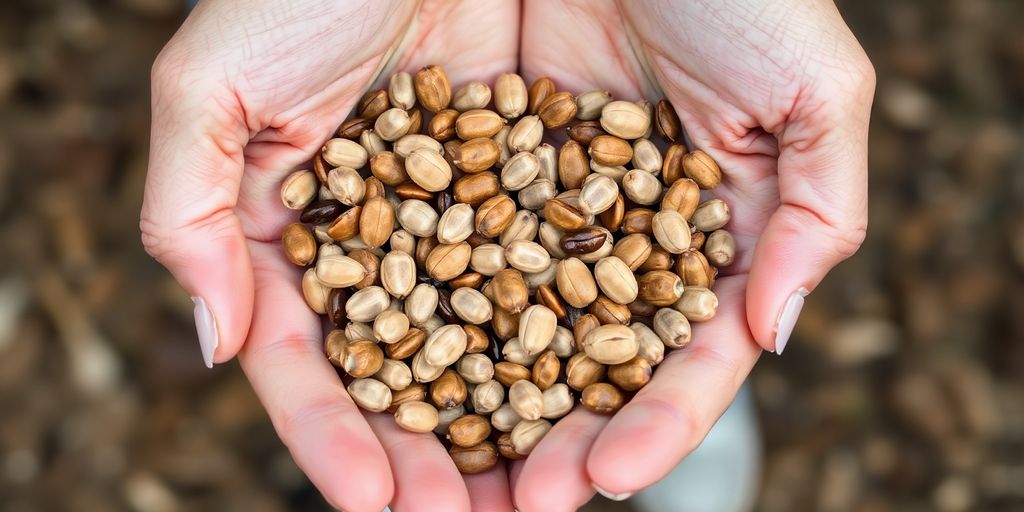
Beans And Peas: Easy Peasy
If you want a really simple start, beans and peas are your best friends. These plants are also self-pollinating, so you don't have to worry too much about them getting mixed up with other varieties. Just let the pods dry out completely on the plant. You'll know they're ready when the pods turn brown and brittle and the beans or peas inside rattle when you shake them. Once they're dry, you can just shell them right out of the pods. It’s that easy! You can find more tips on saving seeds from easy-to-grow plants like these here.
Peppers: Adding Some Spice
Peppers are another great option, though they can be a tiny bit trickier than tomatoes or beans if you have multiple varieties growing close together. Like tomatoes, you want to let your peppers get fully ripe on the plant – often, this means they'll change color from green to red, yellow, or orange. The riper, the better for seed saving.
To collect them:
- Cut the pepper open and carefully remove the seeds from the inside. Try not to touch your eyes!
- Separate the seeds from the pith and membranes.
- Spread the seeds on a paper towel or a non-stick surface to dry. Make sure they are completely dry before storing them.
More Seed Saving Tips For Your Veggie Patch
Let's talk about some more of those garden favorites! Saving seeds from your veggies can be super rewarding, and it's not as tricky as you might think. We've already covered the big hitters, but there are plenty of other plants in your patch that are happy to share their seeds with you for next year's garden.
Lettuce And Leafy Greens
Saving seeds from lettuce and other leafy greens like spinach or arugula is pretty straightforward. Once the plants start to bolt (that's when they send up a flower stalk), you'll see tiny flowers appear. After the flowers fade, little seed heads will form. Let them dry right on the plant as much as possible. When they look papery and dry, you can snip the whole stalk and bring it inside. Then, you just rub the dried stalks between your hands over a bowl or a tray to release the tiny seeds. It’s a bit like sifting flour, but with seeds!
- Let plants bolt naturally.
- Wait for seed stalks to dry completely.
- Gently rub stalks to release seeds.
Root Vegetables: A Different Approach
Root vegetables like carrots, beets, and radishes are a bit different. You can't save seeds from the root itself, obviously! You need to let the plant go to seed, which means leaving it in the ground (or replanting a few roots) to produce flowers and then seeds. For carrots, you'll see those characteristic umbrella-like flower clusters. Once the seeds on the outer edges of the flower head turn brown and dry, it's time to harvest. Cut the entire seed head and let it finish drying indoors. For beets, you'll harvest the seed balls after the plant has dried out.
Remember that root vegetables often need to overwinter or be replanted to produce seeds. This means you'll need a bit more space and patience, but the payoff is worth it!
Squash And Cucumbers: Big Seeds, Big Rewards
These are some of the easiest and most satisfying seeds to save. When you're ready to harvest a squash or cucumber for seed saving, pick a mature fruit. That means it's fully grown and has started to harden or change color slightly. Cut the fruit open and scoop out the seeds. For squash, you'll want to separate the seeds from the pulp. A good way to do this is to put the seeds and pulp in a jar with a little water and let it ferment for a day or two. The good seeds will sink to the bottom, and the pulp will float. Rinse them well, and then you're ready to dry them. Cucumbers are similar, just scoop out the seeds from the center. You can find great tips on saving vegetable seeds here.
- Choose fully mature fruits.
- Scoop out seeds and remove pulp.
- Fermenting can help clean squash seeds.
Saving seeds from these plants is a fantastic way to connect with your garden and ensure you have a great harvest next year, all from your own plants!
Troubleshooting Common Seed Saving Issues
Don't let a few hiccups discourage you from saving seeds! It's totally normal to run into a few snags along the way. Think of it as part of the learning process. We've all been there, staring at a batch of seeds that just don't look quite right. But with a little know-how, you can sort out most common seed saving issues.
Dealing With Moldy Seeds
Mold is usually a sign that your seeds didn't dry out fast enough. If you catch it early, you might be able to salvage them. Gently brush off any visible mold. Then, spread the seeds out in a single layer on a clean paper towel or screen in a well-ventilated area. You can even try a dehydrator on a very low setting, just a bit warmer than room temperature, for a few hours. The key is good airflow and making sure they are completely dry before storing. If the mold is really bad, it's probably best to just toss that batch and try again next season. Remember, saving garden seeds enhances self-reliance in gardening and farming. saving seeds
When Seeds Don't Dry Properly
Sometimes seeds just seem to cling to moisture. This can happen if your humidity is high or if you didn't quite get them spread out enough. The goal is to get them to a state where they rattle around loosely. If they feel even a little bit sticky or clump together, they need more drying time. Try spreading them thinner on a tray or using a fan to increase air circulation around them. You can also try the paper bag method again, but make sure the bag is in a dry spot. Patience is really important here; rushing the drying process is a common mistake.
Identifying Unviable Seeds
Not all seeds will be winners, and that's okay. Some seeds might just not be fertile, or they could be too old. A simple way to check is the float test. Put your seeds in a glass of water for about 15-30 minutes. Seeds that sink to the bottom are usually good and viable. The ones that float are often empty or dead. You can also do a germination test before you store them for the long haul. Take a small sample of your seeds, place them on a damp paper towel inside a plastic bag, and keep them in a warm spot. Check them daily for sprouts. If only a few sprout, or none do, they might not be worth storing.
It's easy to get discouraged when seeds don't turn out perfectly, but every attempt is a learning opportunity. Focus on what you can control: thorough drying, proper cleaning, and good storage conditions. Even if some seeds don't make the cut, the ones that do will be a testament to your efforts and a great start for your next garden.
Sharing Your Seed Bounty
You've done it! You've successfully saved seeds from your garden, and now you've got a little treasure trove. What's next? Well, sharing that bounty is one of the most rewarding parts of seed saving. It's not just about having extra seeds; it's about connecting with other gardeners and keeping those special plant varieties going strong.
Organizing a Seed Swap
Seed swaps are fantastic events. They're a great way to meet fellow plant enthusiasts and trade seeds you've saved for something new and exciting. Think of it as a potluck for your garden! You can organize one with friends, neighbors, or even join a local gardening club's event. Make sure your seeds are clearly labeled with the plant name, variety, and the year you saved them. It makes the swap much smoother for everyone.
Preserving Heirloom Varieties
Saving seeds from heirloom plants is like being a guardian of garden history. These varieties have been passed down through generations, often with unique flavors and characteristics that you won't find in modern hybrids. By saving their seeds, you're helping to keep these living pieces of the past alive and available for future gardeners. It’s a wonderful way to contribute to plant diversity, and you can even be part of larger preservation efforts, like those with the Seed Savers Exchange.
Building a Community Garden
Sharing your saved seeds can also be a cornerstone of building a stronger community garden. Imagine a shared plot where everyone contributes seeds from their successful harvests. This not only diversifies the garden's offerings but also builds a sense of shared purpose and accomplishment. It’s a beautiful cycle: you save seeds, share them, and then enjoy the fruits (and vegetables!) of a collective effort. Plus, it’s a fantastic way to introduce new gardeners to the joys of growing their own food.
Sharing your saved seeds is more than just an exchange of plant material; it's an exchange of knowledge, passion, and a commitment to the future of gardening.
Happy Seed Saving!
So there you have it! Saving seeds might seem like a lot at first, but it's really rewarding. You'll have your own little plant babies ready to go for next year, and it's a great way to keep your favorite varieties going strong. Plus, it connects you more to your garden. Think of all the cool plants you'll be able to grow, all from seeds you saved yourself. It’s a pretty neat feeling, honestly. Give it a try, and get ready for an even better garden next season!
Frequently Asked Questions
What exactly is seed saving?
Saving seeds means collecting and storing seeds from your own plants so you can grow them again next year. It's a great way to save money and keep your favorite plant types going strong.
What are the easiest plants to save seeds from?
For beginners, it's best to start with plants that are easy to save seeds from, like beans, peas, tomatoes, and peppers. These plants usually don't cross-pollinate easily, making the process simpler.
What supplies do I need for seed saving?
You'll need a few things: paper bags or envelopes for drying, small containers or envelopes for storing, a marker for labeling, and maybe a strainer if you're washing seeds. A notebook to jot down details is also super helpful!
How do I know when my seeds are ready to collect?
Seeds are usually ready when the fruit or pod holding them is fully ripe and starting to dry out on the plant. For things like beans, the pods turn yellow or brown and get dry and brittle.
What's the best way to store saved seeds?
Keeping seeds cool, dry, and dark is the golden rule. Think of a cool pantry, basement, or even a refrigerator (but keep them in an airtight container so they don't get damp).
How long can I keep my saved seeds?
Seeds don't last forever! Their lifespan depends on the type of plant. Some, like beans, can last for several years, while others, like onions or carrots, might only be good for a year or two. Testing them before planting is a smart move.
How can I check if my old seeds will still grow?
You can test seeds by putting a few on a damp paper towel inside a plastic bag. Keep them in a warm spot and see how many sprout over a week or two. If most sprout, they're likely still good!
What does ‘open-pollinated' mean for seed saving?
Open-pollinated plants are great because they grow true to type. This means if you save seeds from an open-pollinated tomato, the new plants will be very similar to the parent plant. Hybrids, on the other hand, can produce unpredictable results.