
Indoor Composting Ideas: Turning Kitchen Scraps into Garden Gold
Imagine transforming your daily food waste into a nutrient-rich resource, all within the comfort of your home. Indoor composting offers a sustainable and convenient way to reduce waste, enrich your plants, and connect with nature, regardless of your living space. Whether you reside in a sprawling suburban house or a compact city apartment, several indoor composting ideas can fit your lifestyle.
Why Choose Indoor Composting? Benefits Beyond Waste Reduction
Before diving into specific methods, let’s explore the compelling reasons to embrace indoor composting:
- Environmental Impact: Reduce landfill waste and its associated methane emissions, contributing to a greener planet.
- Nutrient-Rich Compost: Create valuable compost to nourish your houseplants, herbs, or balcony garden, promoting healthy growth and vibrant blooms.
- Cost Savings: Decrease your reliance on store-bought fertilizers, saving money while providing your plants with a natural and sustainable food source.
- Educational Opportunity: Learn about decomposition, nutrient cycles, and the fascinating world of microorganisms, fostering a deeper understanding of nature.
- Convenience: Dispose of food scraps easily and efficiently, reducing odors and fruit flies compared to traditional garbage disposal.
Addressing Common Concerns: Odor and Pests
Many people hesitate to start indoor composting due to concerns about unpleasant odors or attracting pests. However, with proper techniques and maintenance, these issues can be easily managed. The key is to maintain a balanced environment within your compost bin, ensuring adequate aeration, moisture control, and a proper mix of greens (nitrogen-rich materials) and browns (carbon-rich materials).
Choosing the Right Indoor Composting Method: A Guide to Different Options
Several indoor composting methods cater to various needs and preferences. Here's an overview of the most popular options:
1. Vermicomposting: Harnessing the Power of Worms
Vermicomposting, or worm composting, utilizes earthworms to break down organic matter efficiently. Red wigglers (Eisenia fetida) are the stars of this process, consuming food scraps and producing nutrient-rich castings, a potent fertilizer.
How it works:
A vermicomposting system typically consists of a bin with bedding material (shredded paper, coconut coir, or peat moss) where the worms live. Food scraps are added to the bedding, and the worms feast on them, breaking them down into compost.
Benefits of Vermicomposting:
- Fast Decomposition: Worms significantly accelerate the composting process compared to other methods.
- High-Quality Compost: Worm castings are exceptionally rich in nutrients and beneficial microorganisms, ideal for plant growth.
- Odorless (When Done Right): A well-maintained worm bin shouldn't produce unpleasant odors.
- Fun and Educational: Watching the worms work can be a fascinating experience, especially for children.
Setting up a Vermicomposting System:
You can purchase a pre-made vermicomposting bin or build your own using plastic bins. Here are the basic steps:
- Choose a Bin: Select a bin with adequate drainage and ventilation. A two- or three-tray system allows for easy harvesting of compost.
- Prepare the Bedding: Moisten shredded paper, coconut coir, or peat moss and add it to the bin. The bedding should be damp like a wrung-out sponge.
- Introduce the Worms: Obtain red wigglers from a reputable source. Start with about 1,000 worms (approximately one pound) for a small to medium-sized bin.
- Bury the Food Scraps: Add small amounts of food scraps to the bedding, burying them to prevent odors and fruit flies.
- Maintain Moisture and Aeration: Keep the bedding moist and aerated by gently turning it regularly.
What to Feed Your Worms:
Worms enjoy a variety of food scraps, including:
- Fruit and vegetable peels and cores
- Coffee grounds and tea bags
- Crushed eggshells
- Bread crusts and stale grains
What to Avoid Feeding Your Worms:
- Meat and dairy products (attract pests and cause odors)
- Oily or greasy foods
- Citrus fruits (in large quantities, can make the bin acidic)
- Onions and garlic (can deter worms)
Harvesting Vermicompost:
After several months, the bottom tray of your vermicomposting system will be filled with rich, dark compost. There are several methods for harvesting vermicompost:
- The Dump and Sort Method: Dump the contents of the bin onto a tarp and carefully separate the worms from the compost.
- The Migration Method: Place fresh bedding and food in one side of the bin. The worms will gradually migrate to the fresh side, leaving the compost behind.
- The Harvesting Tray Method (for multi-tray systems): Remove the top tray and start feeding the worms in the tray below. The worms will migrate downwards, leaving the finished compost in the top tray.
2. Bokashi Composting: Fermenting Your Way to Soil Enrichment
Bokashi composting is an anaerobic (oxygen-free) fermentation process that utilizes a special bran inoculated with beneficial microorganisms to pickle food waste. This method is particularly effective for composting all types of food scraps, including meat, dairy, and oily foods, which are typically avoided in vermicomposting.
How it works:
Food scraps are added to a Bokashi bucket along with a sprinkling of Bokashi bran. The bran contains beneficial bacteria that ferment the food waste, breaking it down into a pre-compost material.
Benefits of Bokashi Composting:
- Composts All Food Waste: Handles meat, dairy, and oily foods that are problematic for vermicomposting.
- Reduces Odors: The fermentation process minimizes unpleasant odors.
- Pre-Composts Food Waste: The Bokashi process breaks down food waste significantly, making it easier to compost further in a garden or compost pile.
- Produces Nutrient-Rich Leachate: The liquid that drains from the Bokashi bucket can be diluted and used as a fertilizer for plants.
Setting up a Bokashi Composting System:
Bokashi composting requires a special Bokashi bucket with an airtight lid and a spigot for draining the leachate.
- Obtain a Bokashi Bucket: Purchase a Bokashi bucket from a garden supply store or online retailer.
- Add Food Scraps: Place food scraps in the bucket, chopping them into smaller pieces to speed up the fermentation process.
- Sprinkle with Bokashi Bran: Sprinkle a generous amount of Bokashi bran over each layer of food scraps.
- Press Down and Seal: Press down on the food scraps to remove air pockets and seal the lid tightly.
- Drain Leachate Regularly: Drain the leachate every few days and dilute it with water (1:100 ratio) to use as a fertilizer.
- Ferment for 2-4 Weeks: Once the bucket is full, allow it to ferment for 2-4 weeks.
What to Compost in a Bokashi Bucket:
Virtually all food scraps can be composted using the Bokashi method, including:
- Fruit and vegetable scraps
- Meat and dairy products
- Bones
- Cooked foods
- Coffee grounds and tea bags
Finishing the Bokashi Compost:
After the fermentation process, the Bokashi compost needs to be further composted in a garden, compost pile, or trench. You can also bury it directly in the soil, away from plant roots. The pre-composted material will break down quickly, enriching the soil.
3. Electric Composters: Speeding Up the Process with Technology
Electric composters are countertop appliances that use heat, aeration, and sometimes microorganisms to rapidly decompose food waste. These devices offer a convenient and odor-free way to compost indoors, producing compost in a matter of hours or days.
How it works:
Electric composters typically have a chamber where food scraps are placed. The device heats the food waste, aerates it to promote decomposition, and may also add microorganisms to accelerate the process.
Benefits of Electric Composters:
- Rapid Composting: Produces compost in hours or days, compared to weeks or months with other methods.
- Odor-Free Operation: Electric composters are designed to minimize odors.
- Convenient and Easy to Use: Simply add food scraps and press a button.
- Reduces Volume of Food Waste: Significantly reduces the volume of food waste.
Choosing an Electric Composter:
Several electric composters are available on the market, with varying features and price points. Consider the following factors when choosing an electric composter:
- Capacity: Choose a composter with a capacity that meets your needs.
- Cycle Time: Consider the length of the composting cycle.
- Odor Control: Look for composters with effective odor control systems.
- Features: Some composters have additional features, such as automatic mixing or self-cleaning.
Using an Electric Composter:
Using an electric composter is typically straightforward:
- Add Food Scraps: Place food scraps in the composter chamber.
- Start the Cycle: Press the start button to begin the composting cycle.
- Remove the Compost: Once the cycle is complete, remove the composted material.
Limitations of Electric Composters:
While electric composters offer several advantages, they also have some limitations:
- Cost: Electric composters can be expensive.
- Energy Consumption: They consume electricity during the composting cycle.
- May Not Produce True Compost: Some electric composters produce a dried, processed material rather than true compost.
4. Traditional Compost Bins: A Simple and Time-Tested Approach
While often associated with outdoor composting, traditional compost bins can also be used indoors, especially in larger homes or garages. These bins rely on natural decomposition processes, requiring a balance of greens and browns and regular turning to maintain aeration.
How it works:
Food scraps and yard waste are layered in a compost bin, along with brown materials like dried leaves, shredded paper, or wood chips. Microorganisms break down the organic matter, creating compost.
Benefits of Traditional Compost Bins:
- Simple and Inexpensive: Compost bins are relatively inexpensive to purchase or build.
- Large Capacity: Can handle larger volumes of food waste and yard waste compared to other indoor methods.
- Produces High-Quality Compost: When properly maintained, traditional compost bins can produce excellent compost.
Setting up a Traditional Compost Bin Indoors:
To set up a traditional compost bin indoors, choose a well-ventilated location, such as a garage or basement.
- Choose a Bin: Select a compost bin with a lid and ventilation holes.
- Layer Greens and Browns: Layer food scraps (greens) with dried leaves, shredded paper, or wood chips (browns). Aim for a 1:1 or 2:1 ratio of browns to greens.
- Maintain Moisture: Keep the compost moist but not soggy. Water the pile as needed.
- Turn Regularly: Turn the compost pile regularly to aerate it and speed up decomposition.
Challenges of Traditional Compost Bins Indoors:
Traditional compost bins can be challenging to maintain indoors due to:
- Odor Potential: Can produce unpleasant odors if not properly managed.
- Pest Attraction: May attract fruit flies or other pests.
- Space Requirements: Requires more space than other indoor composting methods.
Tips for Successful Indoor Composting: A Comprehensive Guide
No matter which method you choose, these tips will help you achieve successful indoor composting:
1. Proper Ventilation: Preventing Odors and Promoting Decomposition
Adequate ventilation is crucial for preventing odors and promoting aerobic decomposition. Ensure that your compost bin or system has sufficient ventilation holes or is turned regularly to aerate the contents. 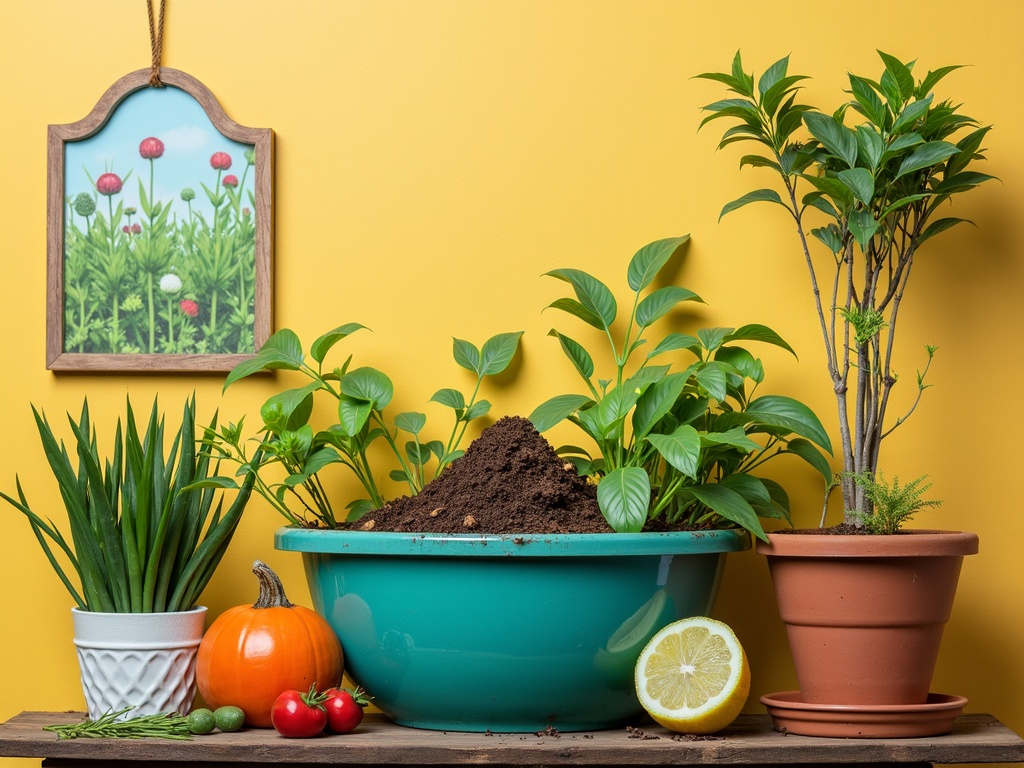
2. Moisture Control: Maintaining the Right Balance
Maintaining the right moisture level is essential for healthy composting. The compost should be damp like a wrung-out sponge. If it's too dry, add water. If it's too wet, add dry materials like shredded paper or wood chips.
3. The Greens and Browns Ratio: Creating a Balanced Ecosystem
The balance of greens (nitrogen-rich materials) and browns (carbon-rich materials) is critical for successful composting. Aim for a 1:1 or 2:1 ratio of browns to greens.
Greens:
- Fruit and vegetable scraps
- Coffee grounds and tea bags
- Grass clippings
Browns:
- Dried leaves
- Shredded paper
- Wood chips
- Sawdust
4. Managing Fruit Flies: Prevention and Control
Fruit flies are a common nuisance in indoor composting systems. Here are some tips for preventing and controlling fruit flies:
- Bury food scraps completely in the compost.
- Cover the compost bin with a tight-fitting lid.
- Use fruit fly traps (vinegar or soapy water).
- Keep the area around the compost bin clean.
5. Choosing the Right Location: Temperature and Accessibility
Choose a location for your compost bin that is easily accessible and has a stable temperature. Avoid placing the bin in direct sunlight or near heat sources.
6. Regular Maintenance: Monitoring and Adjusting
Regularly monitor your compost bin and adjust the moisture, aeration, and greens/browns ratio as needed.
Using Your Indoor Compost: Nourishing Your Plants
Once your compost is ready, it's time to use it to nourish your plants. Here are some ways to use your indoor compost:
- Potting Mix Amendment: Mix compost with potting soil to improve drainage, aeration, and nutrient content.
- Top Dressing: Sprinkle compost around the base of plants as a top dressing.
- Compost Tea: Brew compost tea by steeping compost in water. Use the tea to water your plants.
Troubleshooting Common Composting Problems
Even with careful planning, you may encounter some challenges during indoor composting. Here are some common problems and how to solve them:
- Odor: Ensure adequate ventilation, balance the greens and browns ratio, and bury food scraps completely.
- Slow Decomposition: Increase aeration, add more greens, and maintain the right moisture level.
- Fruit Flies: Follow the fruit fly prevention and control tips mentioned above.
- Mold: Mold is usually harmless, but you can reduce it by increasing aeration and reducing moisture.
Conclusion: Embrace the Power of Indoor Composting
Indoor composting offers a sustainable and rewarding way to reduce waste, enrich your plants, and connect with nature. By choosing the right method, following best practices, and troubleshooting common problems, you can successfully transform your kitchen scraps into valuable garden gold. So, take the plunge and embrace the power of indoor composting – your plants and the planet will thank you for it!