Preparing Your Greenhouse for Spring: A Comprehensive Guide
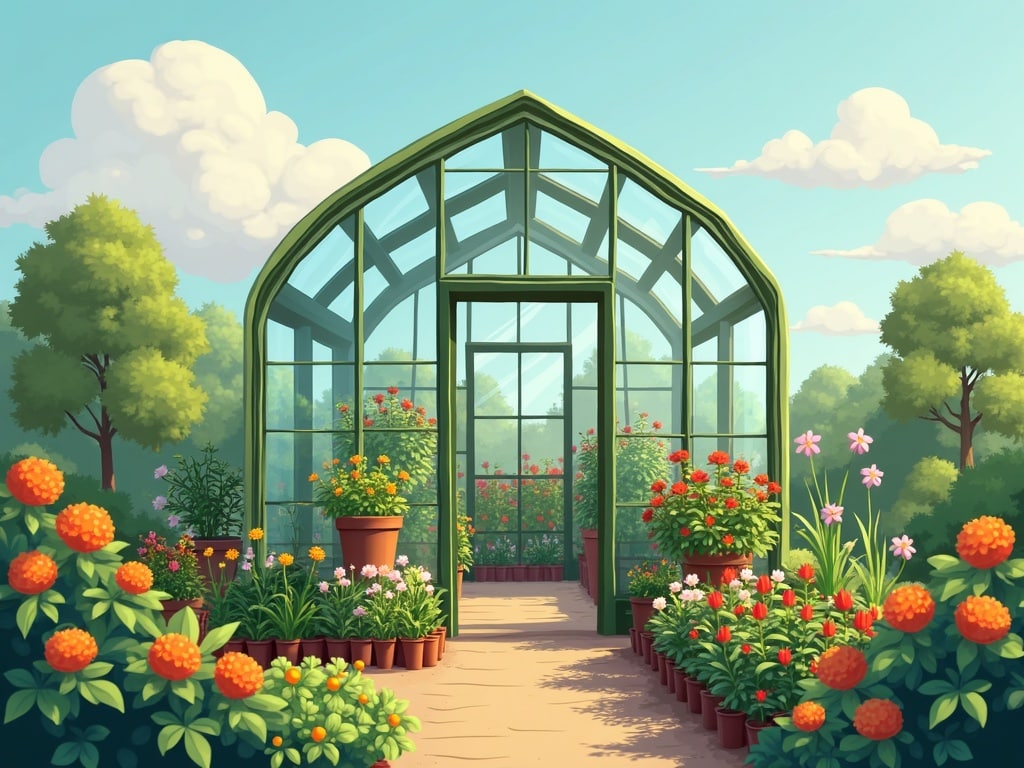
Imagine stepping into your greenhouse on a crisp spring morning, the air thick with the promise of new life. Sunlight streams through the glass, warming the soil and awakening dormant seeds. But this idyllic scene doesn't just happen; it's the result of careful preparation. Preparing your greenhouse for spring is crucial for a successful growing season, ensuring a healthy and productive environment for your plants. This guide will walk you through every step, from cleaning and repairs to soil preparation and pest control, so you can maximize your greenhouse potential.
Why Spring Greenhouse Preparation Matters
Skipping or skimping on spring preparation can lead to a host of problems down the line. Overwintering pests and diseases can quickly decimate your seedlings, while a dirty or damaged greenhouse can limit sunlight and hinder growth. Taking the time to thoroughly prepare your greenhouse ensures:
- Optimal Growing Conditions: A clean and well-maintained greenhouse provides the ideal environment for seedlings and plants to thrive.
- Pest and Disease Prevention: Eliminating overwintering pests and diseases before they have a chance to spread.
- Increased Productivity: Healthy plants translate to a bountiful harvest.
- Extended Greenhouse Lifespan: Regular maintenance prevents damage and prolongs the life of your greenhouse.
Step 1: The Deep Clean
The first step in preparing your greenhouse for spring is a thorough cleaning. This involves removing all debris, sanitizing surfaces, and ensuring proper ventilation.
Clearing Out the Clutter
**Remove all plants and pots:Even if some plants have survived the winter, it's best to remove them temporarily to allow for a complete cleaning. Discard any dead or diseased plant material.
**Sweep and vacuum:Remove all leaves, dirt, and debris from the floor, benches, and walls. A wet/dry vacuum can be particularly helpful for removing stubborn dirt.
**Wash surfaces:Use a mild detergent and water solution to wash all surfaces, including the glazing, benches, and walkways. Pay special attention to areas where algae or mold may have accumulated.
Sanitizing for a Healthy Start
Simply cleaning isn't enough; you also need to sanitize your greenhouse to kill any lingering pathogens.
**Choose a disinfectant:Several options are available, including bleach solutions (1 part bleach to 9 parts water), horticultural disinfectants, and even vinegar.
**Apply the disinfectant:Follow the manufacturer's instructions carefully, ensuring that all surfaces are thoroughly wetted.
**Rinse thoroughly:After the recommended contact time, rinse all surfaces with clean water to remove any disinfectant residue.
**Consider steam cleaning:For a deeper clean, consider using a steam cleaner to sanitize your greenhouse. The high temperature steam will kill most pathogens without the need for harsh chemicals.
Ventilation is Key
Proper ventilation is crucial for preventing the build-up of moisture and humidity, which can create an ideal environment for diseases.
**Open vents and doors:On a warm, sunny day, open all vents and doors to allow for maximum airflow.
**Check vent mechanisms:Ensure that all vents are functioning properly and can be easily opened and closed.
**Consider installing a fan:A circulating fan can help to improve airflow and prevent stagnant air pockets.
Step 2: Inspecting and Repairing the Structure
After cleaning, take the time to inspect your greenhouse for any damage or wear and tear. Addressing these issues early can prevent more significant problems later on.
Glazing Inspection and Repair
The glazing is the most important part of your greenhouse, as it allows sunlight to enter and traps heat.
Check for cracks and breaks: Carefully inspect all of the glazing panels for any cracks, chips, or breaks.
Replace damaged panels: Replace any damaged panels immediately to prevent heat loss and water leaks.
Seal any gaps: Use caulk or weather stripping to seal any gaps around the glazing to prevent drafts and heat loss.
Clean the glazing: Use a glass cleaner specifically designed for greenhouses to remove any dirt or algae buildup on the glazing. This will maximize the amount of sunlight that enters the greenhouse.
Frame Inspection and Repair
The frame provides the structural support for your greenhouse, so it's important to ensure that it's in good condition.
Check for rust or corrosion: Inspect the frame for any signs of rust or corrosion, especially at joints and connections.
Repair or replace damaged frame members: Repair any damaged frame members or replace them if necessary.
Tighten loose bolts and screws: Tighten any loose bolts or screws to ensure that the frame is stable.
Consider painting or staining: Painting or staining the frame can help to protect it from the elements and extend its lifespan.
Door and Vent Maintenance
Doors and vents are essential for controlling temperature and ventilation in your greenhouse.
Check hinges and latches: Ensure that all hinges and latches are functioning properly and are securely attached.
Lubricate moving parts: Lubricate any moving parts with a silicone-based lubricant to prevent sticking or binding.
Repair or replace damaged doors or vents: Repair any damaged doors or vents or replace them if necessary.
Ensure a tight seal: Ensure that doors and vents close tightly to prevent drafts and heat loss.
Step 3: Soil Preparation and Management
The soil in your greenhouse is the foundation for healthy plant growth. Preparing the soil properly is essential for providing plants with the nutrients and support they need.
Removing Old Soil
If you've been using the same soil in your greenhouse for several seasons, it's best to remove it and replace it with fresh soil.
Remove the top layer: Remove the top layer of soil (4-6 inches) and discard it. This layer is likely to be depleted of nutrients and may contain pests or diseases.
Consider solarizing the soil: If you're concerned about soilborne pathogens, you can solarize the soil by covering it with clear plastic for several weeks during the hottest part of the summer. The heat trapped under the plastic will kill most pathogens.
Amending and Improving Soil Structure
Whether you're using new soil or reusing existing soil, it's important to amend it to improve its structure and fertility.
Add compost: Compost is a great way to add organic matter to the soil, improving its drainage, aeration, and nutrient content.
Incorporate well-rotted manure: Well-rotted manure is another excellent source of organic matter and nutrients.
Add peat moss or coco coir: Peat moss or coco coir can help to improve the water retention of sandy soils.
Consider adding perlite or vermiculite: Perlite or vermiculite can help to improve the drainage and aeration of heavy clay soils.
Soil Testing and pH Adjustment
Before planting, it's a good idea to test your soil to determine its pH and nutrient content.
Use a soil testing kit: You can purchase a soil testing kit at most garden centers.
Send a sample to a lab: For a more detailed analysis, you can send a soil sample to a soil testing lab.
Adjust the pH if necessary: Most plants prefer a slightly acidic soil pH (6.0-7.0). If your soil is too acidic, you can add lime to raise the pH. If your soil is too alkaline, you can add sulfur to lower the pH.
Add fertilizer based on soil test results: Add fertilizer according to the recommendations of your soil test results.
Choosing the Right Soil Mix
The best soil mix for your greenhouse will depend on the types of plants you're growing.
Seed starting mix: A light, well-draining mix designed for starting seeds.
Potting mix: A general-purpose mix for growing plants in containers.
Raised bed mix: A mix designed for raised beds, typically containing a blend of topsoil, compost, and other amendments.
Step 4: Setting Up Irrigation and Watering Systems
Proper irrigation is crucial for providing plants with the water they need to thrive.
Inspecting Existing Systems
If you already have an irrigation system in place, it's important to inspect it before the growing season begins.
Check for leaks: Inspect all hoses, pipes, and connections for leaks.
Clean emitters and nozzles: Clean any clogged emitters or nozzles.
Test the system: Run the system to ensure that it's working properly and that all plants are receiving adequate water.
Choosing the Right Irrigation Method
Several different irrigation methods are available, each with its own advantages and disadvantages.
Drip irrigation: Delivers water directly to the roots of plants, minimizing water waste and reducing the risk of foliar diseases.
Overhead sprinklers: A convenient way to water a large area, but can lead to water waste and an increased risk of foliar diseases.
Hand watering: A good option for small greenhouses or for plants that require specific watering needs.
Maintaining Consistent Moisture Levels
Consistent moisture levels are crucial for healthy plant growth.
Water deeply and infrequently: Water thoroughly, allowing the soil to dry out slightly between waterings.
Monitor soil moisture: Use a soil moisture meter or your finger to check the moisture level of the soil.
Adjust watering based on weather conditions: Water more frequently during hot, dry weather and less frequently during cool, wet weather.
Step 5: Pest and Disease Prevention
Preventing pests and diseases is much easier than trying to control them once they've taken hold.
Identifying Potential Problems
Learn to identify the common pests and diseases that affect greenhouse plants.
Common pests: Aphids, whiteflies, spider mites, thrips, fungus gnats.
Common diseases: Powdery mildew, botrytis, damping-off.
Implementing Preventative Measures
Maintain good hygiene: Remove any dead or diseased plant material promptly.
Improve ventilation: Proper ventilation can help to prevent the build-up of humidity, which can promote disease.
Use disease-resistant varieties: Choose plant varieties that are resistant to common diseases.
Inspect plants regularly: Inspect your plants regularly for any signs of pests or diseases.
Organic Pest Control Methods
If you do find pests or diseases, try to control them using organic methods.
Insecticidal soap: Effective against aphids, whiteflies, and spider mites.
Neem oil: A broad-spectrum insecticide and fungicide.
Diatomaceous earth: A natural insecticide that kills pests by dehydrating them.
Beneficial insects: Introduce beneficial insects, such as ladybugs and lacewings, to prey on pests.
[externalLink]
Step 6: Optimizing Greenhouse Climate Control
Maintaining the ideal temperature and humidity levels is crucial for successful greenhouse growing.
Temperature Management
Heating: If you're starting plants early in the spring, you may need to provide supplemental heat.
Cooling: During hot weather, you'll need to provide cooling to prevent plants from overheating.
Ventilation: Proper ventilation is essential for regulating temperature and humidity.
Shading: Use shade cloth or whitewash to reduce the amount of sunlight entering the greenhouse during the hottest part of the day.
Humidity Control
Ventilation: Proper ventilation can help to reduce humidity levels.
Watering practices: Avoid overwatering, as this can increase humidity levels.
Humidifiers and dehumidifiers: Use humidifiers to increase humidity levels during dry weather and dehumidifiers to reduce humidity levels during humid weather.
Using Technology for Climate Control
Consider investing in technology to automate climate control in your greenhouse.
Thermostats: Use thermostats to automatically control heating and cooling systems.
Humidity sensors: Use humidity sensors to monitor humidity levels and control humidifiers and dehumidifiers.
Automated ventilation systems: Use automated ventilation systems to automatically open and close vents based on temperature and humidity levels.
Step 7: Planning Your Spring Planting Schedule
Once your greenhouse is clean, repaired, and ready to go, it's time to start planning your spring planting schedule.
Choosing the Right Plants
Consider your climate: Choose plants that are well-suited to your local climate.
Think about your space: Choose plants that will fit comfortably in your greenhouse.
Plan for succession planting: Plant a variety of crops that will mature at different times, ensuring a continuous harvest throughout the spring and summer.
Starting Seeds Indoors
Use a seed starting mix: Use a light, well-draining seed starting mix.
Provide adequate light: Provide seedlings with plenty of light, either from natural sunlight or grow lights.
Maintain consistent moisture: Keep the soil consistently moist, but not soggy.
Harden off seedlings before transplanting: Gradually acclimate seedlings to outdoor conditions before transplanting them into the greenhouse.
Transplanting Seedlings
Choose a cloudy day: Transplant seedlings on a cloudy day to minimize stress.
Water thoroughly: Water seedlings thoroughly after transplanting.
Provide support if needed: Provide seedlings with support if needed, such as stakes or trellises.
Step 8: Maintaining Your Greenhouse Throughout the Spring
Preparing your greenhouse for spring is just the first step. You'll also need to maintain it throughout the spring to ensure a successful growing season.
Regular Cleaning
Sweep and vacuum regularly: Remove any debris from the floor and benches.
Wash surfaces as needed: Wash surfaces with a mild detergent and water solution to remove any dirt or algae buildup.
Pest and Disease Monitoring
Inspect plants regularly: Inspect your plants regularly for any signs of pests or diseases.
Take action promptly: Take action promptly to control any pests or diseases that you find.
Watering and Fertilizing
Water deeply and infrequently: Water thoroughly, allowing the soil to dry out slightly between waterings.
Fertilize regularly: Fertilize plants regularly with a balanced fertilizer.
Ventilation and Climate Control
Monitor temperature and humidity: Monitor temperature and humidity levels regularly.
Adjust ventilation as needed: Adjust ventilation to maintain optimal temperature and humidity levels.
Provide shade during hot weather: Provide shade during hot weather to prevent plants from overheating.
Conclusion
Preparing your greenhouse for spring is an investment in a successful and rewarding growing season. By following these steps, you can create a healthy, productive environment for your plants and enjoy a bountiful harvest. So, get started today and watch your greenhouse flourish!