How to Dry Fresh Herbs at Home: A Comprehensive Guide
Imagine the intoxicating aroma of your own homegrown herbs filling your kitchen, not just during the growing season, but all year round. Drying fresh herbs at home is a simple, rewarding process that allows you to preserve the flavors of summer and elevate your culinary creations. From fragrant basil to robust rosemary, learn how to transform your garden's bounty into a pantry full of potent, flavorful seasonings.
Why Dry Your Own Herbs?
Before we dive into the *how*, let's explore the *why*. Why should you dedicate your time and effort to drying your own herbs when the supermarket shelves are lined with commercially dried options?
- Superior Flavor: Home-dried herbs retain more of their essential oils, resulting in a noticeably richer, more vibrant flavor compared to store-bought varieties, which can often be stale or overly processed.
- Cost Savings: Growing your own herbs and drying them yourself is significantly cheaper than constantly purchasing small jars of dried herbs from the store.
- Control and Quality: You have complete control over the entire process, from selecting the best herbs to ensuring they are dried properly and stored correctly. You know exactly what you're getting – no hidden additives or preservatives.
- Sustainable Practice: Drying your own herbs reduces your reliance on commercially produced, packaged goods, contributing to a more sustainable lifestyle.
- Gardening Satisfaction: It extends the joy of gardening. Seeing your herbs transformed into culinary staples adds another layer of satisfaction to the gardening experience.
Which Herbs are Best for Drying?
While almost any herb can be dried, some lend themselves to the process better than others. Herbs with higher essential oil content tend to retain their flavor more effectively when dried.
Here's a list of herbs that are particularly well-suited for drying:
- Mediterranean Herbs: Rosemary, thyme, oregano, sage, and savory. These herbs are naturally drought-tolerant and packed with flavor.
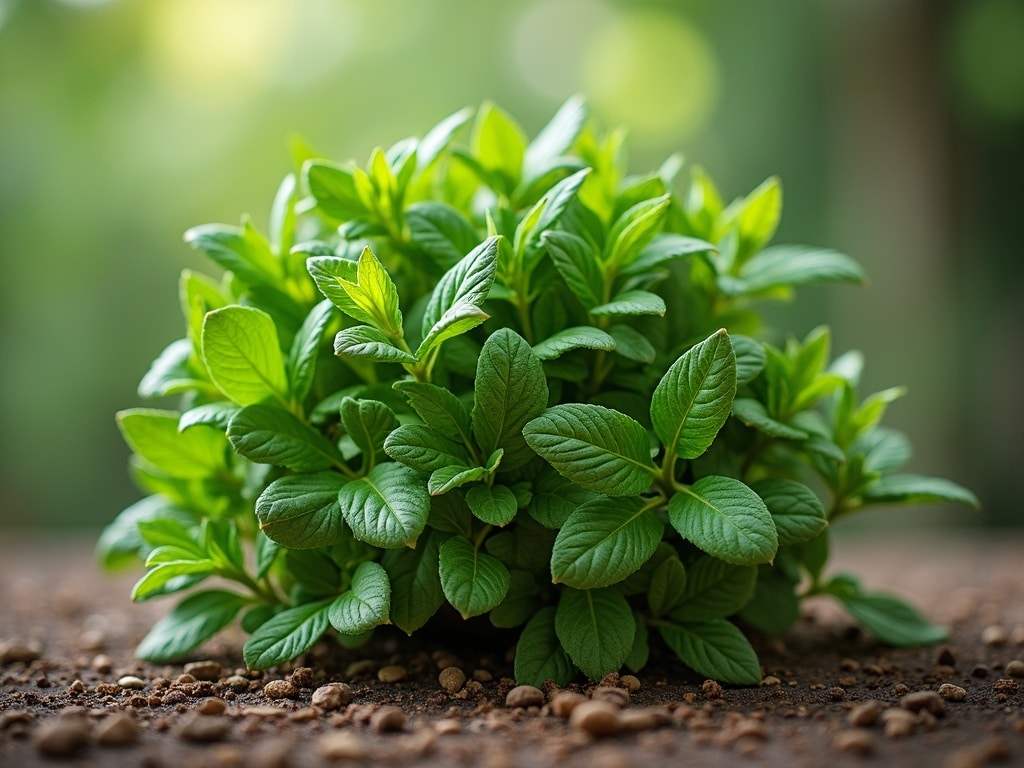
- Mint Family: Peppermint, spearmint, lemon balm, and catnip. These are best harvested before flowering to prevent a bitter taste.
- Bay Laurel: The leaves can be dried whole and added to soups, stews, and sauces.
- Parsley: Although it can lose some flavor, it's still worth drying if you have a surplus.
- Marjoram: Has a delicate, floral flavor that's intensified by drying.
- Lemon Verbena: Retains its bright, citrusy aroma beautifully.
Herbs with high moisture content, like basil, chives, and tarragon, can be more challenging to dry and may require special attention to prevent mold growth. However, with the right techniques, you can still successfully dry them.
Harvesting Herbs for Drying: Timing is Everything
The key to preserving the best flavor and aroma is to harvest your herbs at the optimal time. Here are some guidelines:
- Timing: Harvest herbs in the morning, after the dew has evaporated but before the heat of the day sets in. This is when the essential oils are most concentrated.
- Before Flowering: Ideally, harvest herbs just before they begin to flower. Once the plant starts to flower, it often diverts energy away from leaf production, and the flavor can become less intense or even bitter. Exceptions to this rule include herbs like chamomile and calendula, where the flowers themselves are the desired part to harvest.
- Healthy Foliage: Choose healthy, vibrant leaves that are free from blemishes, insect damage, or disease. Avoid harvesting wilted or discolored leaves.
- Gentle Handling: Handle herbs gently during harvest to avoid bruising or damaging the leaves. Use sharp scissors or pruning shears to cut the stems.
A Note on Second Harvests: Many herbs, especially annuals like basil and cilantro, can be harvested multiple times throughout the growing season. After harvesting, the plant will often produce new growth, allowing for a second or even third harvest. Be sure to fertilize lightly after each harvest to encourage new growth.
Preparation is Key: Cleaning and Sorting Your Herbs
Once you've harvested your herbs, it's important to prepare them properly for drying. This involves cleaning and sorting to remove any debris or damaged leaves.
- Gently Rinse: Rinse the herbs gently under cool running water to remove any dirt, dust, or insects. Avoid soaking them for extended periods, as this can leach out some of the essential oils.
- Remove Damaged Leaves: Carefully inspect the herbs and remove any leaves that are damaged, discolored, or diseased.
- Dry Thoroughly: Pat the herbs dry with a clean towel or use a salad spinner to remove excess water. It's crucial to remove as much moisture as possible before drying to prevent mold growth.
For herbs with larger leaves, like bay laurel, you can dry them individually. For herbs with smaller leaves, like thyme or rosemary, you can dry them in small bundles.
Methods for Drying Fresh Herbs: Choose Your Technique
There are several methods you can use to dry fresh herbs at home, each with its own advantages and disadvantages. The best method for you will depend on your climate, the type of herbs you're drying, and your personal preferences.
1. Air Drying: The Traditional Method
Air drying is the oldest and simplest method for drying herbs. It requires no special equipment and is ideal for herbs with low moisture content.
How to Air Dry Herbs:
- Bundle the Herbs: Gather small bunches of herbs (5-10 stems) and tie them together with twine or rubber bands. Make sure the bundles are not too thick, as this can prevent proper air circulation.
- Hang Upside Down: Hang the bundles upside down in a warm, dry, well-ventilated area. A dark location is preferable, as sunlight can fade the color and diminish the flavor of the herbs. Good options include an attic, a spare room, or even a closet (as long as it's well-ventilated).
- Protect from Dust: To protect the herbs from dust, you can cover the bundles with a paper bag with holes punched in it for air circulation.
- Drying Time: Air drying typically takes 1-3 weeks, depending on the humidity and temperature. The herbs are dry when the leaves crumble easily when touched.
Tips for Successful Air Drying:
- Ensure good air circulation to prevent mold growth.
- Avoid drying herbs in humid environments.
- Don't overcrowd the bundles.
- Check the herbs regularly for mold or mildew.
2. Oven Drying: A Faster Approach
Oven drying is a faster method than air drying, but it requires careful attention to temperature to prevent the herbs from burning or losing their flavor.
How to Oven Dry Herbs:
- Preheat Oven: Preheat your oven to the lowest possible temperature (ideally below 170°F or 77°C). If your oven doesn't go that low, prop the oven door open slightly to allow moisture to escape.
- Arrange Herbs: Spread the herbs in a single layer on a baking sheet lined with parchment paper.
- Drying Time: Dry the herbs in the oven for 2-4 hours, or until they are brittle and crumble easily. Check them frequently to prevent burning.
- Cool Completely: Allow the herbs to cool completely before storing them.
Tips for Successful Oven Drying:
- Use the lowest possible oven temperature.
- Monitor the herbs closely to prevent burning.
- Turn the herbs occasionally to ensure even drying.
- Leave the oven door slightly ajar to allow moisture to escape.
3. Dehydrator Drying: The Consistent Choice
A food dehydrator provides a controlled environment for drying herbs, resulting in consistent results and preserving more of their flavor and aroma.
How to Dehydrate Herbs:
- Arrange Herbs: Spread the herbs in a single layer on the dehydrator trays.
- Set Temperature: Set the dehydrator temperature to 95-115°F (35-46°C).
- Drying Time: Dehydrate the herbs for 2-4 hours, or until they are brittle and crumble easily.
- Cool Completely: Allow the herbs to cool completely before storing them.
Tips for Successful Dehydrator Drying:
- Don't overcrowd the dehydrator trays.
- Rotate the trays occasionally to ensure even drying.
- Check the herbs regularly for dryness.
4. Microwave Drying: The Quickest (But Riskiest) Method
Microwave drying is the fastest method, but it's also the trickiest, as it can easily burn the herbs or leave them with a cooked flavor.
How to Microwave Dry Herbs:
- Arrange Herbs: Place a single layer of herbs between two paper towels.
- Microwave in Short Bursts: Microwave on high for 30-60 seconds, then check for dryness. Repeat in 15-30 second intervals until the herbs are dry but not burned.
- Cool Completely: Allow the herbs to cool completely before storing them.
Tips for Successful Microwave Drying:
- Use short bursts of microwave time to prevent burning.
- Monitor the herbs very closely.
- Microwave drying is best suited for small quantities of herbs.
5. Using a Drying Rack: Simple and Effective
A simple drying rack can be created using a screen or mesh elevated off the ground. This method is similar to air drying and works well in dry climates.
How to Use a Drying Rack:
- Prepare the Rack: Cover a screen or mesh rack with cheesecloth or paper towels.
- Arrange Herbs: Spread the herbs in a single layer on the rack, ensuring good air circulation around each leaf.
- Drying Time: Place the rack in a warm, dry, well-ventilated area. Drying time will vary depending on humidity and temperature, but typically takes 1-3 weeks.
Signs That Your Herbs Are Properly Dried
Knowing when your herbs are properly dried is crucial for preserving their flavor and preventing mold growth. Here are some telltale signs:
- Crisp Texture: The leaves should be brittle and easily crumble when touched.
- No Soft Spots: There should be no soft or pliable spots on the leaves.
- Snap Test: Stems should snap cleanly when bent.
- Aromatic: The herbs should still have a strong, characteristic aroma.
Storing Your Dried Herbs: Maintaining Flavor and Potency
Proper storage is essential for maintaining the flavor and potency of your dried herbs. Here are some guidelines:
- Airtight Containers: Store dried herbs in airtight containers, such as glass jars or metal tins. Avoid plastic containers, as they can absorb the herbs' essential oils and affect their flavor.
- Dark and Cool: Store the containers in a dark, cool, and dry place, away from direct sunlight, heat, and humidity. A pantry, cupboard, or drawer is ideal.
- Whole or Crumbled: Store herbs whole whenever possible, as they will retain their flavor longer. Crumble them just before using.
- Label and Date: Label each container with the name of the herb and the date it was dried. This will help you keep track of your inventory and ensure you use the herbs while they are still fresh.
- Avoid Refrigeration: Do not store dried herbs in the refrigerator, as the humidity can cause them to lose their flavor and become moldy.
Shelf Life of Dried Herbs
While dried herbs don't technically expire, their flavor and potency will diminish over time. Properly stored dried herbs will generally retain their flavor for 1-3 years. After that, they may still be safe to use, but they will have lost much of their aromatic punch.
To test the freshness of your dried herbs, rub a small amount between your fingers. If the aroma is weak or nonexistent, it's time to replace them.
Using Your Home-Dried Herbs: Culinary Delights
Now that you've successfully dried and stored your herbs, it's time to put them to use in your culinary creations! Here are some ideas:
- Seasoning: Use dried herbs to season soups, stews, sauces, roasts, vegetables, and other dishes.
- Marinades: Add dried herbs to marinades for meats, poultry, and fish.
- Herb Blends: Create your own custom herb blends, such as Italian seasoning, Herbes de Provence, or poultry seasoning.
- Teas: Use dried herbs like peppermint, chamomile, and lemon balm to make herbal teas.
- Infused Oils and Vinegars: Infuse olive oil or vinegar with dried herbs to create flavorful condiments.
- Potpourri: Use fragrant dried herbs like lavender, rosemary, and thyme to make potpourri.
Remember that dried herbs have a more concentrated flavor than fresh herbs, so you'll need to use less. A general rule of thumb is to use about one-third the amount of dried herbs as you would fresh herbs.
Troubleshooting Common Drying Problems
Even with the best preparation, you might encounter some challenges when drying herbs. Here are some common problems and how to address them:
- Mold Growth: This is usually caused by insufficient air circulation or incomplete drying. Discard any moldy herbs and ensure better ventilation and thorough drying for future batches.
- Loss of Flavor: This can be caused by over-drying, exposure to sunlight, or improper storage. Use the lowest possible drying temperature and store herbs in airtight containers in a dark, cool place.
- Herbs Turning Brown: This is often a result of drying herbs at too high a temperature. Reduce the drying temperature and monitor the herbs closely.
- Insects: If you notice insects on your herbs, wash them thoroughly before drying. You can also try dipping them in a solution of water and a few drops of dish soap, then rinsing them well.
Beyond the Kitchen: Other Uses for Dried Herbs
Dried herbs aren't just for cooking! They can also be used for a variety of other purposes:
- Natural Cleaning Products: Infuse vinegar with herbs like lavender, rosemary, and thyme to create natural cleaning solutions. [externalLink insert]
- Aromatic Bath Products: Add dried herbs to bath salts, bath bombs, or herbal bath teas for a relaxing and fragrant soak.
- Insect Repellents: Certain herbs, like lavender, mint, and rosemary, can be used to repel insects. Place sachets of dried herbs in drawers, closets, or around the house.
- Craft Projects: Use dried herbs in craft projects like wreaths, potpourri, and herbal sachets.
- Pet Care: Some dried herbs, like chamomile and calendula, can be used to soothe irritated skin or promote healing in pets (consult with a veterinarian first).
Growing Your Own Herbs: The Ultimate Source
While this article focuses on drying herbs, the best way to ensure a constant supply of fresh, flavorful herbs is to grow your own! Even a small herb garden can provide you with an abundance of herbs for drying and cooking.
Consider growing a variety of herbs that you use frequently in your cooking. Choose a sunny location with well-drained soil. You can start herbs from seeds or purchase starter plants from a nursery.
With a little planning and effort, you can create a thriving herb garden that will provide you with fresh, flavorful herbs for years to come.
Experimenting with Different Herbs and Drying Techniques
Don't be afraid to experiment with different herbs and drying techniques to find what works best for you. Each herb has its own unique flavor and aroma, and each drying method will yield slightly different results.
Try drying different varieties of the same herb to see how their flavor profiles differ. For example, you could dry both Genovese basil and Thai basil to compare their flavors.
You can also experiment with different drying times and temperatures to see how they affect the flavor and aroma of the herbs.
A Final Word: Embrace the Process
Drying fresh herbs at home is a rewarding and enjoyable process. It connects you to the natural world, allows you to preserve the flavors of summer, and provides you with a pantry full of flavorful seasonings.
So, gather your herbs, choose your preferred drying method, and embrace the process. With a little patience and attention to detail, you can create a supply of home-dried herbs that will elevate your culinary creations and bring the vibrant flavors of your garden to your table year-round.