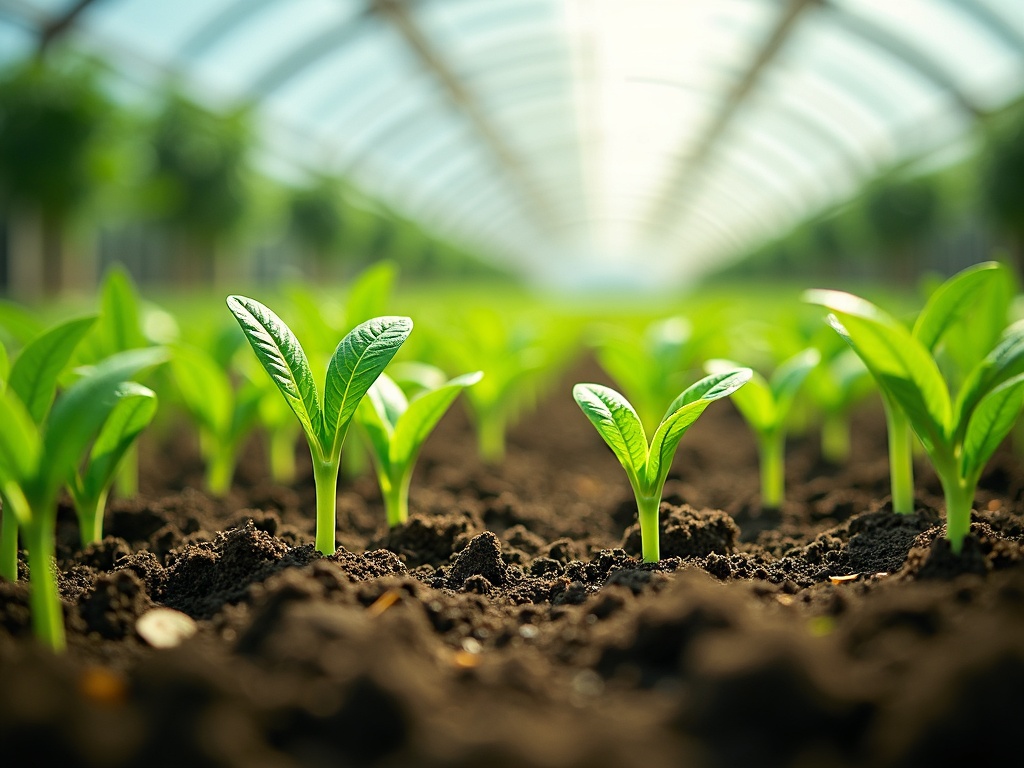
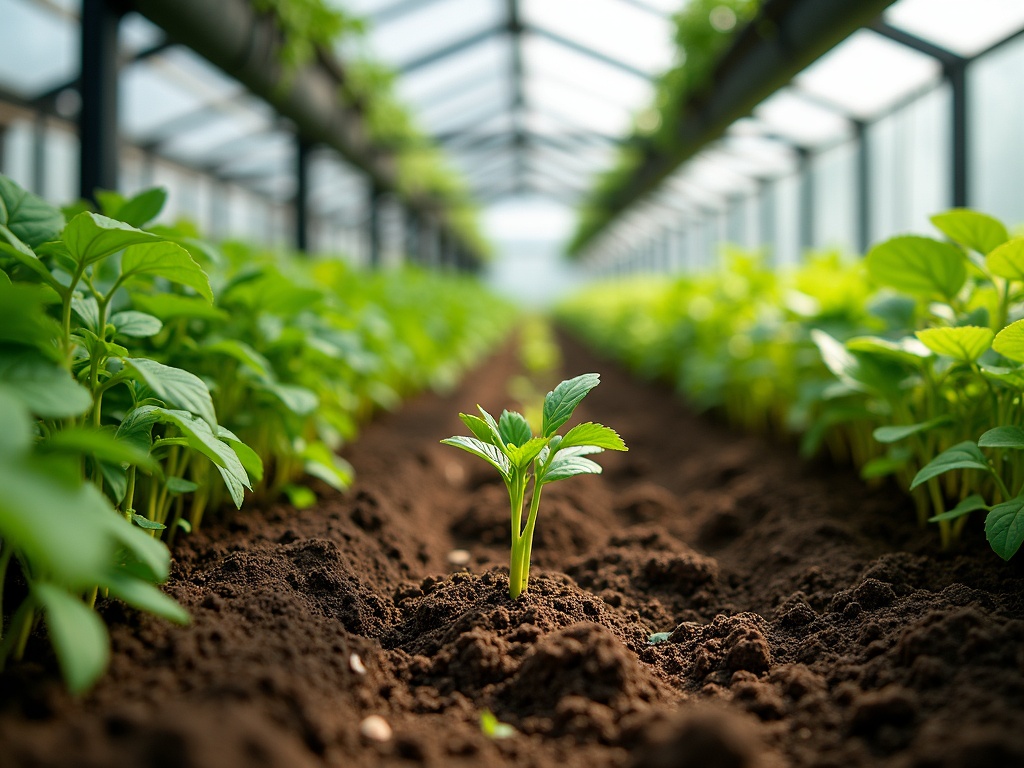
Starting Seeds in a Greenhouse: A Comprehensive Guide
Imagine stepping into a warm, humid greenhouse on a crisp spring morning, the air thick with the earthy scent of damp soil and nascent life. Rows of vibrant green seedlings stretch towards the sunlight, a promise of bountiful harvests to come. Starting seeds in a greenhouse offers a distinct advantage to gardeners, extending growing seasons and nurturing delicate plants in a controlled environment. This guide will walk you through every aspect of starting seeds in a greenhouse, from choosing the right structure to troubleshooting common problems.
Why Start Seeds in a Greenhouse?
Starting seeds indoors allows gardeners to get a jump start on the growing season, especially in regions with short summers. A greenhouse provides an even more controlled environment than a windowsill, offering several key benefits:
- Extended Growing Season: Greenhouses trap heat, allowing you to start seeds earlier in the spring and extend the growing season into the fall and winter.
- Controlled Environment: You can regulate temperature, humidity, and light levels, creating the ideal conditions for seed germination and seedling growth.
- Protection from Pests and Diseases: A greenhouse provides a barrier against many common garden pests and diseases.
- Improved Germination Rates: Consistent temperature and moisture levels lead to higher germination rates and healthier seedlings.
- Greater Variety: You can grow a wider variety of plants, including those that require a longer growing season or specific environmental conditions.
- Cost Savings: Starting your own seeds is generally cheaper than buying transplants from a nursery.
Choosing the Right Greenhouse for Seed Starting
The type of greenhouse you need will depend on your budget, space, and the types of plants you want to grow. Here's an overview of common greenhouse options:
Types of Greenhouses
- Cold Frames: These are simple, unheated structures that provide protection from frost and wind. They are ideal for hardening off seedlings or starting cool-season crops.
- Hoop Houses: These are constructed from arched hoops covered with plastic sheeting. They are relatively inexpensive and easy to build, providing a larger growing space than cold frames.
- Mini Greenhouses: These are small, often portable greenhouses, perfect for balconies or patios. They typically feature shelves and a zippered cover.
- Polycarbonate Greenhouses: These greenhouses have a rigid frame and are covered with polycarbonate panels, offering excellent insulation and light transmission.
- Glass Greenhouses: Glass greenhouses provide excellent light transmission and insulation but are more expensive and require a sturdier frame.
Factors to Consider When Choosing a Greenhouse
**Size:Consider the amount of space you have available and the number of plants you want to grow.
**Material:Choose a material that provides adequate light transmission and insulation. Polycarbonate and glass are excellent options, while plastic sheeting is more affordable but less durable.
**Ventilation:Adequate ventilation is crucial to prevent overheating and humidity buildup. Look for greenhouses with vents or consider installing a fan.
**Heating:If you plan to start seeds very early in the spring or grow year-round, you may need to invest in a greenhouse heater.
**Budget:Greenhouses range in price from a few hundred dollars for a small hoop house to several thousand dollars for a large, permanent structure.
Essential Equipment for Starting Seeds in a Greenhouse
In addition to a greenhouse, you'll need a few essential supplies to start seeds successfully:
- Seed Starting Trays or Pots: Choose trays or pots with drainage holes to prevent waterlogging.
- Seed Starting Mix: Use a sterile, soilless mix specifically formulated for seed starting. This will help prevent diseases and provide good drainage.
- Heat Mat: A heat mat provides bottom heat, which can significantly improve germination rates, especially for warm-weather crops.
- Grow Lights: Supplement natural light with grow lights, especially if your greenhouse is not located in a sunny area.
- Watering Can or Spray Bottle: Use a gentle watering can or spray bottle to avoid disturbing the seeds.
- Labels and Markers: Label your seeds clearly with the plant name and date of sowing.
- Thermometer and Hygrometer: Monitor temperature and humidity levels in your greenhouse to ensure optimal conditions.
- Seedling Heat Mat: These mats gently warm the soil, encouraging faster and more uniform germination.
- Humidity Dome: A clear plastic dome that fits over your seed starting tray to help maintain high humidity levels, which are crucial for germination
Choosing the Right Seeds
Selecting high-quality seeds is crucial for successful seed starting. Consider the following factors:
**Variety:Choose varieties that are well-suited to your climate and growing conditions.
**Freshness:Check the seed packet for the expiration date. Older seeds may have lower germination rates.
**Source:Purchase seeds from reputable seed companies that offer a wide selection of high-quality seeds.
**Organic:If you prefer organic gardening, choose certified organic seeds.
**Hybrid vs. Open-Pollinated:Hybrids often offer improved disease resistance and higher yields, while open-pollinated varieties produce seeds that can be saved and replanted.
Step-by-Step Guide to Starting Seeds in a Greenhouse
Here's a detailed guide to starting seeds in your greenhouse:
1. Prepare Your Seed Starting Area
Clean your greenhouse thoroughly to remove any debris or pests.
Set up your seed starting area with heat mats, grow lights, and a watering station.
Gather all your necessary supplies, including seed starting trays, seed starting mix, labels, and markers.
2. Sow Your Seeds
Moisten the seed starting mix thoroughly.
Fill the seed starting trays or pots with the moistened mix.
Follow the instructions on the seed packet for sowing depth and spacing. Generally, seeds should be planted at a depth equal to two to three times their diameter.
Gently cover the seeds with the seed starting mix.
Water the seeds gently with a watering can or spray bottle.
Label each tray or pot with the plant name and date of sowing.
3. Provide Optimal Germination Conditions
Place the seed starting trays on a heat mat to maintain a soil temperature of 70-75°F (21-24°C).
Cover the trays with a humidity dome or plastic wrap to maintain high humidity levels.
Place the trays under grow lights, providing 14-16 hours of light per day.
Monitor the temperature and humidity levels in your greenhouse and adjust as needed. Use the thermometer and hygrometer.
4. Monitor and Water Regularly
Check the seed starting trays daily and water as needed to keep the soil moist but not waterlogged.
Remove the humidity dome or plastic wrap once the seeds have germinated.
Ensure adequate ventilation to prevent fungal diseases.
Rotate the trays regularly to ensure that all seedlings receive equal light.
5. Thin Seedlings
Once the seedlings have emerged, thin them to one plant per cell or pot.
Use a small pair of scissors to snip off the weaker seedlings at the soil level.
Avoid pulling the seedlings, as this can damage the roots of the remaining plant.
6. Harden Off Seedlings
Before transplanting the seedlings outdoors, gradually acclimate them to outdoor conditions.
Start by placing the seedlings in a sheltered location outdoors for a few hours each day, gradually increasing the amount of time they spend outside.
Protect the seedlings from direct sunlight, wind, and frost.
7. Transplant Seedlings
Once the seedlings have been hardened off, they are ready to be transplanted into the garden or larger pots.
Choose a cloudy day or early evening to transplant the seedlings to minimize stress.
Dig a hole slightly larger than the root ball of the seedling.
Gently remove the seedling from the tray or pot and place it in the hole.
Backfill the hole with soil and water thoroughly.
Maintaining Optimal Greenhouse Conditions for Seedlings
Maintaining the right environment is crucial for healthy seedling development:
Temperature Control
Use a greenhouse heater to maintain a consistent temperature, especially during cold weather.
Ventilate the greenhouse on warm days to prevent overheating.
Use shade cloth to reduce the amount of sunlight entering the greenhouse during the hottest part of the day.
Humidity Control
Maintain high humidity levels during germination by using a humidity dome or plastic wrap.
Once the seeds have germinated, reduce humidity levels to prevent fungal diseases.
Ventilate the greenhouse regularly to reduce humidity.
Consider using a dehumidifier if humidity levels are consistently high.
### Light Management
Supplement natural light with grow lights, especially during cloudy weather or in greenhouses with limited sunlight.
Provide 14-16 hours of light per day for optimal seedling growth.
Adjust the height of the grow lights as the seedlings grow.
Troubleshooting Common Problems
Starting seeds in a greenhouse can be challenging. Here are some common problems and how to solve them:
**Damping Off:This fungal disease can cause seedlings to rot at the soil level. Prevent damping off by using sterile seed starting mix, providing adequate ventilation, and avoiding overwatering.
**Leggy Seedlings:Leggy seedlings are tall and spindly due to insufficient light. Provide more light by using grow lights or moving the seedlings to a sunnier location.
**Slow Germination:Slow germination can be caused by cold soil temperatures. Use a heat mat to maintain a soil temperature of 70-75°F (21-24°C).
**Pest Infestations:Greenhouses can be susceptible to pest infestations. Monitor your seedlings regularly and take action quickly if you notice any pests. Common greenhouse pests include aphids, whiteflies, and spider mites.
**Algae Growth:Algae can grow on the surface of the soil or seed starting mix. This is usually a sign of overwatering or poor drainage. Reduce watering and improve drainage to prevent algae growth. Consider using a fungicide if the algae growth is severe.
**Nutrient Deficiencies:Seedlings may develop nutrient deficiencies if the seed starting mix is not nutrient-rich or if they are not being fertilized. Use a seed starting mix that contains essential nutrients or fertilize the seedlings with a diluted solution of liquid fertilizer.
Choosing the Right Seed Starting Mix
The right seed starting mix is fundamental to germination and healthy seedling development. Unlike garden soil, which can be too heavy and contain pathogens, seed starting mixes are designed for optimal drainage, aeration, and moisture retention. Here's what to look for:
Key Components of a Good Seed Starting Mix:
**Peat Moss or Coco Coir**: These provide structure and help retain moisture. Coco coir is a sustainable alternative to peat moss, made from coconut husk fibers.
**Vermiculite**: This mineral enhances aeration and drainage while also retaining moisture and nutrients.
**Perlite**: A volcanic glass that greatly improves drainage and aeration, preventing soil compaction.
**Starter Nutrients**: Some mixes contain a small amount of slow-release fertilizer to provide initial nutrients to the seedlings.
DIY Seed Starting Mix Recipe
If you prefer to make your own mix, here’s a simple and effective recipe:
1 part peat moss or coco coir
1 part vermiculite
1 part perlite
Mix these components thoroughly before moistening and using to sow your seeds. You can also add a small amount of compost for added nutrients if desired, ensuring it is well-decomposed and free of pests or diseases.
Watering Strategies for Seedlings in a Greenhouse
Proper watering is an art. Overwatering can lead to damping-off and root rot, while underwatering can cause seedlings to dry out and die. Here's how to get it just right:
### Best Practices for Watering:
**Water Gently**: Use a watering can with a gentle rose head or a spray bottle to avoid disturbing the seeds and delicate seedlings.
**Water Consistently**: Keep the seed starting mix consistently moist but not waterlogged. The soil should feel damp to the touch.
**Water in the Morning**: This allows the foliage to dry out during the day, reducing the risk of fungal diseases.
**Bottom Watering**: Place the seed starting tray in a shallow tray of water and allow the mix to soak up the water from the bottom. This encourages roots to grow downward.
**Avoid Overwatering**: Check the moisture level of the soil before watering. If the soil is still moist, wait another day.
**Use Room Temperature Water**: Cold water can shock the seedlings.
**Consider a Watering Schedule**: Develop a schedule based on environmental factors like temperature, humidity, and the specific needs of your plants.
Fertilizing Seedlings in a Greenhouse
Once your seedlings have developed their first true leaves (the second set of leaves after the initial seed leaves), they will benefit from a weak fertilizer solution.
### Guidelines for Fertilizing:
**Use a Balanced Liquid Fertilizer**: Look for a fertilizer with equal parts of nitrogen, phosphorus, and potassium (e.g., 10-10-10).
**Dilute the Fertilizer**: Mix the fertilizer at half or even a quarter of the recommended strength. Seedlings are delicate and can be easily burned by too much fertilizer.
**Fertilize Regularly**: Fertilize every 1-2 weeks, or as needed.
**Water Before Fertilizing**: This helps prevent root burn.
**Monitor Your Seedlings**: Watch for signs of nutrient deficiencies, such as yellowing leaves or stunted growth.
**Organic Options**: Fish emulsion and seaweed extract are excellent organic options for fertilizing seedlings.
Hardening Off: Preparing Seedlings for the Outside World
Hardening off is the process of gradually acclimatizing your seedlings to outdoor conditions before transplanting them into the garden. This is a crucial step to prevent transplant shock, which can stunt their growth or even kill them.
### Steps for Hardening Off:
1. **Start Slowly**: Begin by placing your seedlings outside in a sheltered location for just a few hours each day. Choose a spot that is protected from direct sunlight and wind.
2. **Increase Exposure Gradually**: Over the course of a week or two, gradually increase the amount of time the seedlings spend outdoors each day. Also, slowly expose them to more sunlight and wind.
3. **Water Regularly**: Ensure the seedlings are watered well during the hardening off process.
4. **Monitor Weather Conditions**: Protect the seedlings from frost, heavy rain, and extreme temperatures.
5. **Bring Seedlings Inside If Necessary**: If the weather turns severe, bring the seedlings back inside.
6. **Avoid Fertilizing During Hardening Off**: Focus on acclimatization by avoiding fertilizer for a week before transplanting entirely.
Pest and Disease Management in a Greenhouse
While a greenhouse offers protection from many outdoor pests and diseases, it’s not immune to problems. Regular monitoring and preventative measures are essential.
### Strategies for Pest and Disease Control:
**Sanitation**: Keep your greenhouse clean and free of debris. Remove any dead leaves or plant material promptly.
**Ventilation**: Proper ventilation helps to reduce humidity and prevent fungal diseases.
**Monitoring**: Inspect your seedlings regularly for signs of pests or diseases.
**Organic Pest Control**: Use organic pest control methods, such as insecticidal soap, neem oil, or diatomaceous earth.
**Biological Control**: Introduce beneficial insects, such as ladybugs or lacewings, to control pests.
**Crop Rotation**: If you are growing multiple crops in your greenhouse, practice crop rotation to prevent the buildup of pests and diseases.
**Quarantine**: If you suspect a plant is infected, isolate it immediately.
**Avoid Overcrowding:Give your seedlings enough space to promote better air circulation and reduce conditions that favor quick spreading pests and diseases.
Extending the Growing Season with Greenhouse Seed Starting
One of the most significant advantages of starting seeds in a greenhouse is the ability to extend the growing season. Here's how you can maximize this benefit:
### Strategies for Season Extension:
**Start Seeds Early**: Begin sowing seeds indoors weeks or even months before the last expected frost.
**Use a Greenhouse Heater**: Maintain warm temperatures in the greenhouse, especially during cold nights.
**Provide Supplemental Lighting**: Use grow lights to extend the day length and promote faster growth.
**Choose Cold-Hardy Varieties**: Select plant varieties that are known to tolerate cooler temperatures.
**Protect Plants from Frost**: Cover your seedlings with frost blankets or row covers during cold snaps.
**Succession Planting**: Sow seeds in intervals to ensure a continuous harvest throughout the growing season.
The Future of Greenhouse Seed Starting
Advancements in technology and sustainable practices are continuously shaping the future of greenhouse seed starting. Here are a few trends to watch:
**Automation**: Automated systems for watering, fertilizing, and environmental control are becoming more common in greenhouses.
**LED Lighting**: Energy-efficient LED grow lights are replacing traditional lighting systems.
**Hydroponics and Aquaponics**: These soilless growing methods are gaining popularity in greenhouses.
**Data Analytics**: Sensors and data analytics tools are helping growers optimize greenhouse conditions and improve yields.
**Vertical Farming**: Stacked growing systems are maximizing space utilization in urban greenhouses.
**Sustainable Practices**: Growers are increasingly focused on using sustainable materials and practices to reduce their environmental impact.
Conclusion
Starting seeds in a greenhouse is a rewarding and effective way to get a head start on the growing season. By following the tips and techniques outlined in this comprehensive guide, you can create the ideal environment for seed germination and seedling growth. From choosing the right greenhouse and equipment to maintaining optimal conditions and troubleshooting common problems, you'll be well-equipped to nurture healthy, vibrant seedlings that will thrive in your garden. So, embrace the possibilities of greenhouse seed starting and unlock a world of gardening success!