How to Can Tomatoes: A Complete Step-by-Step Guide
Imagine holding a vibrant, sun-ripened tomato, bursting with juicy flavor, picked fresh from your garden. Now, picture capturing that peak-season taste and enjoying it all year round. Canning tomatoes allows you to do just that – preserve summer's bounty and savor its bright flavor in the depths of winter. This comprehensive guide will walk you through every step of the process, ensuring your canned tomatoes are safe, delicious, and a pantry staple you'll reach for again and again.
Why Can Tomatoes? Exploring the Benefits
Canning tomatoes is more than just a way to preserve food; it's a journey into self-sufficiency, flavor, and tradition. Here's why you should consider adding this skill to your kitchen repertoire:
- Preserve Peak Flavor: Capture the intense sweetness and acidity of ripe tomatoes at their prime. Store-bought canned tomatoes often lack the vibrancy of home-canned ones.
- Control Ingredients: You decide what goes into your jars – no added salt, sugar, or preservatives unless you choose to include them.
- Reduce Food Waste: Prevent your garden's harvest from going to waste by preserving the excess.
- Save Money: Home-canned tomatoes can be significantly cheaper than store-bought, especially if you grow your own.
- Enjoy Year-Round: Brighten up winter meals with the taste of summer. Think pasta sauces, stews, chili, and more.
- Connect with Tradition: Canning is a time-honored practice passed down through generations.
Understanding Tomato Acidity and Canning Safety
Before diving into the canning process, it's crucial to understand the role of acidity in food preservation. Tomatoes are considered a borderline high-acid food, meaning they require careful attention to ensure safe canning. Here's why:
- Botulism Risk: Clostridium botulinum is a dangerous bacterium that thrives in low-acid environments. If improperly canned, these bacteria can produce a deadly toxin that causes botulism.
- Acidity as a Defense: High acidity inhibits the growth of Clostridium botulinum. Therefore, maintaining the correct acidity level in your canned tomatoes is paramount to safety.
- Adding Acid: Because tomato acidity can vary depending on the variety and ripeness, it’s essential to add acid to every jar of home-canned tomatoes. This can be done by adding lemon juice, citric acid, or vinegar. The USDA recommends using bottled lemon juice for consistent acidity.
Important Safety Precautions
Canning involves working with high temperatures and potentially hazardous bacteria. Always follow these safety guidelines to protect yourself and your family:
- Use Approved Recipes: Only use canning recipes from reputable sources like the USDA, the National Center for Home Food Preservation, or your local extension office. Don't deviate from the instructions.
- Ensure Proper Headspace: Headspace refers to the empty space between the top of the food and the lid of the jar. Proper headspace allows for expansion during processing and helps create a vacuum seal.
- Proper Processing Time: Process jars for the recommended time based on your altitude and the recipe. Under-processing can lead to spoilage and botulism.
- Inspect Seals: After processing, check each jar to ensure it has properly sealed. The lid should be concave and not flex when pressed.
- Store Properly: Store canned goods in a cool, dark, and dry place.
- When in Doubt, Throw it Out: If you have any doubts about the safety of a jar of canned tomatoes (bulging lid, unusual odor, etc.), discard it immediately.
Essential Canning Equipment: Assembling Your Arsenal
To successfully can tomatoes, you'll need the right equipment. Here's a checklist of essential items:
- Water Bath Canner: A large pot with a rack to hold jars during processing. The pot should be deep enough to cover the jars with 1-2 inches of water.
- Canning Jars: Use specific canning jars, such as Ball or Kerr, designed to withstand the heat and pressure of canning. They are available in various sizes (pint, quart, etc.).
- Canning Lids and Rings: New, two-piece canning lids are essential for each batch. Rings can be reused if they are in good condition.
- Jar Lifter: A specialized tool for safely lifting hot jars from the canner.
- Wide-Mouth Funnel: Makes filling jars easier and prevents spills.
- Ladle: For transferring tomatoes into jars.
- Bubble Remover/Headspace Tool: A plastic or wooden tool for removing air bubbles from jars and measuring headspace. A thin spatula can work in a pinch.
- Kitchen Scale: For accurately measuring ingredients, especially if making tomato sauce or paste.
- Large Bowls: For washing, peeling, and chopping tomatoes.
- Sharp Knives: Essential for preparing the tomatoes.
- Clean Kitchen Towels: For wiping jars and cleaning up spills.
Selecting the Best Tomatoes for Canning
The quality of your canned tomatoes starts with the tomatoes themselves. Choose the right varieties and select them at the peak of ripeness for the best results:
- Variety Matters: Roma, San Marzano, and other paste-type tomatoes are excellent choices for canning due to their meaty texture, low water content, and fewer seeds. Slicing tomatoes can also be used, but they may require longer cooking times to thicken.
- Ripeness is Key: Choose tomatoes that are fully ripe, firm, and free from blemishes or bruises. Overripe tomatoes can be too acidic and have a mushy texture.
- Avoid Damaged Tomatoes: Do not use tomatoes from diseased or frost-damaged plants.
Step-by-Step Guide to Canning Tomatoes: Water Bath Method
This guide focuses on the water bath canning method, which is suitable for high-acid foods like tomatoes. Always follow tested and approved recipes. This example uses crushed tomatoes, but the principles apply to other forms as well.
- Prepare Your Equipment: Wash canning jars, lids, and rings in hot, soapy water. Rinse thoroughly. Place jars in the water bath canner and cover with water. Bring to a simmer (180°F) to sterilize the jars. Keep lids in a separate saucepan with simmering water.
- Prepare the Tomatoes: Wash tomatoes thoroughly. Remove the cores and any blemishes. There are several ways to remove tomato skins:
- Blanching: Score an X on the bottom of each tomato. Drop tomatoes into boiling water for 30-60 seconds, or until the skins start to loosen. Immediately transfer to an ice bath to stop the cooking process. The skins should slip off easily.
- Roasting: Roast tomatoes in a 400°F oven until the skins blister and blacken (about 20-30 minutes). Cool slightly and then peel off the skins. Roasting adds a delicious smoky flavor to the tomatoes.
- Crush the Tomatoes: Roughly chop the peeled tomatoes and place them in a large pot. You can use a food processor or blender, but don't over-process them; you want a chunky consistency.
- Cook the Tomatoes: Bring the crushed tomatoes to a simmer over medium heat. Cook for 5-10 minutes, stirring occasionally, to release their juices and start to break them down. Do not add any thickeners (like cornstarch) before canning.
- Add Acid: This is a crucial step for safety. Add bottled lemon juice or citric acid to each jar according to the recipe instructions. The USDA recommends the following:
- Pint Jars: 2 tablespoons bottled lemon juice or ½ teaspoon citric acid
- Quart Jars: 4 tablespoons bottled lemon juice or 1 teaspoon citric acid
You can also use 5% acidity vinegar, but it can alter the flavor of the tomatoes more noticeably. Use 4 tablespoons in Pint jars and 8 tablespoons in quart jars.
- Add Salt (Optional): Add salt to taste. A general guideline is ½ teaspoon per pint jar or 1 teaspoon per quart jar.
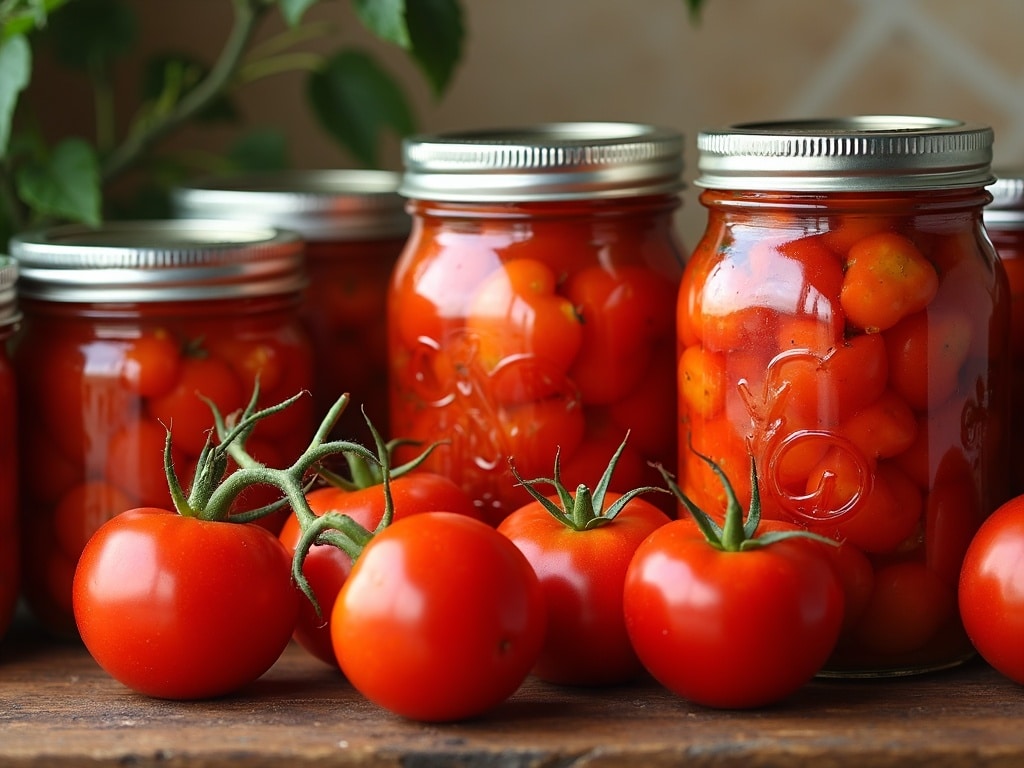
- Fill the Jars: Remove one jar at a time from the simmering water, emptying the water back into the canner. Place the jar on a towel on your counter. Using a wide-mouth funnel and ladle, fill the jar with hot crushed tomatoes, leaving 1/2 inch of headspace.
- Remove Air Bubbles: Insert a bubble remover or plastic spatula down the sides of the jar to release any trapped air bubbles. Gently tap the jar on the counter to encourage bubbles to rise.
- Adjust Headspace: If necessary, add more crushed tomatoes to achieve the correct 1/2 inch headspace.
- Wipe Jar Rims: Use a clean, damp cloth to wipe the rim of each jar. This ensures a good seal.
- Place Lids and Rings: Center a new canning lid on each jar. Screw on the ring fingertip-tight. Do not overtighten.
- Process in Water Bath Canner: Carefully lower the filled jars into the simmering water bath canner using a jar lifter. Ensure the jars are completely covered with at least 1-2 inches of water. Bring the water to a rolling boil.
- Process for the Correct Time: Process the jars for the recommended time based on your altitude and the jar size. Refer to a reliable canning recipe for specific processing times. General guidelines:
- Pint Jars: 85 minutes for 0-1,000 feet elevation, adjust accordingly with your altitude.
- Quart Jars: 85 minutes for 0-1,000 feet elevation, adjust accordingly with your altitude.
- Turn off the Heat and Cool: Once the processing time is complete, turn off the heat and remove the lid from the canner. Let the jars sit in the hot water for 5 minutes. This helps prevent siphoning.
- Remove Jars and Cool: Carefully remove the jars from the canner using a jar lifter and place them on a towel-lined surface, leaving space between the jars. Do not tighten the rings.
- Listen for the Pop: As the jars cool, you should hear a pop sound as the lids seal. This can take anywhere from a few minutes to several hours.
- Check the Seals: After 12-24 hours, check the seals. The lids should be concave and not flex when pressed in the center. If a lid hasn't sealed, you can reprocess the jar with a new lid within 24 hours, or refrigerate the tomatoes and use them within a week.
- Label and Store: Label each jar with the date and contents. Store in a cool, dark, and dry place. Properly canned tomatoes can last for 12-18 months.

Canning Tomato Variations: Whole, Diced, and Sauce
The basic canning process can be adapted to preserve tomatoes in various forms:
Whole Peeled Tomatoes
Follow the same steps as for crushed tomatoes, but keep the tomatoes whole after peeling. Pack them tightly into jars, leaving 1/2 inch of headspace. Add the recommended amount of lemon juice or citric acid and salt (optional). Process according to altitude and jar size as indicated in the guide above.
Diced Tomatoes
After peeling the tomatoes, dice them into small pieces. Follow the canning procedure as described previously for crushed tomatoes, ensuring consistent dice size for even heat distribution during processing. Add lemon juice or citric acid and salt (optional) as with crushed tomatoes and whole peeled tomatoes. Remember that diced tomatoes will take less time to soften than larger pieces, so watch them closely while cooking.
Tomato Sauce
To make tomato sauce, cook the crushed tomatoes for a longer period (30-60 minutes) to reduce the liquid and thicken the sauce. You can also use a food mill or blender to create a smoother consistency. Add any desired herbs or spices (basil, oregano, garlic) *beforecanning. Add the required acid as indicated above! Process using the same times as the other variations, keeping in mind that the density of sauces may increase processing times. Check a reputable canning recipe for specific sauce guidance.
Troubleshooting Common Canning Problems
Even with careful preparation, canning can present some challenges. Here are solutions to common problems:
- Siphoning (Liquid Loss): This occurs when liquid escapes from the jars during processing. Prevent siphoning by ensuring proper headspace, avoiding sudden temperature changes, and letting the jars sit in the canner for 5 minutes after processing before removing them.
- Lids Not Sealing: This can be caused by improper headspace, damaged jar rims, or worn-out lids. Always use new lids, ensure the jar rims are clean, and follow the recommended processing time. Reprocess unsealed jars with new lids within 24 hours, or refrigerate and use the contents within a week.
- Cloudy Liquid: This can be caused by hard water, starch from overripe tomatoes, or mineral deposits. It doesn't necessarily indicate spoilage, but it can affect the appearance of the tomatoes. Using filtered water and avoiding overripe tomatoes can help prevent cloudiness.
- Mold Growth: Mold indicates spoilage. Discard any jars with mold, even if the lid is sealed.
Creative Ways to Use Your Home-Canned Tomatoes
Once you've canned your tomatoes, the possibilities are endless. Here are just a few ideas:
- Pasta Sauce: The most obvious choice! Simmer with garlic, onions, herbs, and your favorite meat or vegetables.
- Soups and Stews: Add a rich tomato base to soups like minestrone, tomato soup, or hearty stews.
- Chili: Canned tomatoes are a staple ingredient in chili.
- Salsa: Use your canned tomatoes as a base for homemade salsa.
- Pizza Sauce: Blend or process your canned tomatoes for a quick and flavorful pizza sauce.
- Braised Dishes: Use crushed or whole canned tomatoes to braise meats like chicken, beef, or pork.
- Casseroles: Add to casseroles for flavor and moisture.
Beyond the Basics: Advanced Canning Techniques
Once you're comfortable with the basic water bath canning method, you can explore more advanced techniques:
Discover Proven Techniques to Preserve Your Food Year-Round and Enjoy Less Waste with More Freshness
- Pressure Canning: Although not necessary for plain tomatoes with added acid, if you wish to can tomato-vegetable mixtures (salsa, tomato soup, etc.) and are concerned about safe acidity levels of the final produce, pressure canning might be the best route if you are not sure about safe acidity levels. Pressure Canning MUST be done for any mixtures with low-acid foods such as meat.
- Adding Herbs and Spices: Experiment with different herbs and spices to create unique flavor combinations. Add them *beforecanning.
- Making Tomato Paste: Cook the tomatoes for a very long time until they reduce to a thick paste.
Resources for Further Learning
Canning is a skill that requires continuous learning and attention to detail. Here are some resources for further information:
- National Center for Home Food Preservation: A comprehensive resource for all things canning, with detailed instructions, recipes, and safety information.
- USDA Complete Guide to Home Canning: The official guide from the USDA, available online or in print.
- Your Local Extension Office: Offers workshops, classes, and personalized advice on canning.
- Reputable Canning Books: Look for canning books from trusted sources like Ball, Bernardin, or university extension services.
Embrace the Bounty: Start Canning Today!
Canning tomatoes is a rewarding experience that allows you to enjoy the taste of summer all year round. With careful preparation, attention to detail, and adherence to safety guidelines, you can create a pantry full of delicious and nutritious home-canned tomatoes. So gather your equipment, select your tomatoes, and embark on your canning adventure today!