DIY Rain Barrel from Garbage Can: A Comprehensive Guide
Imagine turning a discarded garbage can into a valuable resource – a rain barrel that can provide free water for your garden, reduce your water bill, and help conserve water. Building your own rain barrel is easier than you might think, and using a garbage can as the base makes it an affordable and eco-friendly project. This guide will walk you through every step, from selecting the right materials to installing and maintaining your DIY rain barrel.
Why Build a Rain Barrel?
Before we dive into the construction process, let's explore the compelling reasons to install a rain barrel.
Conserving Water
Rainwater harvesting is an excellent way to conserve water, especially during dry seasons or in regions with water restrictions. By collecting rainwater, you reduce your reliance on municipal water sources, contributing to a more sustainable environment.
Saving Money
Water bills can be surprisingly high, especially if you have a garden or lawn to water. Using a rain barrel for irrigation can significantly reduce your water consumption and lower your monthly expenses. Over time, the savings can add up substantially.
Environmentally Friendly
Rainwater is naturally soft and free from chemicals like chlorine and fluoride, which are often added to municipal water supplies. This makes it ideal for watering plants, as it doesn't contain substances that can harm delicate vegetation or alter soil pH.
Reducing Stormwater Runoff
Rain barrels help reduce stormwater runoff, which can contribute to erosion, pollution, and flooding. By capturing rainwater, you lessen the amount of water flowing into storm drains, helping to protect local waterways and ecosystems.
Easy to Build and Maintain
Building a rain barrel from a garbage can is a relatively simple and straightforward project, requiring basic tools and minimal technical expertise. Once installed, rain barrels are easy to maintain, ensuring a long-lasting and reliable water source.
Choosing the Right Garbage Can
The foundation of your DIY rain barrel is the garbage can, so selecting the right one is crucial. Here's what to consider:
Material
Plastic: Opt for a durable, UV-resistant plastic garbage can. Look for high-density polyethylene (HDPE), which is known for its strength and longevity. Avoid brittle or flimsy plastic, as it may crack or break under the weight of the water.
Metal: While less common, metal garbage cans can also be used. Ensure the can is rust-proof or coated to prevent corrosion. Metal cans can be heavier and more difficult to work with.
Size
The ideal size depends on your water needs and the available space. Common sizes range from 30 to 55 gallons. Consider the average rainfall in your area and the size of your garden when making your decision. A larger can will store more water but may be more challenging to handle and require a sturdier base.
Lid
A tight-fitting lid is essential to prevent debris, insects, and algae from entering the rain barrel. The lid should be secure enough to withstand wind and rain, but also easy to remove for cleaning and maintenance. Consider a lid that can be easily modified to accommodate the downspout.
Condition
If you're repurposing an old garbage can, ensure it's clean and free from any harmful chemicals or residues. Thoroughly scrub the can with soap and water, and rinse it well before starting the project. Avoid using cans that previously held toxic materials.
Materials and Tools You'll Need
Here's a comprehensive list of the materials and tools required to build your DIY rain barrel:
Materials
- Garbage can (plastic or rust-proof metal)
- Downspout diverter
- Spigot (brass or plastic)
- Bulkhead fitting (to connect the spigot to the barrel)
- Screen mesh (to filter debris)
- Silicone sealant (waterproof and UV-resistant)
- Drill with various drill bits
- Hole saw (matching the size of the bulkhead fitting)
- Measuring tape
- Pencil or marker
- Safety glasses
- Gloves
- Sandpaper (optional, for smoothing rough edges)
- PVC pipe and fittings (if needed to extend the downspout)
Tools
- Drill
- Hole saw
- Screwdriver
- Wrench (for tightening fittings)
- Utility knife or scissors (for cutting screen mesh)
- Caulk gun (for applying sealant)
Step-by-Step Instructions
Now, let's get to the fun part – building your rain barrel!
1. Prepare the Garbage Can
Start by cleaning the garbage can thoroughly with soap and water. Rinse it well and allow it to dry completely. If there are any rough edges or imperfections, use sandpaper to smooth them out.
2. Cut the Inlet Hole
Decide where you want to position the downspout diverter on the lid of the garbage can. Place the diverter on the lid and trace around it with a pencil or marker. Use a drill with a hole saw to carefully cut out the hole. Ensure the hole is slightly larger than the downspout diverter to allow for easy installation.
3. Install the Downspout Diverter
Insert the downspout diverter into the hole you just cut. Some diverters come with screws or clips to secure them in place. Follow the manufacturer's instructions for installation. If necessary, apply silicone sealant around the edges of the diverter to create a watertight seal.
4. Cut the Outlet Hole
Determine the location for the spigot on the lower part of the garbage can. The spigot should be positioned low enough to allow most of the water to drain but high enough to avoid sediment buildup at the bottom. Use a drill with a hole saw to cut a hole that matches the size of the bulkhead fitting.
5. Install the Bulkhead Fitting and Spigot
Insert the bulkhead fitting into the hole you just cut. The bulkhead fitting typically consists of two parts that screw together, sandwiching the wall of the garbage can between them. Tighten the fitting securely to create a watertight seal. Attach the spigot to the bulkhead fitting, ensuring it's properly aligned and tightened.
6. Install the Screen Mesh
Cut a piece of screen mesh that's slightly larger than the opening of the downspout diverter. This will prevent leaves, twigs, and other debris from entering the rain barrel. Secure the screen mesh to the underside of the lid using silicone sealant or by attaching it to the downspout diverter itself.
7. Seal All Connections
Carefully inspect all connections (downspout diverter, bulkhead fitting, spigot) and apply silicone sealant to any areas that may leak. Allow the sealant to dry completely according to the manufacturer's instructions.
8. Test for Leaks
Before installing the rain barrel, test it for leaks. Fill the barrel with water and check all connections for any signs of leakage. If you find any leaks, drain the barrel, dry the area, and apply more silicone sealant.
Installing Your Rain Barrel
With your rain barrel assembled and tested, it's time to install it in your desired location.
1. Choose a Location
Select a location that's close to a downspout and has a level, stable surface. Avoid placing the rain barrel directly on the ground, as this can cause it to sink or tip over. A concrete slab, wooden platform, or gravel bed can provide a solid foundation.
2. Prepare the Base
If necessary, level the ground and create a stable base for the rain barrel. Use gravel, paving stones, or a pre-made platform to provide a solid foundation. Ensure the base is large enough to support the weight of the filled rain barrel.
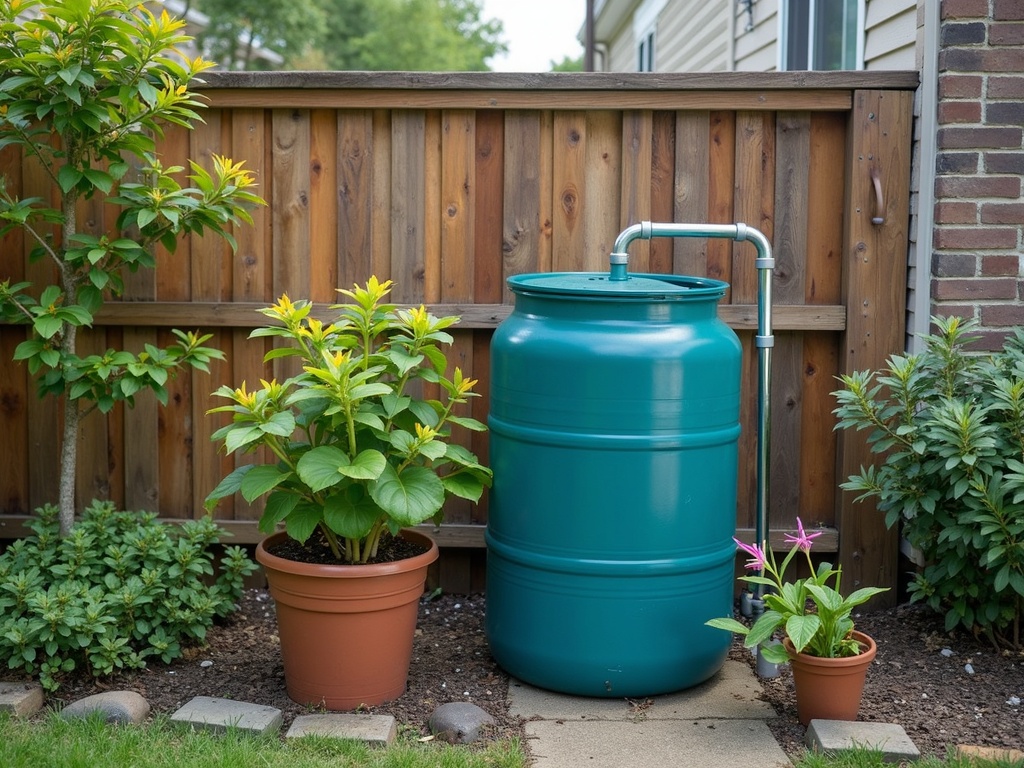
3. Connect the Downspout
Disconnect the downspout from the gutter and install the downspout diverter. Depending on the type of diverter, you may need to cut the downspout to the appropriate length. Follow the manufacturer's instructions for connecting the diverter to the downspout and the rain barrel.
4. Overflow Management
Consider how you will manage overflow water. Some downspout diverters have an overflow outlet that directs excess water away from the foundation. Alternatively, you can connect an overflow hose to the rain barrel and direct the water to a safe location, such as a garden bed or drainage ditch. It's important to prevent water from pooling near the foundation of your house.
5. Secure the Rain Barrel
To prevent the rain barrel from tipping over in strong winds, secure it to a nearby structure, such as a fence or wall. Use straps, ropes, or brackets to hold the barrel in place. Make sure the securing mechanism is strong enough to withstand the weight of the filled barrel and the forces of wind and weather.
Maintaining Your Rain Barrel
Proper maintenance is essential to ensure your rain barrel functions effectively and lasts for many years.
Regular Cleaning
Clean your rain barrel regularly to remove any accumulated debris, sediment, or algae. Drain the barrel completely and scrub the interior with a brush and soapy water. Rinse thoroughly and allow it to dry before refilling. Cleaning the barrel every few months will help prevent clogs and maintain water quality.
Inspect the Screen Mesh
Periodically inspect the screen mesh to ensure it's clean and intact. Remove any leaves, twigs, or debris that may have accumulated on the screen. Replace the screen mesh if it's damaged or worn.
Check for Leaks
Regularly check all connections (downspout diverter, bulkhead fitting, spigot) for leaks. If you find any leaks, repair them promptly by tightening the fittings or applying more silicone sealant.
Winterizing Your Rain Barrel
In cold climates, it's important to winterize your rain barrel to prevent damage from freezing temperatures. Drain the barrel completely before the first frost and disconnect it from the downspout. Store the barrel in a sheltered location, such as a garage or shed, to protect it from freezing and cracking. Alternatively, you can wrap the barrel with insulation to help prevent it from freezing.
Algae Control
Algae can grow in rain barrels, especially in sunny locations. To control algae growth, keep the barrel covered and out of direct sunlight as much as possible. You can also add a small amount of chlorine bleach (about 1/4 cup per 50 gallons of water) to the barrel to kill algae. However, be aware that chlorine can be harmful to some plants, so use caution when watering your garden.
Troubleshooting Common Issues
Here are some common issues you may encounter with your DIY rain barrel and how to address them:
Clogged Downspout Diverter
If the downspout diverter becomes clogged with leaves or debris, water may back up in the gutter and overflow. Clean the diverter regularly to prevent clogs. You may also consider installing a gutter guard to reduce the amount of debris entering the downspout.
Leaking Connections
Leaking connections are a common problem with rain barrels. Ensure all fittings are properly tightened and sealed with silicone sealant. If a connection continues to leak, disassemble it, clean the threads, and reapply sealant before reassembling.
Slow Water Flow
If the water flow from the spigot is slow, the barrel may be clogged with sediment or debris. Drain the barrel and clean the interior thoroughly. Also, check the spigot for any obstructions and remove them.
Mosquitoes
Mosquitoes can breed in standing water, so it's important to prevent them from entering your rain barrel. Ensure the screen mesh is securely in place to keep mosquitoes out. You can also add mosquito dunks (Bacillus thuringiensis israelensis or Bti) to the water to kill mosquito larvae.
Creative Ideas and Enhancements
Once you've built your basic rain barrel, you can customize it with various enhancements and creative ideas.
Multiple Rain Barrels
If you have a large garden or want to collect more rainwater, consider installing multiple rain barrels. Connect the barrels in series, so that when one barrel is full, the excess water flows into the next. This allows you to maximize your water storage capacity.
Rain Barrel Stands
Elevating your rain barrel on a stand can increase water pressure and make it easier to fill watering cans. You can build a simple wooden stand or purchase a pre-made stand from a garden supply store. Ensure the stand is sturdy enough to support the weight of the filled barrel.
Decorative Finishes
Make your rain barrel more aesthetically pleasing by adding decorative finishes. Paint the barrel with exterior-grade paint, add stencils or murals, or cover it with natural materials like bamboo or wood. Coordinate the design with your garden's overall theme and style.
Automatic Watering Systems
Connect your rain barrel to an automatic watering system to irrigate your garden while you're away. Use a timer and a soaker hose or drip irrigation system to deliver water directly to the plants. This can save you time and ensure your plants receive consistent moisture.
Rain Chains
Instead of a traditional downspout, consider using a rain chain to direct water from the gutter to the rain barrel. Rain chains are both functional and decorative, adding a touch of elegance to your home's exterior.
Conclusion
Building a DIY rain barrel from a garbage can is a rewarding project that can benefit both you and the environment. By following these steps, you can create a reliable source of free water for your garden, reduce your water bill, and help conserve precious resources. With a little effort and creativity, you can transform a discarded garbage can into a valuable asset that will add beauty and sustainability to your home.