Blanching Vegetables Before Freezing: A Comprehensive Guide
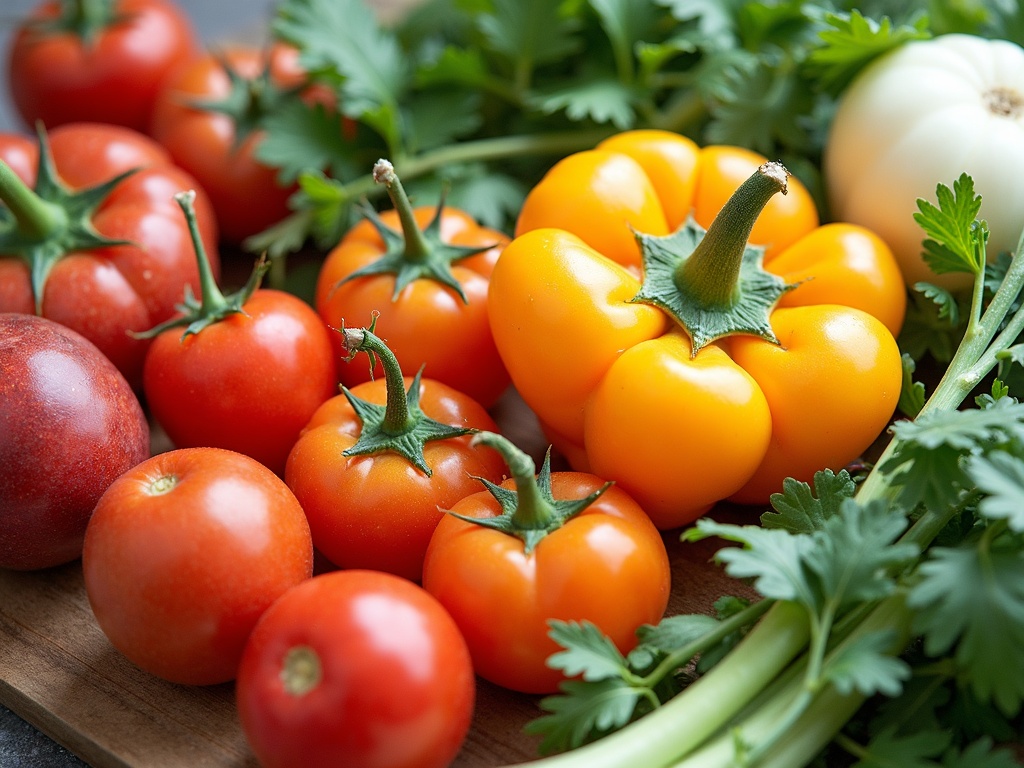
Imagine biting into a vibrant, crisp green bean in the dead of winter, a taste of summer sunshine on a frosty day. Freezing your garden's bounty, or those great deals discovered at the farmer's market allows you to enjoy seasonal produce year-round. But to truly preserve that fresh flavor, texture, and nutritional value, there's a crucial step you absolutely cannot skip: blanching.
Why Blanching is Essential for Freezing Vegetables
Blanching is a simple, yet vital, process that involves briefly plunging vegetables into boiling water or steam, followed by an immediate ice bath to halt the cooking process. It's not about fully cooking the vegetables; it's about preparing them for long-term freezer storage. So, what exactly does blanching accomplish?
Inactivating Enzymes: Stopping the Spoilage Process
Vegetables naturally contain enzymes that, even after harvesting, continue to function. These enzymes are responsible for ripening, changing flavor, and altering the color and texture of produce. Frozen vegetables that haven’t been blanched will continue to degrade, leading to mushy, discolored, and off-flavored results. Blanching deactivates these enzymes, effectively putting a pause on this degradation, preserving the quality of your frozen vegetables.
Cleaning and Brightening: Enhancing Appearance and Taste
Beyond enzyme inactivation, blanching offers additional benefits. It helps to clean the surface of the vegetables, removing dirt and microorganisms. It also intensifies the color of many vegetables, making them look more appealing both before and after freezing. This color enhancement is most noticeable in green vegetables like broccoli, spinach, and green beans, which become a brighter, more vibrant shade of green after blanching.
Wilting Vegetables: Preparing for Optimal Packaging
Certain leafy greens like spinach and kale can be quite bulky. Blanching helps to wilt these vegetables, reducing their volume and enabling you to pack them more efficiently for freezing. This saves valuable freezer space and allows for more uniform freezing.
The Science Behind Blanching: A Deeper Dive
To truly understand the importance of blanching, let's delve into the scientific processes at play.
Understanding Enzyme Activity
Enzymes are biological catalysts that speed up chemical reactions. In vegetables, they contribute to a variety of processes, including:
**Oxidation:This process causes browning and discoloration, particularly in cut surfaces of fruits and vegetables.
**Hydrolysis:This involves the breakdown of complex carbohydrates and proteins, leading to changes in texture and flavor.
**Softening of Cell Walls:Enzymes can degrade the cell walls of vegetables, resulting in a mushy or less crisp texture.
How Heat Impacts Enzymes
Heat effectively denatures enzymes, meaning it alters their structure and renders them inactive. Each enzyme has a specific temperature at which it denatures. Blanching provides enough heat to inactivate the majority of enzymes responsible for vegetable spoilage, without significantly cooking the vegetables.
The Importance of the Ice Bath: Stopping the Cooking Process
It's crucial to stop the cooking process immediately after blanching by plunging the vegetables into an ice bath. If the vegetables are left at room temperature, residual heat will continue to cook them, leading to a loss of crispness and a less desirable texture. The ice bath rapidly cools the vegetables, preventing overcooking and preserving their quality.
Blanching Methods: Water vs. Steam
There are two primary methods for blanching vegetables: water blanching and steam blanching. Both are effective, but each has its own advantages and disadvantages.
Water Blanching: The Most Common Method
Water blanching involves immersing vegetables in boiling water for a specific period.
**How to Water Blanch:**
1. **Prepare the Ice Bath:Fill a large bowl with ice water. Ensure you have enough ice to keep the water very cold.
2. **Bring Water to a Rolling Boil:Use a large pot and fill it with enough water to completely submerge the vegetables. Bring the water to a rapid, rolling boil.
3. **Blanch the Vegetables:Add the vegetables to the boiling water in small batches so as not to lower the temperature of the water too much. Start timing immediately after adding the vegetables.
4. **Remove and Cool:Once the blanching time is up, immediately remove the vegetables from the boiling water using a slotted spoon or blanching basket. Plunge them into the ice bath.
5. **Cool Completely:Allow the vegetables to cool completely in the ice bath, usually for the same amount of time as the blanching time or slightly longer.
6. **Drain and Dry:Once cooled, drain the vegetables thoroughly and pat them dry with paper towels. This helps to prevent ice crystals from forming during freezing.
**Advantages of Water Blanching:**
**Faster Heating:Water blanching generally heats vegetables more quickly than steam blanching.
**More Uniform Heating:The vegetables are completely submerged in water, ensuring more even heating.
**Disadvantages of Water Blanching:**
**Nutrient Loss:Some water-soluble vitamins and minerals can be leached out into the blanching water.
**Waterlogged Texture:If not properly drained and dried, vegetables can become waterlogged and mushy.
Steam Blanching: A More Gentle Approach
Steam blanching involves cooking vegetables with steam rather than immersing them in boiling water.
**How to Steam Blanch:**
1. **Prepare the Steamer:Use a steamer basket placed inside a pot with a tight-fitting lid. Add enough water to the pot so that it reaches just below the bottom of the steamer basket.
2. **Bring Water to a Boil:Bring the water to a rapid boil.
3. **Steam the Vegetables:Place the vegetables in the steamer basket in a single layer. Cover the pot tightly and steam for the recommended time.
4. **Remove and Cool:Once the blanching time is up, immediately remove the vegetables from the steamer basket and plunge them into the ice bath.
5. **Cool Completely:Allow the vegetables to cool completely in the ice bath, usually for the same amount of time as the blanching time or slightly longer.
6. **Drain and Dry:Once cooled, drain the vegetables thoroughly and pat them dry with paper towels.
**Advantages of Steam Blanching:**
**Less Nutrient Loss:Steam blanching retains more water-soluble vitamins and minerals than water blanching because the vegetables don't come into direct contact with boiling water.
**Better Texture:Steam blanching can result in a slightly crisper texture compared to water blanching.
**Disadvantages of Steam Blanching:**
**Slower Heating:Steam blanching generally takes longer than water blanching.
**Uneven Heating:It can be more difficult to ensure even heating with steam blanching, especially if the vegetables are not arranged in a single layer.
Choosing the Right Method
The best blanching method depends on the type of vegetable.
**Water blanching is generally recommended for:Broccoli, carrots, green beans, peas, and other dense vegetables.
**Steam blanching is recommended for:Leafy greens like spinach and kale, as well as delicate vegetables like asparagus.
Blanching Times for Common Vegetables: A Quick Reference Guide
Blanching times vary depending on the type and size of the vegetable. Over-blanching can result in mushy vegetables, while under-blanching can lead to enzyme activity and spoilage. The following table provides a general guide to blanching times for common vegetables.
**Important Note:These times are approximate and may need to be adjusted based on the size and maturity of the vegetables.
| Vegetable | Preparation | Water Blanching Time (minutes) | Steam Blanching Time (minutes) |
| —————- | —————————————– | ——————————- | —————————— |
| Asparagus | Trimmed to desired length | 2-4 | 3-5 |
| Green Beans | Trimmed and snapped or cut | 2-3 | 3-4 |
| Broccoli | Cut into florets | 3 | 5 |
| Brussels Sprouts | Trimmed and halved or quartered (large) | 3-5 | 5-7 |
| Carrots | Peeled and sliced or diced | 2-3 | 3-5 |
| Cauliflower | Cut into florets | 3 | 5 |
| Corn (on the cob) | Husked and silked | 7-11 | 8-12 |
| Green Peas | Shelled | 1-2 | 2-3 |
| Kale | Washed and chopped | 2 | 3 |
| Spinach | Washed | 1-2 | 2-3 |
| Summer Squash | Sliced or diced | 3 | 4 |
| Winter Squash | Peeled, seeded, and cubed | 3 | 5 |
Step-by-Step Guide: Blanching Vegetables Like a Pro
Now that you understand the theory and methods, let's walk through a detailed guide to blanching vegetables, ensuring perfect results every time.
1. Selecting and Preparing Your Vegetables
**Choose Fresh, High-Quality Vegetables:Start with the freshest, highest-quality vegetables you can find. Avoid vegetables that are bruised, wilted, or show signs of spoilage.
**Wash Thoroughly:Wash the vegetables thoroughly under cold running water to remove any dirt or debris.
**Prepare the Vegetables:Prepare the vegetables according to the specific type. This may involve trimming, peeling, slicing, dicing, or cutting into florets. Ensure the pieces are uniform in size for even blanching.
2. Gathering Your Equipment
**Large Pot:You'll need a large pot, preferably with a capacity of at least 6 quarts, for water blanching. For steam blanching, choose a pot that can accommodate a steamer basket.
**Steamer Basket (for Steam Blanching):A steamer basket that fits snugly inside your pot is essential for steam blanching.
**Large Bowl:A large bowl is needed for the ice bath.
**Ice:You'll need plenty of ice to create an effective ice bath.
**Slotted Spoon or Blanching Basket:A slotted spoon or blanching basket is used to transfer the vegetables from the boiling water or steamer to the ice bath.
**Timer:A timer is crucial for accurately timing the blanching process.
**Paper Towels:Paper towels are used to dry the vegetables after the ice bath.
**Freezer Bags or Containers:Use freezer-safe bags or containers to store the blanched vegetables in the freezer.
3. Blanching Process: Water Blanching
1. **Prepare the Ice Bath:Fill a large bowl with ice and water. Use plenty of ice to ensure the water remains very cold.
2. **Bring Water to a Rolling Boil:Fill the large pot with water, leaving enough space to add the vegetables without overflowing. Bring the water to a rapid, rolling boil.
3. **Add Vegetables in Small Batches:Add the prepared vegetables to the boiling water in small batches. Adding too many vegetables at once will lower the temperature of the water and affect the blanching time.
4. **Start Timing Immediately:As soon as you add the vegetables to the boiling water, start the timer.
5. **Maintain a Rolling Boil:Ensure the water returns to a rolling boil as quickly as possible after adding the vegetables.
6. **Blanch for the Recommended Time:Blanch the vegetables for the recommended time according to the blanching chart.
7. **Remove and Cool:Immediately remove the vegetables from the boiling water using a slotted spoon or blanching basket and plunge them into the ice bath.
8. **Cool Completely:Allow the vegetables to cool completely in the ice bath for the same amount of time as the blanching time, or slightly longer. The vegetables should be cool to the touch.
9. **Drain and Dry:Once cooled, drain the vegetables thoroughly and pat them dry with paper towels. This helps to prevent ice crystals from forming during freezing.
Discover Proven Techniques to Preserve Your Food Year-Round and Enjoy Less Waste with More Freshness
4. Blanching Process: Steam Blanching
1. **Prepare the Steamer:Place the steamer basket inside the pot. Add enough water to the pot so that it reaches just below the bottom of the steamer basket.
2. **Bring Water to a Boil:Bring the water to a rapid boil.
3. **Place Vegetables in Steamer Basket:Arrange the prepared vegetables in the steamer basket in a single layer. Avoid overcrowding the basket to ensure even steaming.
4. **Cover and Steam:Cover the pot tightly with a lid.
5. **Start Timing Immediately:As soon as the pot is covered, start the timer.
6. **Steam for the Recommended Time:Steam the vegetables for the recommended time according to the blanching chart.
7. **Remove and Cool:Immediately remove the vegetables from the steamer basket and plunge them into the ice bath.
8. **Cool Completely:Allow the vegetables to cool completely in the ice bath for the same amount of time as the blanching time, or slightly longer. The vegetables should be cool to the touch.
9. **Drain and Dry:Once cooled, drain the vegetables thoroughly and pat them dry with paper towels.
5. Packaging and Freezing
1. **Portion the Vegetables:Divide the blanched and dried vegetables into portions that are convenient for your needs.
2. **Pack into Freezer Bags or Containers:Pack the vegetables into freezer-safe bags or containers.
3. **Remove Air:Remove as much air as possible from the bags or containers. For freezer bags, you can use the water displacement method: seal the bag almost completely, then submerge the bottom of the bag in water, allowing the air to escape. Seal the bag completely before removing it from the water.
4. **Label and Date:Label each bag or container with the name of the vegetable and the date of freezing. This will help you keep track of your frozen produce.
5. **Freeze Quickly:Place the bags or containers in the freezer in a single layer. This will help them freeze quickly. Avoid placing warm items next to the vegetables, as this can slow down the freezing process.
6. **Store Properly:Once the vegetables are frozen solid, you can stack them in the freezer. Properly blanched and frozen vegetables can be stored for 8-12 months.
Troubleshooting Common Blanching Problems
Even with careful attention to detail, you may encounter some problems during the blanching process. Here's how to troubleshoot some common issues:
**Vegetables are Mushy:This is usually caused by over-blanching. Reduce the blanching time in future batches.
**Vegetables are Discolored:This could be due to under-blanching or improper storage. Ensure you are blanching for the correct amount of time and that you are removing as much air as possible from the freezer bags or containers.
**Vegetables are Waterlogged:This is caused by not draining and drying the vegetables thoroughly after the ice bath. Be sure to pat the vegetables dry with paper towels before packaging and freezing.
**Water Doesn't Return to a Boil Quickly:You may be adding too many vegetables at once. Blanch in smaller batches to maintain a consistent boiling temperature.
Beyond the Basics: Advanced Blanching Tips and Techniques
Ready to take your blanching skills to the next level? Here are some advanced tips and techniques:
**Blanching in a Microwave:While not as common, some vegetables can be blanched in the microwave. This method can be faster, but it's important to monitor the vegetables closely to prevent overcooking.
**Blanching with Salt:Adding a small amount of salt to the blanching water can help to preserve the color and flavor of some vegetables.
**Using a Blanching Basket:A blanching basket makes it easier to transfer the vegetables from the boiling water to the ice bath quickly and efficiently.
**Shocking Vegetables for Salads:Blanching can also be used to shock vegetables for salads. This involves briefly blanching the vegetables to soften them slightly and enhance their color.
**Combining Blanching and Roasting:For some vegetables, like Brussels sprouts, you can combine blanching and roasting for a delicious and easy side dish. Blanch the Brussels sprouts first, then roast them in the oven with olive oil and seasonings.
Frequently Asked Questions About Blanching
**Can I skip blanching and just freeze my vegetables?While you *canfreeze vegetables without blanching, it's not recommended. Unblanched vegetables will lose quality and flavor over time.
**Does blanching remove all the nutrients from vegetables?While some nutrients are lost during blanching, the amount is relatively small. The benefits of blanching in terms of preserving quality and flavor far outweigh the slight nutrient loss.
**Can I use the same blanching water for multiple batches of vegetables?Yes, you can reuse the blanching water for multiple batches of the same type of vegetable. However, you may need to add more water if it evaporates. Be sure to discard the blanching water if it becomes cloudy or discolored.
**How long can I store blanched and frozen vegetables?Properly blanched and frozen vegetables can be stored for 8-12 months.
Conclusion: Blanching – Your Key to Freezer Success
Blanching vegetables before freezing is an essential step for preserving their flavor, texture, color, and nutritional value. While it might seem like an extra step, the benefits far outweigh the effort. By following the guidelines and tips outlined in this comprehensive guide, you can confidently blanch your favorite vegetables and enjoy the taste of summer all year round. So, grab your veggies, fire up your pot, and get blanching! Your future self will thank you.