Want to add some super fresh crunch to your meals? Growing bean sprouts at home is surprisingly easy and a great way to have healthy greens on hand. Forget those sad, wilted sprouts from the grocery store. We're going to walk through how to get your own sprouts going, from picking the best beans to enjoying the fruits of your labor. It’s a simple process that really pays off in freshness and flavor.
Key Takeaways
- Choosing the right type of beans is the first step to successful sprouting.
- Gathering basic supplies like a jar and cheesecloth makes the process smooth.
- Regular rinsing and good airflow are key to healthy bean sprouts at home.
- Knowing when your sprouts are ready and how to harvest them is important.
- Homegrown bean sprouts can be used in countless delicious and healthy ways.
Getting Started With Your Bean Sprouts At Home
Hey there, future sprout grower! It's super exciting that you're looking to bring some fresh, crunchy goodness right into your kitchen. Growing your own bean sprouts is surprisingly easy and incredibly rewarding. Forget those sad, wilted sprouts you sometimes find at the store; we're talking about vibrant, lively sprouts that you grew yourself! It’s a fantastic way to add a burst of freshness and nutrition to your meals without much fuss. Let's get you set up for success with just a few simple steps. You'll be amazed at how quickly you can go from beans in a jar to delicious sprouts on your plate. It’s a little bit of magic happening right on your countertop, and you’re the magician! Ready to start this fun journey? It’s easier than you think, and the results are totally worth it. Let's get those beans sprouting!
Choosing The Right Beans
Not all beans are created equal when it comes to sprouting, but thankfully, the most common and easiest ones to find are perfect for this. Mung beans are the superstars of the sprouting world – they grow fast, are super reliable, and have that classic crisp texture everyone loves. You can usually find them in the bulk bin section of your grocery store or health food store. Just make sure they look plump and healthy, not shriveled or dusty. Other great options include adzuki beans, lentils (though they tend to be a bit smaller and more delicate), and even chickpeas if you’re feeling adventurous! For beginners, though, sticking with mung beans is a really safe bet. They’re forgiving and give you that satisfying, quick win that’ll make you want to sprout more.
Gathering Your Growing Supplies
Honestly, you don't need a whole lot to get started, which is part of the charm! The most important thing is a container to hold your beans while they sprout. A simple glass jar, like a quart-sized mason jar, works perfectly. You'll also need something to cover the jar opening that allows air in but keeps little critters out – a piece of cheesecloth or a fine-mesh strainer secured with a rubber band is ideal. If you don't have cheesecloth, a clean piece of fabric or even a paper towel can work in a pinch, though you might need to be more careful when rinsing. Some people also like to use a dedicated sprouting jar with a special lid, but a regular jar and some cheesecloth will do the trick just fine. Oh, and of course, you'll need your chosen beans!
Preparing Your Beans For Sprouting
Before your beans can start their amazing transformation, they need a little prep work. First, give them a good rinse under cool running water. This gets rid of any dust or debris. Then, it’s time for the soak! Place your rinsed beans in your jar and cover them with plenty of cool water – usually about three times the volume of the beans, as they’ll swell up quite a bit. Let them soak for about 8 to 12 hours, or overnight. This soaking process is what wakes them up and gets them ready to sprout. After soaking, drain all the water out completely. It’s really important that there’s no standing water left in the jar, as this can lead to mold or rot instead of happy sprouts. Just give them a good shake to get rid of excess moisture, and then you’re ready for the next exciting phase: the actual sprouting!
Remember, the key to successful sprouting is cleanliness and proper drainage. Keep everything clean, and don't let those beans sit in water for too long after the initial soak.
The Sprouting Process Unveiled
Alright, so you've got your beans ready to go. Now comes the fun part – watching them transform! It's pretty amazing how quickly these little guys wake up and start growing. The whole process is really straightforward, and honestly, quite rewarding. You're basically just giving them what they need to sprout, and they do all the hard work themselves. It’s a neat little science experiment happening right on your countertop.
Daily Rinsing And Draining
This is the most important step, so don't skip it! You'll need to rinse your beans at least twice a day, usually in the morning and evening. Think of it like giving them a refreshing drink and a quick clean-up. Here’s how it works:
- Rinse: Pour fresh, cool water over the beans in your jar or sprouting container. Swish them around gently to make sure all the beans get wet.
- Drain: Tip the container to let all the water out. Make sure it drains completely. You don't want any standing water, as that can lead to yucky stuff growing.
- Air Dry: Give the container a little shake to help the beans dry off a bit. This is where proper air circulation comes in.
This consistent rinsing and draining is what keeps your beans happy and healthy, preventing them from getting waterlogged and encouraging them to sprout vigorously. It’s the secret sauce to success!
Ensuring Proper Air Circulation
Good airflow is super important for your sprouting beans. It helps them dry out a bit between rinses and keeps mold away. If you're using a jar, a sprouting lid with a mesh screen is perfect for this. If you're using a tray, make sure there's space around it for air to move. You want your sprouts to breathe! Stagnant air can lead to problems, so just keep that in mind. A gentle breeze, so to speak, is what they need.
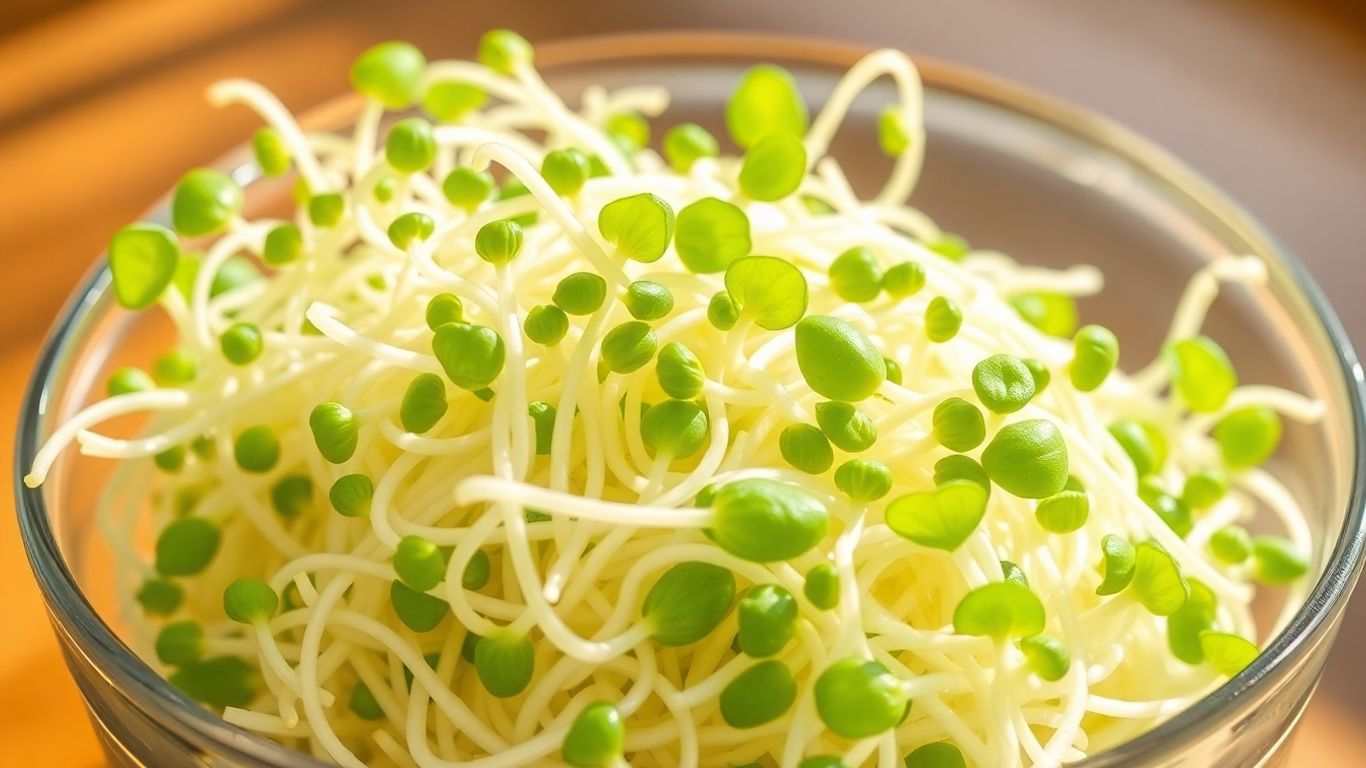
Watching Your Sprouts Grow
Over the next few days, you'll start to see some real action. You'll notice little white tails emerging from the beans. These are your sprouts! They'll get longer and more numerous each day. It’s really satisfying to see the progress. You might even notice a slight, pleasant, earthy smell. Keep up with the rinsing and draining, and before you know it, you'll have a jar full of fresh, crunchy sprouts ready to eat. It’s a pretty cool transformation to witness firsthand.
Harvesting Your Fresh Bean Sprouts
It’s harvest time! After all your hard work, you’re finally ready to enjoy the fruits (or rather, sprouts) of your labor. It’s a pretty exciting moment when you see those little sprouts ready to eat. Knowing when to harvest is key to getting the best flavor and texture. Don't let them sit too long, or they might get a bit too mature for your liking.
Knowing When Your Sprouts Are Ready
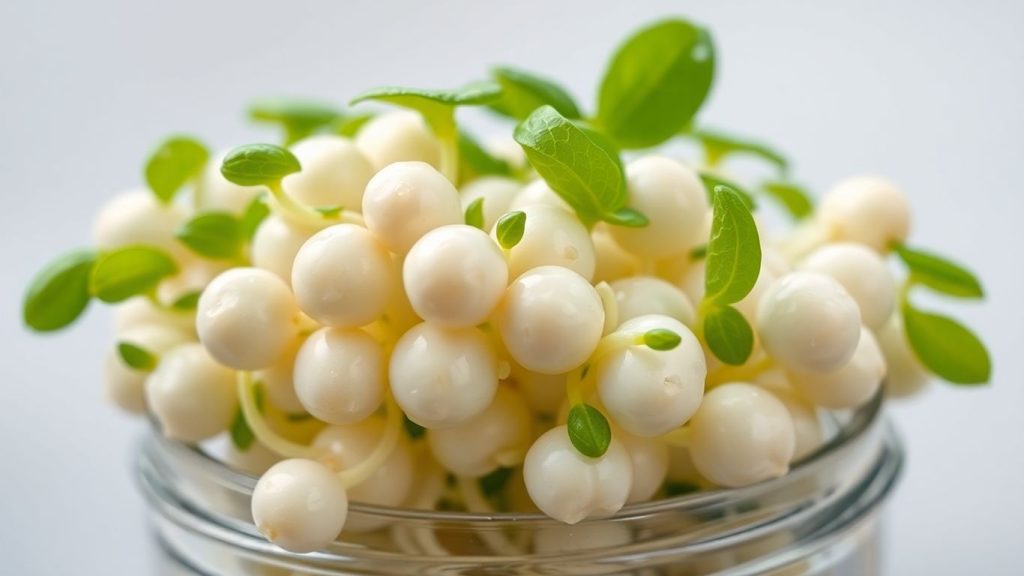
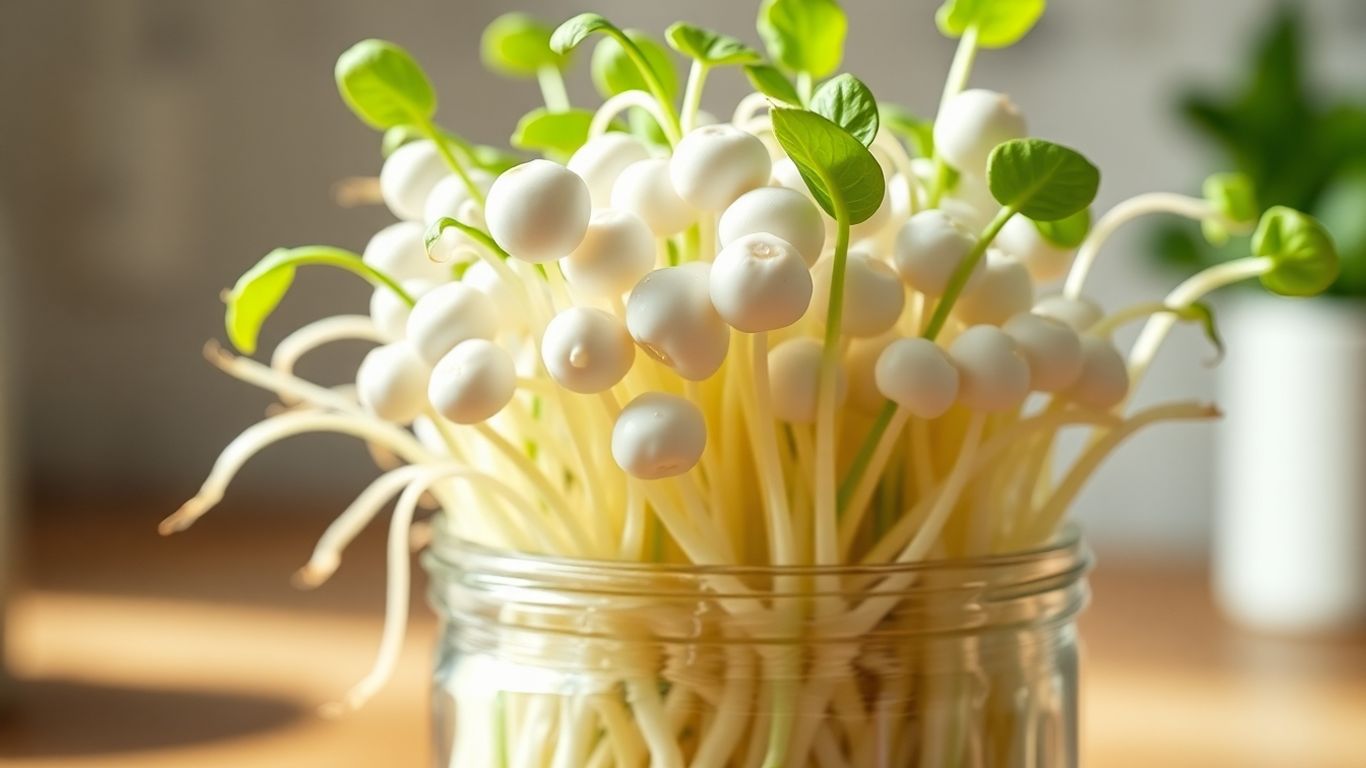
So, how do you tell if your bean sprouts are ready for their close-up? It’s usually pretty straightforward. Most bean sprouts, like mung beans, are ready to harvest when they’ve reached about 1 to 2 inches in length. You’ll notice they’ve developed a nice, crisp texture and a pleasant, mild flavor. They should look plump and white, with just a hint of the original bean at the bottom. If you’re growing other types of beans, the ideal length might vary a bit, so it’s always good to check the specific recommendations for the beans you chose.
The Best Way To Harvest
Harvesting is simple, but doing it right makes a difference. You want to be gentle to avoid damaging those delicate sprouts. The best method is to carefully scoop them out of your growing container. If you’ve been using a jar, you can tip it over a colander. For tray systems, just lift them out. It’s a good idea to rinse them one last time under cool water to remove any lingering bits of the bean hull or growing medium. This also helps keep them fresh and clean for eating.
Storing Your Bountiful Harvest
Once you’ve harvested your sprouts, you’ll want to store them properly to keep them fresh for as long as possible. The best way to store them is in a clean, breathable container in the refrigerator. A loosely covered bowl or a plastic bag with a few holes poked in it works well. They usually stay good for about 3 to 5 days. Try to use them up within that time frame for the best taste and crunch.
Storing them correctly means you can enjoy that fresh, homegrown crunch in your meals for days to come, making all your sprouting efforts totally worth it.
Enjoying Your Homegrown Goodness
So, you've successfully sprouted some beans! That's awesome. Now comes the really fun part: eating them. It’s pretty amazing to think you grew these yourself, right? Forget those sad, wilted sprouts you sometimes get from the store. Yours are fresh, crisp, and full of life. The taste is just so much better when you know you grew them.
Delicious Ways To Use Bean Sprouts
Bean sprouts are super versatile. You can toss them into almost anything to add a nice crunch and some extra nutrients. Here are a few ideas to get you started:
- Stir-fries: This is a classic for a reason. Add them near the end of cooking so they stay crisp. A simple stir-fry with garlic and soy sauce really lets the sprouts shine. Check out this recipe for garlic soy mung bean sprouts for inspiration.
- Salads: Mix them into your favorite salads for a fresh, crunchy texture. They work great in Asian-inspired salads or even just a simple green salad.
- Sandwiches and Wraps: Tuck a handful into your sandwiches or wraps for an extra layer of texture and freshness.
- Soups: Add them to noodle soups or broths just before serving. They’ll soften slightly but still give you a pleasant bite.
Boosting Your Meals With Freshness
Using your homegrown sprouts is a fantastic way to make everyday meals feel a bit more special. It’s like having a secret ingredient that’s always available. You can really taste the difference that freshness makes. Plus, you’re getting all those good vitamins and minerals without any of the worries about pesticides or how long they’ve been sitting around.
Growing your own food, even something as simple as bean sprouts, gives you a real sense of accomplishment. It connects you to your food in a way that buying from the store just can't match. It’s a small step, but it makes a big difference in how you feel about what you’re eating.
Creative Recipes For Your Sprouts
Don't be afraid to experiment! You can try adding sprouts to omelets, using them as a topping for tacos, or even blending them into smoothies if you’re feeling adventurous (though they’re best enjoyed for their crunch!). Think about what you like to eat and how a little bit of fresh, crisp sprout could make it even better. You might be surprised at how many ways you can use them. Happy sprouting and happy eating!
Troubleshooting Common Sprouting Issues
Even the most enthusiastic sprout grower can run into a few hiccups. Don't worry, most problems are totally fixable with a little know-how! Let's tackle some common issues so you can get back to enjoying your fresh sprouts.
Dealing With Slimy Sprouts
Sliminess is probably the most common concern people have when sprouting. It usually means your sprouts aren't getting enough air or aren't being drained and rinsed properly. Too much moisture and not enough airflow are the main culprits.
Here’s how to get them back on track:
- Rinse Thoroughly: Give your sprouts a good rinse under cool water. Make sure to drain them completely afterward. You want them damp, not sitting in water.
- Improve Airflow: If you're using a jar, make sure the lid or screen is secure but allows air to pass through easily. If you're using a tray, ensure there's space around it for air to circulate.
- Rinse More Often: If they're already feeling a bit slimy, try rinsing and draining them an extra time or two a day for a couple of days. This can help wash away any buildup that's causing the sliminess.
Remember, a little bit of natural moisture is good, but if they feel like a slippery mess, it's time to adjust your routine. The goal is to keep them moist but not waterlogged.
Preventing Mold Growth
Mold can be a bit more serious than sliminess, but it's also preventable. Mold typically appears as fuzzy white or black spots, and it's definitely not something you want to eat.
- Start with Clean Supplies: Always use clean jars, screens, and containers. Wash everything thoroughly before you start.
- Use Good Quality Seeds: Make sure the beans you're using are fresh and specifically meant for sprouting. Old or poor-quality seeds are more prone to mold.
- Drain Completely: This is super important! Waterlogged beans are a breeding ground for mold. After each rinse, shake out as much water as you can.
- Maintain Proper Temperature: Avoid sprouting in overly warm or humid environments, as this can encourage mold growth.
If you do spot mold, it's best to discard that batch. It's better to be safe than sorry!
Ensuring Vigorous Growth
Sometimes, sprouts just seem a bit… sad. They might be slow to grow, look weak, or just not plump up like you expect. Here are a few things to check:
- Seed Quality: As mentioned before, good seeds make a big difference. If your seeds are old, they might not have the energy to sprout well.
- Water Temperature: While cool water is generally best for rinsing, make sure it's not too cold, especially in a cooler room. Lukewarm water might be better in very chilly conditions.
- Light Exposure: Sprouts don't need direct sunlight, but they do need some ambient light to grow properly. Don't keep them in a completely dark cupboard for too long.
- Patience: Sometimes, sprouts just take their own sweet time! Give them a few days to get going. If after 5-7 days you're still not seeing much action, it might be time to try a new batch of seeds.
Happy Sprouting!
So there you have it! Growing your own bean sprouts is surprisingly easy and totally worth it. Forget those sad, wilted sprouts from the store. Now you can have crisp, fresh ones anytime you want, right from your own kitchen. It’s a small step, but it feels pretty great to grow your own food. Give it a try, and enjoy the fresh crunch!
Frequently Asked Questions
What kind of beans are best for sprouting?
You can sprout many kinds of beans, but some popular choices are mung beans, adzuki beans, and lentils. They sprout quickly and have a great taste. Just make sure you're using beans meant for eating, not for planting, as those might have coatings.
How often do I need to rinse the sprouts?
You should rinse your sprouts about two to three times a day. This keeps them clean, gives them moisture, and helps prevent them from getting too warm or developing any funky smells. It's a simple step that makes a big difference.
What if my sprouts look a little slimy?
A little sliminess can happen, especially if they don't have enough air. Make sure your container has good airflow. Rinsing them more thoroughly and draining them really well usually helps clear that up. If it's really bad, it might be best to toss them.
How do I know when my sprouts are ready to eat?
Your sprouts are usually ready after about 3 to 5 days. They should be a good size, firm, and have a nice crunch. You'll see little tails or roots sticking out. Give them a taste test to see if you like their flavor and texture.
Can I store homegrown bean sprouts?
Yes, you can store them! After you harvest and dry them gently, put them in a clean container or bag in the fridge. They're best eaten within a few days to a week to enjoy that super fresh taste.
What are some simple ways to use bean sprouts?
Bean sprouts are super versatile! You can toss them into salads, stir-fries, sandwiches, or wraps. They add a nice crunch and freshness to almost any dish. They're great in soups too, just add them at the end so they don't get mushy.