Thinking about growing your own food but don't have a lot of space or time? You can actually sprout seeds right in your kitchen! It's a super easy way to get fresh greens and add some flavor to your meals. We'll walk you through how to sprout seeds at home, from picking the seeds to eating your harvest. It’s a simple process that anyone can do, and it’s pretty rewarding too.
Key Takeaways
- Growing your own food, even just sprouts, can be a rewarding experience.
- Choosing the right seeds and containers makes the sprouting process easier.
- Regular rinsing and proper air circulation are important for healthy sprouts.
- Knowing how to handle common issues will help your sprouting success.
- Sprouts are versatile and can be added to many different meals.
Embarking On Your Sprouting Adventure
Welcome to the wonderful world of sprouting! It's really not as complicated as it might sound. Think of it as giving tiny seeds a cozy place to wake up and start growing. You're about to discover how easy it is to bring fresh, living food right into your kitchen, no matter the season.
Discover the Joy of Growing Your Own
There's something incredibly satisfying about nurturing a seed and watching it transform. It’s a direct connection to nature, happening right on your windowsill. You get to be part of that amazing process, from a tiny, dormant seed to a vibrant, edible sprout.
Embrace Freshness and Flavor
Forget those sad, wilted greens you sometimes find in the store. Sprouts offer a burst of fresh flavor and a satisfying crunch that can liven up any meal. They're packed with nutrients and taste so much better when they're just a few days old, grown by you.
Your Path to Homegrown Goodness
Getting started is simpler than you might think. You don't need a big garden or fancy equipment. Just a few basic items and a little bit of patience will have you enjoying your own homegrown sprouts in no time. It’s a fantastic way to add healthy, delicious greens to your diet.
- It’s a quick process: You can go from seed to sprout in just a few days.
- It’s space-saving: Perfect for apartments or small kitchens.
- It’s rewarding: Enjoy the taste and health benefits of your own harvest.
Sprouting is a fantastic way to connect with your food and enjoy a taste of nature's vitality, even in the middle of winter. It’s a simple skill that brings big rewards.
Gathering Your Sprouting Essentials
Alright, let's get down to business! To start sprouting, you don't need a whole lot, but having the right gear makes things way easier and more fun. Think of it like getting your kitchen ready before you bake your first cake – a few key things make all the difference.
Choosing the Right Seeds
First things first, you need seeds! Not all seeds are created equal when it comes to sprouting. You want seeds specifically labeled for sprouting. These are usually smaller and have been grown with sprouting in mind, meaning they're less likely to have any weird coatings or treatments that you wouldn't want to eat. Some super popular choices for beginners include:
- Alfalfa: Tiny seeds, big flavor, and they sprout really fast.
- Broccoli: Packed with nutrients and have a nice, mild taste.
- Radish: These grow quickly and give you a little peppery kick.
- Mung Beans: A classic for a reason, they're hearty and easy to grow.
It's always a good idea to start with just one or two types to get the hang of it. You can find sprouting seeds at most health food stores or online. Check out sprouting seeds online for a good selection.
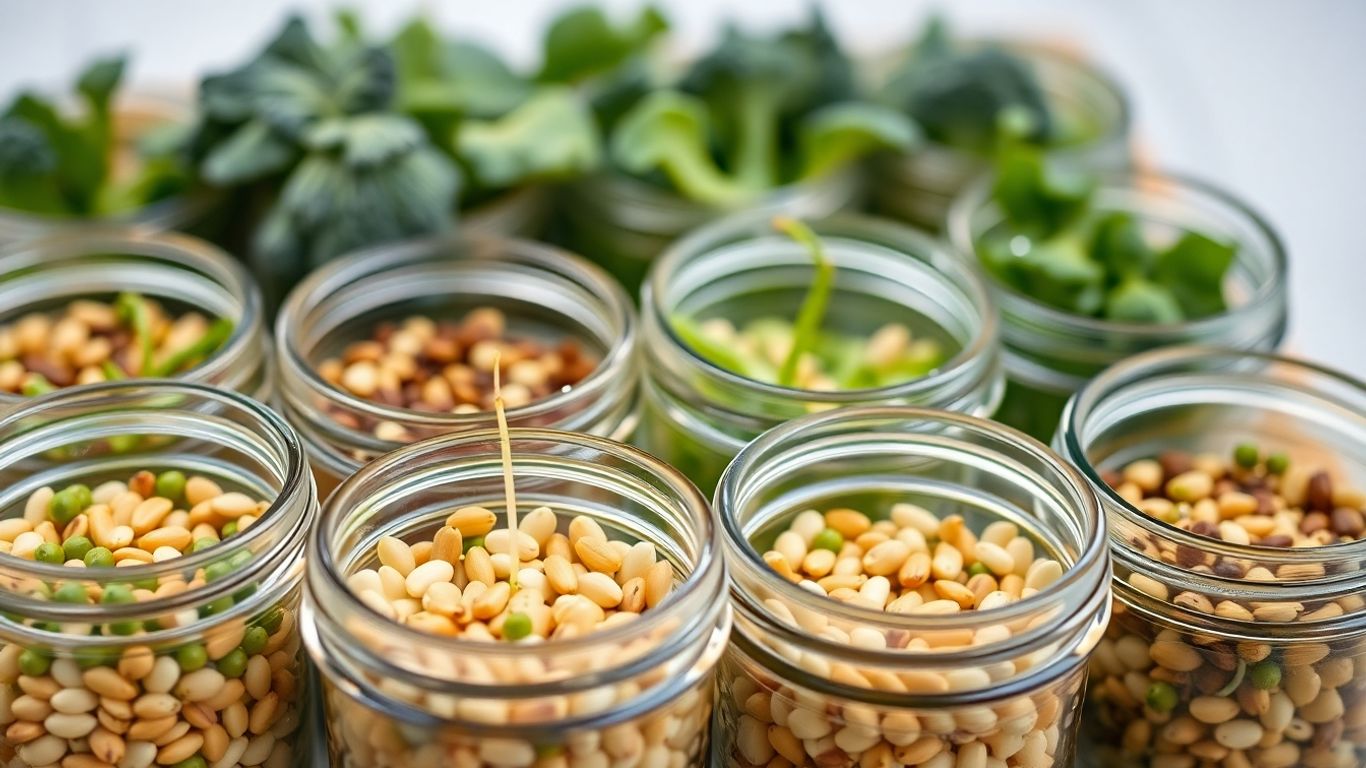
Selecting Your Sprouting Containers
Now, where are these little guys going to live while they grow? You have a few options, and honestly, they all work pretty well. The main goal is to allow for drainage and air circulation.
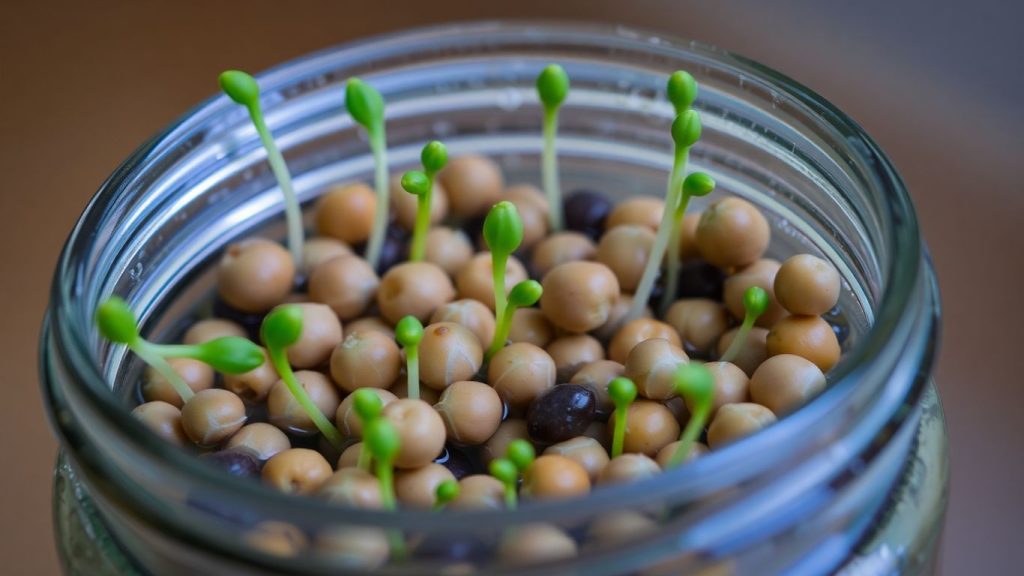
- Mason Jar System: This is super popular. You just need a wide-mouth mason jar, a sprouting lid (which is basically a mesh screen), and a rubber band to hold it on. Easy peasy.
- Sprouting Trays or Screens: These are often tiered systems or flat screens that allow water to drain away easily. They're great if you plan on sprouting larger quantities.
- Colander: Yep, even a simple colander can work in a pinch, especially if it has fine holes. Just make sure to rinse them really well.
Whatever you choose, make sure it's clean and allows water to escape. Soggy seeds are unhappy seeds!
Essential Tools for Success
Beyond the seeds and the container, there are a couple of other things that are really helpful:
- A good water source: You'll be rinsing these seeds a lot, so having a clean water supply is key.
- A place to drain: You need somewhere to prop up your jar or tray so the water can drip out freely. A drying rack or even just a bowl works.
The most important thing is to keep things clean. You're eating these sprouts raw, so good hygiene prevents any unwanted guests from joining your sprout party. Wash your hands, wash your jars, and you'll be golden.
That's really it for the setup! Once you have these few bits and pieces, you're totally ready to get those seeds sprouting.
The Simple Steps to Sprout Seeds at Home
Getting your sprouts going is surprisingly straightforward. It really just boils down to a few key actions that keep your seeds happy and hydrated. Think of it as a gentle routine for your tiny plant babies.
Rinsing and Soaking Your Seeds
First things first, give those seeds a good rinse under cool running water. This washes away any dust or debris they might have picked up. After rinsing, it’s time for a soak. Most seeds need to sit in water for about 6-12 hours, or overnight. This is the crucial step that wakes them up and gets them ready to sprout. Just pop them in a jar or bowl, cover them with plenty of fresh water, and let them do their thing.
The Art of the Drain and Rinse Cycle
Once your seeds have soaked, it’s time to drain them thoroughly. You want them moist, but not sitting in water, which can lead to rot. Pour out all the water, and then give them another quick rinse. This rinse-and-drain process is what you’ll repeat a couple of times a day. It keeps the seeds clean, provides them with the moisture they need to grow, and allows air to circulate, which is super important.
This regular rinsing and draining is the heart of sprouting. It mimics natural rainfall and drainage, creating the perfect environment for germination without letting things get stagnant.
Finding the Perfect Spot for Growth
Now, where do you put your sprouting seeds? They don't need sunlight to grow, in fact, direct sun can sometimes be too harsh. A spot on your kitchen counter, away from direct light, is usually perfect. You want a place where they’ll be at room temperature and where you can easily remember to do your daily rinse and drain. Just keep them in their jar or container, tilted slightly so any extra water can drip away.
Nurturing Your Sprouts to Perfection
Alright, you've got your seeds soaking and ready to go. Now comes the fun part: watching them grow! It’s not complicated, but a little attention goes a long way to getting those tasty sprouts.
Ensuring Proper Air Circulation
This is super important. Sprouts need air to breathe and to help them dry out properly between rinses. If they sit too wet, they can get a bit funky. Most sprouting jars or trays have lids with holes, or you can use a fine mesh screen. Just make sure air can get in and out. It helps prevent mold and keeps things fresh.
Watching for Signs of Growth
It’s like magic happening right before your eyes! You’ll start to see tiny roots emerging from the seeds. This usually happens within a day or two, depending on the seed type. Keep an eye out for that little white tail – that’s the root! The sprouts will also start to plump up and look more alive.
- Day 1-2: Seeds start to swell and show tiny root tips.
- Day 3-4: Roots get longer, and you'll see the first green leaves starting to peek out.
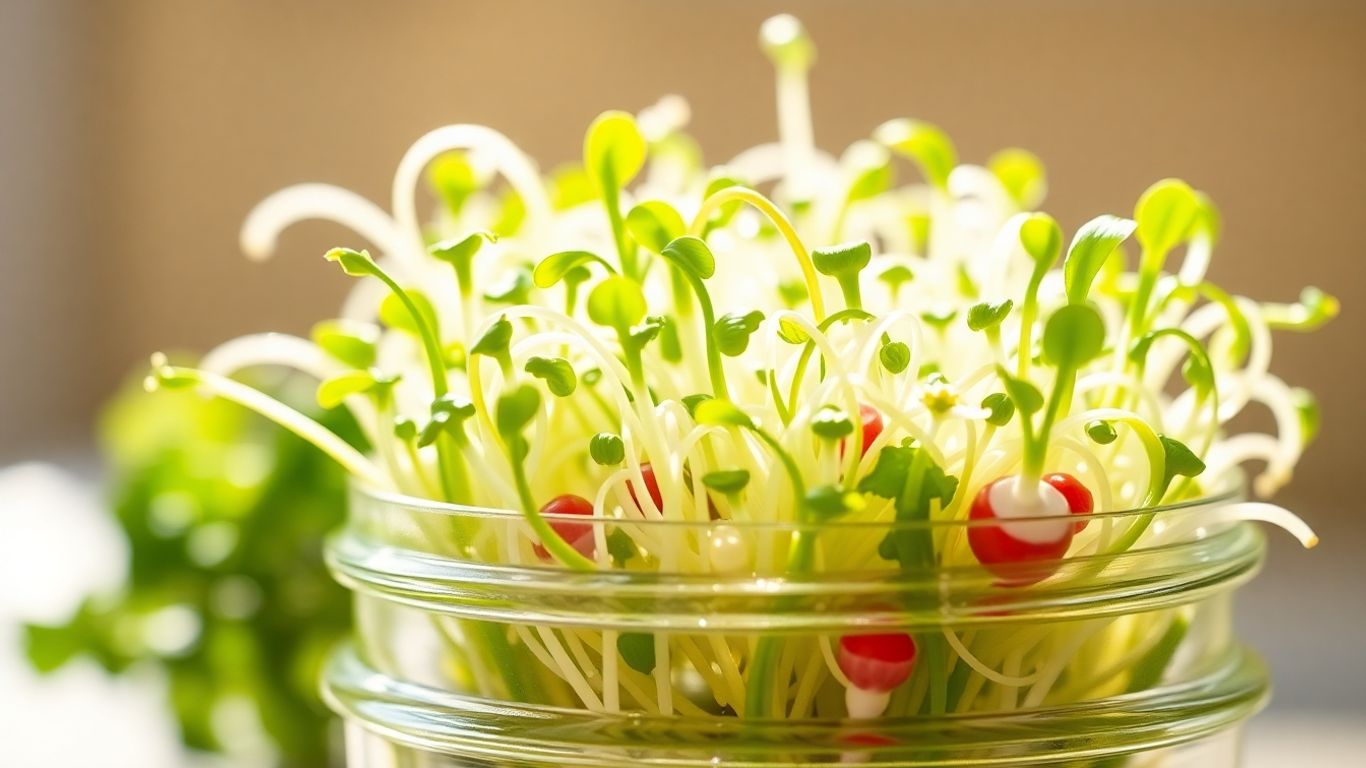
- Day 5-7: Sprouts are usually a good size, looking lush and ready for a taste test.
Harvesting Your Bountiful Sprouts
When your sprouts look good and green, and have that nice, fresh smell, they're ready to harvest. This usually takes about 3 to 7 days. To harvest, give them a good final rinse and drain them really well. You can eat them right away, or store them in the fridge for a few days.
Don't be afraid to taste them as they grow. You'll figure out what stage you like best. Some people like them when they're just starting to sprout, while others prefer them a bit bigger and leafier. It's all about what tastes good to you!
Just remember to keep rinsing and draining them twice a day. It’s a simple routine that makes all the difference in getting healthy, delicious sprouts.
Troubleshooting Common Sprouting Hiccups
When Sprouts Seem Slow to Grow
Sometimes, sprouts can be a bit shy and take their time getting going. Don't panic if you don't see much action on day one or two. A few things might be at play here. First, double-check that your seeds are still viable – older seeds might not sprout as readily. Also, make sure they're getting enough warmth; a slightly cooler spot can really slow things down.
Here are a few things to try:
- Give them a gentle stir: Sometimes, just agitating them a little can wake them up.
- Check the temperature: Aim for a consistent room temperature, avoiding drafts or direct heat.
- Ensure consistent moisture: They shouldn't be waterlogged, but they also shouldn't dry out completely between rinses.
Remember, patience is key in the sprouting world. Most seeds will eventually get with the program if given the right conditions.
Dealing with Unwanted Odors
An unpleasant smell is usually a sign that something's not quite right, and it's often related to too much moisture or not enough airflow. Sprouts need to breathe! If they sit in stagnant water, they can develop a sour or musty smell, which isn't ideal.
To fix this:
- Rinse thoroughly: Give your sprouts a good rinse with fresh water.
- Drain completely: Make sure all excess water is gone. Tip the jar or tray upside down to let gravity do its work.
- Improve air circulation: If you're using a jar, ensure the lid allows for good airflow. If you're using a tray, make sure it's not covered too tightly.
If the smell persists after a couple of rinses and ensuring good drainage, it might be best to discard that batch and start fresh with new seeds. It's better to be safe than sorry when it comes to your food!
Keeping Your Sprouts Healthy and Happy
Keeping your sprouts thriving is mostly about consistency and observation. You want to create an environment where they can grow without getting stressed. Think of it like giving them a spa day, every day!
- Rinse and drain regularly: This is the golden rule. Aim for at least two rinses a day to keep them clean and hydrated.
- Avoid overcrowding: Give your seeds enough space to expand. Too many seeds packed together can lead to poor airflow and mold.
- Watch for mold: While a little bit of fuzz can sometimes be mistaken for roots, actual mold is usually fuzzy and might have a greenish or blackish tint. If you see mold, it's time to toss the batch.
The most common mistake beginners make is not draining their sprouts well enough. Excess water is the enemy of happy sprouts, leading to rot and discouraging growth. Always give them a good shake and let them air out!
Savoring Your Homegrown Sprouts
Delicious Ways to Enjoy Your Sprouts
So, you've successfully grown your own sprouts! That's awesome. Now comes the really fun part: eating them. Sprouts are super versatile and can add a fresh, crunchy boost to almost anything. Think about tossing them into salads for an extra layer of texture and flavor. They're also fantastic piled onto sandwiches or wraps – a much healthier alternative to processed fillings. Don't forget about adding them to stir-fries right at the end, or even blending them into smoothies for a hidden nutritional punch.
Here are a few ideas to get you started:
- Salads: Mix with your favorite greens, veggies, and a light vinaigrette.
- Sandwiches & Wraps: Layer them generously for a fresh crunch.
- Smoothies: A small handful adds nutrients without overpowering the taste.
- Soups & Stews: Stir in just before serving for a fresh garnish.
- Omelets & Scrambles: Fold them into your morning eggs.
Storing Your Freshly Sprouted Seeds
Once your sprouts are ready, you'll want to keep them fresh. The best way is to store them in a clean, breathable container in the refrigerator. A glass jar with a lid that has some holes, or even a plastic container lined with a paper towel, works well. The paper towel helps absorb any extra moisture, which is key to preventing sliminess. Proper storage can keep your sprouts fresh for about a week. Give them a gentle rinse every couple of days if they seem a bit dry, but make sure to drain them thoroughly afterward.
Storing sprouts correctly means you can enjoy that fresh, homegrown goodness for several days, making your sprouting efforts even more rewarding.
Incorporating Sprouts into Your Meals
Getting sprouts into your daily meals is easier than you might think. Start small if you're new to them. Maybe add a small amount to your morning yogurt or cereal. Then, try them on top of avocado toast. As you get more comfortable, you can start adding larger portions to your salads or using them as a base for a light lunch. They really do transform simple dishes into something a bit more special and nutritious. It’s all about experimenting and finding what you like best. Happy sprouting and happy eating!
Happy Sprouting!
So there you have it! Sprouting seeds at home is pretty straightforward, right? You've learned how to take tiny little seeds and turn them into something fresh and tasty with just a little water and patience. It’s a really cool way to get some healthy greens into your diet without a lot of fuss or space. Plus, it feels pretty good to grow your own food, even if it's just a small jar of sprouts. Give it a try, and don't be afraid to experiment with different kinds of seeds. You might be surprised at how easy and rewarding it can be. Happy sprouting!
Frequently Asked Questions
Why should I sprout seeds at home?
Sprouting seeds at home is a fantastic way to get super fresh, nutrient-packed food right from your kitchen. It's easy, cheap, and you can enjoy a variety of tasty sprouts year-round. Plus, it’s a fun way to connect with your food and see something grow!
What kind of seeds can I sprout?
You can sprout many types of seeds, like alfalfa, broccoli, radish, clover, and mung beans. Just make sure you buy seeds specifically meant for sprouting, as some garden seeds aren't safe to eat.
How long does it take for seeds to sprout?
Most seeds sprout pretty quickly, usually within 3 to 7 days. You'll start seeing little sprouts emerge after just a day or two of soaking and rinsing.
What do I need to start sprouting?
You don't need much! A jar with a screen lid or a sprouting tray works well. You'll also need your sprouting seeds and clean water. That's it – simple and effective!
How often should I rinse my sprouts?
You should rinse your sprouts about two to three times a day. This keeps them moist, washes away any gunk, and helps them grow healthy and strong. Just drain them well after each rinse.
What if my sprouts smell bad?
A mild, earthy smell is normal. But if they smell really sour or rotten, something went wrong. This usually happens if they weren't drained properly, leading to mold. It's best to toss those and start over with clean equipment.